Making of Sanlik
This tutorial shows the process of creation of the character called “Sanlik”.This creature was designed for a short film that I wrote 2 years ago.
Introduction:
His race is Quelonian, a reptile specie that has evolved with the course of time. They live in an aquatic planet, where the cities are floating on water. Looking for alternative resources, the Quelonians created the Spatial Scout Program (SSP) and here is where our Character comes. He is a space scout.
I have always wanted to make characters that fit in some story, it’s easier and more fun this way.
The first step is to draw as many sketches as you can. Sides of the figure, proportions, face details, etc. I am not a professional concept artist, but I always try to draw the best that I can to have a better understanding of what I’m going to do in 3D. (Fig 01)

I also did some test color in Photoshop (Fig 02).

In this making of, I am going to explain more in depth the texture process since I made a retexture version of Sanlik using Textures from Total Textures.
References:
I collected some references of animals like amphibians, reptiles, birds, which helped me a lot to understand how the skin should look like and how to adapt the details on a humanoid body. (Fig03)

Modeling and Sculpting:
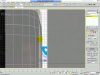
Having all the references set up and all the sketches, I started with a very basic base mesh done in 3d max and then imported it into Zbrush to start the sculpting process. At the beginning, I focused in the gesture of the character paying attention in all the proportions and the silhouette.
Anatomy is very important even if he is not human, this always gives a more realistic feeling (Fig04)

When I finished with the gesture, I analyzed the figure seeing if all the scales looked nice (fig05)

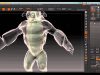
At this point it is a good time to remesh our creature before to start adding the details (I posed the model and made few renders) (Fig06).

I was very careful detailing the scales masking them one by one, applying alphas and then sculpting over the top. I also made details inside the mouth. I paid attention in the size of every scale, for example, on the face they are tiny, on the back they are bigger (Fig07).

NOTE: I used the alphas just to mark the scales; most of the works were made by hand with clay brush and slash3 brush.
The following image shows the model with all the details on it. (fig08).

For the armor I made simple meshes in 3d max (Fig09) I imported them into Zbrush using the crease smoothing groups plug-in and then subdivided the mesh.

To start the details I first used the Slash3 brush to make the lines between the pieces of the armor.
I used lots of alphas to make all the little things like the screws, lids, vents, etc , and for those bigger shapes I made a masked section and extruded the zone using “inflate” in the deformation panel. Lastly I used the Mallet Fast and Slash brushes for all the damage, scratch and knocks. (Fig10)

At this point all the modeling it’s done.
TEXTURE
With everything done right now, I proceeded to unwrap the body and pieces using UVLayOut to start the texturing process. I baked a displacement map in Zbrush and applied it into the body mesh. For the hard surface I used normal map. The following image shows a render of the body with the Vray displacement mode and a simple clay material (Fig 11).

Making the Diffuse of the body.
Previously, I set up a Vray scene with an HDRI light to bake an Ambient Occlusion, also I baked a Cavity map from ZBrush. I took those two maps as the base of the diffuse texture. They are on the top of everything. I inserted them in a folder named “AO”. Under this folder I created all the rest of the folders and layers. (fig.12)

The next step was to create the textures of the scales, skin and mouth (I placed them in different folders) so, I started with the scales textures: I created a Base layer with green color, then I used the “brown01” map from TotalTextures Alien Organics and repeated it all around the canvas, changed the blend mode to Darker Color, opacity to 45% and applied a Color Balance to give it a more greenish looking (fig.13), also the Base green layer determine the overall color of the texture. Notice that the empty areas of the texture are filled with black color; I usually do this to not distract my eyes seeing the texture everywhere (I Just applied a mask with the UVs Alphas into the root folder and outside that folder a Black layer)(fig.14).


After that, I used the “brown12” map and repeated it all around the canvas, changed the blend mode to Soft Light, opacity to 60% and changed the Blend option in Layer Style (I moved the white arrow to the left to preserve only the darkest areas of the map)(fig.15).

At this point, the texture still looks too uniform, so I used another map to give it more variations; “material06b” this time from Total Texture Sci-fi, I changed the blend mode to Vivid Light and applied a Contrast of 100(fig.16).

You may be asking why the skin in the render looks a bit red, that is because I was using a SSS map in VRay.
Once the scales texture is done I started the skin, I used the “red02” map from alien organics, always the same technique of repeating the map all around the canvas, I changed the blend mode to Lighter Color, opacity to 50%, changed the Color Balance and brightness just a little bit. Finally, since this map looks a little flat I used the Burn and Dodge tools to get darker or lighter some areas (fig17).

Note that I made a black mask in the Skin folder and painted white all the areas of the skin.
For the mouth, I just made a base pink layer and over it I used the “red07” map on Normal blending mode and 40% opacity, changed the Color Balance and Brightness a little bit and finally over them I created a darker pink layer with 25% opacity to unify the map and used again the Burn and Dodge tool in some areas (fig18).

Sanlik now have a good texture but still needs more color variation, he is very plane and basic, so I made a new folder named “Top textures” with a new set of map that helped me to make Sanlik looks more alive.
I found the map “brown06” very useful for color variations; I changed the Blend mode to Color Dodge, 50% opacity and it was perfect to create some yellow areas. I used the same map but this time in Darker Color and I got some nice purple dots (fig19).

To take further the skin I used the “blue08” map in Soft light to get a delicate variation in the texture. Finally I added some Marks in the trunk with the “gray 11” map in Overlay (fig20).

I did some details in the back to make it more interesting taking the “red04” map, I just changed the Blend option in Layer Style moving the black arrow to the right to preserve the lightest colors of the map in this case the red one, but this action also took away the dark dots, so I duplicated the layer and changed the blend mode to Pin Light. One final detail in the back was adding some marks with the map “gray11” in overlay (fig21).

One more step was paint all the little details like the nipples, nails, birthmarks, some skin lines between the scales and teeth (fig22). The most important thing, the final touch to give Sanlik more realism was adding the veins. To do this, I used the “blue08b” map, I inverted the colors by pressing Ctrl+I then changed the Blend option in Layer Style and the Blend mode in Pin Light, now the map is very similar to some kind of veins (fig23).


Making the eye
The eye was quite simple to do; I used for it the “green09”map and paint over all the details and veins (fig24). In the render, there is a crystal around it making more real the reflections.

Making the diffuse of the armor
The diffuse of the armor was quite easier to do than the body; I started with two different Ambient Occlusions that I previously got in 3DsMax and a gray Base Layer (fig25).

I then created a new folder named “Colors” where I painted in different layer the grays and yellow areas all of them in Normal blend mode and 100% opacity (fig26).

The next step was to paint the scratches; I created a mask in the “Color” folder and painted them by hand following the Ambient Occlusion map (fig27).

After that I started to light him painting some Glows all around his armor; I chose a very light orange color in Normal blend mode and copy it twice and changed the blend mode to Screen to make them as brighter as possible (fig28).

Note that the Glow folder is over the AO folder because they should not be affected by the Ambient Occlusion.
Finally I used the “material06b” from TotalTexture Sci-Fi to make the texture looks dirtier; I changed the Blend mode to Soft Light, opacity to 50% and applied a Contrast adjustment of 200. Also I Used “alien05a” and “number__16a” in Color Dodge blend mode like symbols around his armor (fig29).

Shaders
In the image you can see the different settings I used for the shaders of the body and armor, also you can see the SSS map that I got from ZBrush baking a red skin material (fig30).

Illumination:
For the illumination I used the HDRI dome light method and added some fill lights and a Rim Light. Remember to use the gamma correction 2,2 and Vray frame buffer for better results.
The following image shows the lighting setup in viewport (Fig31)

For the final Image I took the render and the alpha channel from the Vray buffer and composite it in Photoshop adding the floor, background, glows, Overlay layers for more contrast and Sharpen in some blur areas (fig32).

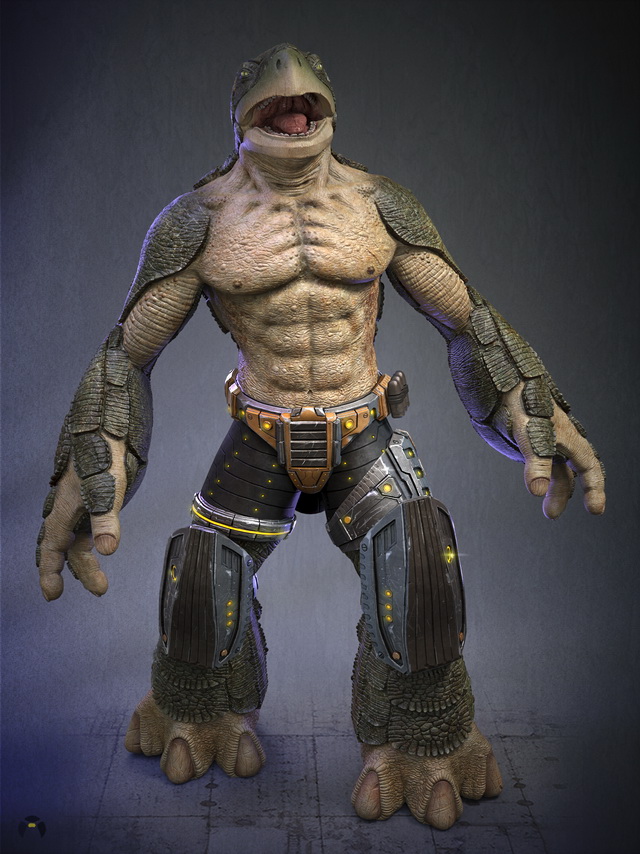
Finally all this hard work was done (FINAL).

Conclusion:
This project was very hard but fun to make, I learned a lot mixing human anatomy with animals.
I hope this making of was useful to you all and thank you very much for having taken the time to read it. If you have any question or are interested to know more, don’t hesitate to contact us.
Making of made by Eduardo Balestrini. Texture section by Victoria Passariello

About The Author
You might be interested in