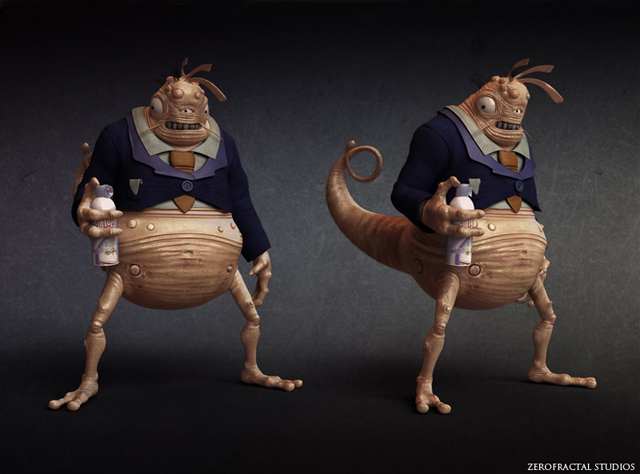
Making of “The Duel”
In this tutorial Carlos Lopez shows us how he was making his work “The Duel”
Concept
The initial concept was born in the company I work, and the initial idea was to represent a bacteria battle position and carries in his hand a weapon not so common, a disinfectant.

STEP 1: Sketch
It gave him a look of a classic character Grief (Fig.02),, with its elegant dress and a gentleman of combat. The colors that were more land, opaque and in a darker environment.

STEP 2
This is the base mesh entirely in 3ds max (Fig.03), has a total of 32 068 polys is not subdivided, is made for entertainment if required. Generally beginning in position T and then do the pose in Zbrush. We also see the sculpture in ZBrush, started with the base mesh, verify that the Uvs are correct and we began to make the initial detail, we apply asymmetries and so we’re getting what we want to the character.

STEP 3
Already have the original sculpture started posing with Transpose the character of ZBrush (Fig.04), I do what I want to mask and Place moving pivot points for the pose looks good and credible, after posed, I fix the the sculpture because there are always imperfect parts of the original detail, polish the sculpture and I make the details of the skin, clothing and accessories..

STEP 4
Here are the different types of Brushes (Fig.05), I always start with a standard brush to start to make the volumes (add and sub) and then with more prominence Magnify Brush volumes and textures, and at last I apply the smooth Brush.

STEP 5
With the sculpture finished we can extract the maps: normal map, Displacement, Cavity map and the diffuse made it from the texture, color and projection of the displacement and cavity map, hence I can draw the map and Specular additional map for the bump.

STEP 6

STEP 7
The material edition is made in Multisub objects (Fig.07), this group of materials makes them more ordered for working with IDs, gives better control and order without doubt, I always work for my projects. In general I used Vray materials and for the skin I used Vray Blend keeping as a base material Fast SSS2 Vray. I added Vray Fur also to give it a touch of more realism to my model. For the illumination I use a system called IBL (Image based lighting)

STEP 8
Light Design For Use U VRay lights (Fig.08), a main light for me to generate the main shadows and two side lights and glitter to add speculars necessary for the final composition.

STEP 9
Render in Vray with GI and use a few passes needed to make a really nice composition: SSS2, Raw Reflection, Raw Shadows and Specular (Fig.09)


The composition was made in Photoshop, a background designed for me, the main, the passes, to integrate more texture, Color Balance, Hue Saturation and Photo Filter. (Fig.10 – Fig.11)
STEP 10
This is the finished piece, the truth I was always very happy with the final result is good and my first job with a composition well organized and planned from the beginning, it was a great experience for me as an artist I hope will be many more tutorials that they can provide for those who start on this and I want to thank all who have followed this tutorial.
This work is dedicated to God who is the one who gives me strength to keep going in this great race.
No longer hope you like this tutorial.


