Tutorial of the Florence Design Academy- Chair Modeling Tutorial (Spline technique)
This tutorial from the the Florence Design Academy, the best design school in Europe, will show you how to use the SPLINES effectively in the field of Interior/Furniture Design. This tutorial is based only on splines. It is very important that your chair has the correct dimensions, otherwise the rendering with Mental Ray will not be optimal. Let’s begin our tutorial.

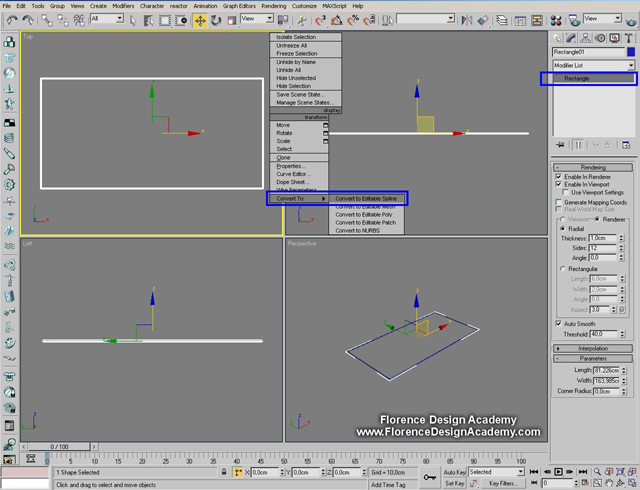
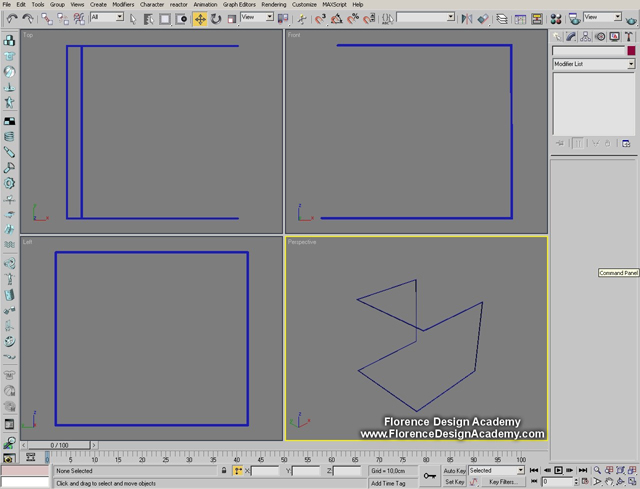
Create a rectangle in the TOP view. Make a right mouse button click (RMC) on it and choose convert to
editable spline.
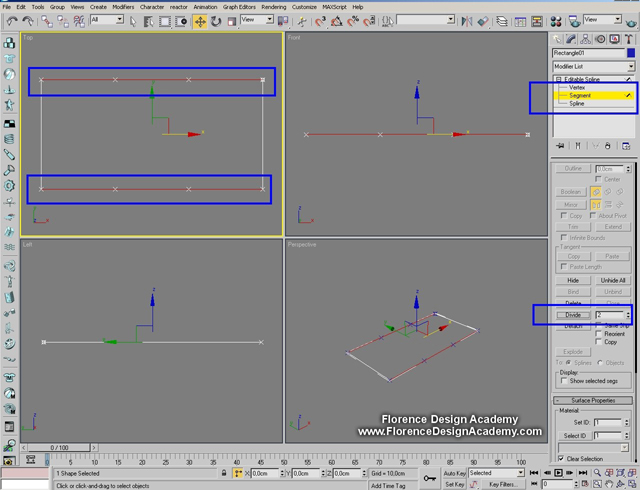
Select the segments like in the image above and go to the slot DIVIDE. Put the number 2 in the slot and
click on the button DIVIDE. This will create 2 additional vertexes on each selected segment.
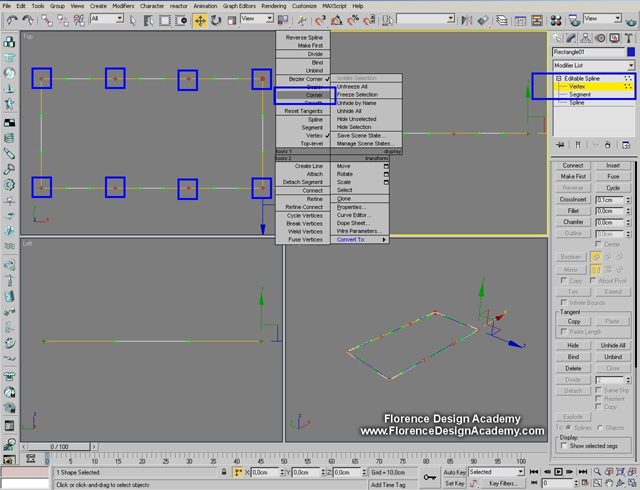
Select all vertexes and make a right mouse button click on them. Now choose CORNER (there are 4 different types of vertexes: Corner, Smooth, Bezier and Bezier Corner). This step will make the next steps
easier.
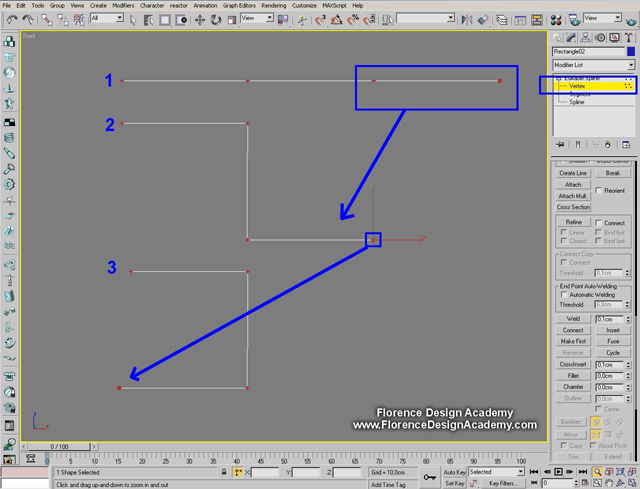
Now select the vertexes like in step 1 and move them down and left to get the shape of step 2. After this
step select the vertexes of step 2 and move them right to get the shape of step 3. The end result seems to be a flipped letter C. Important: remember that in the front view you see only one side of the chair. Make always a REGION selection to be sure that you are selecting the vertexes on both sides of the chair.
This is now what you can see in the perspective view.
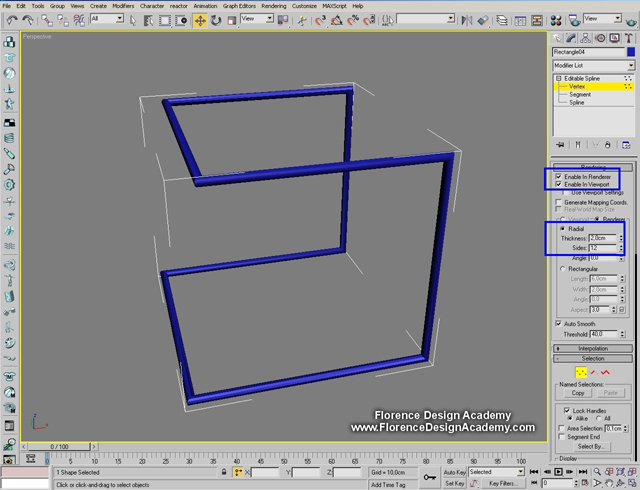
To create a 3D Object you must go to the modify panel and enable 2 slots which are : Enable in Renderer and Enable in Viewport. This will transform your spline in a object in which you can choose to change a few parameters. For our chair we need a radial section. Choose Radial and write in the thickness slot the diameter size .
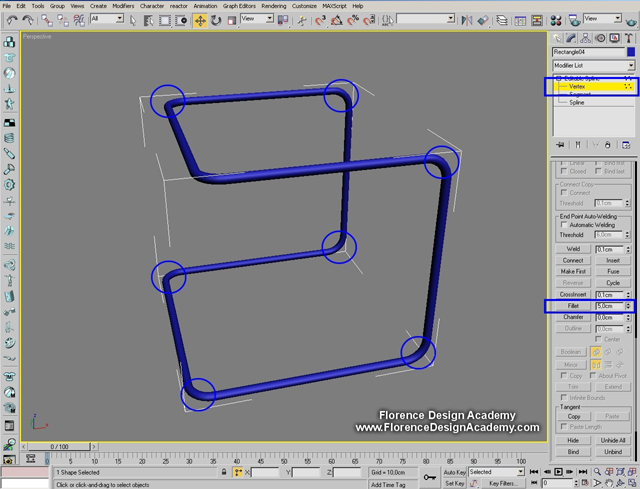
Select all vertexes and go to the command FILLET. This will round your sharp corners.
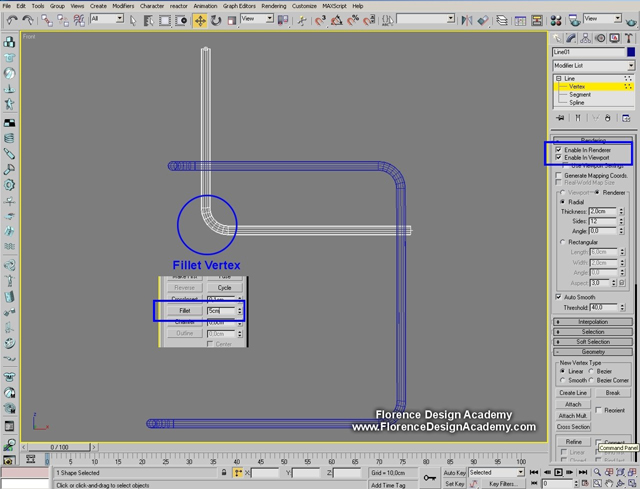
Create a new spline with the shape of the letter L.
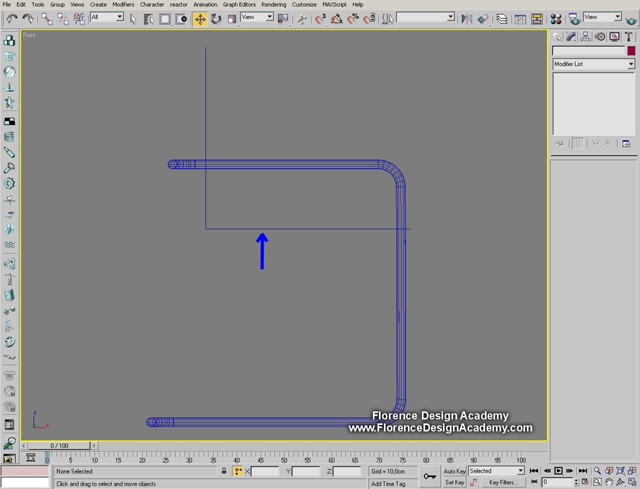
Check again the slots enable in renderer and enable in viewport. Now select the vertex like in the picture and fillet it.
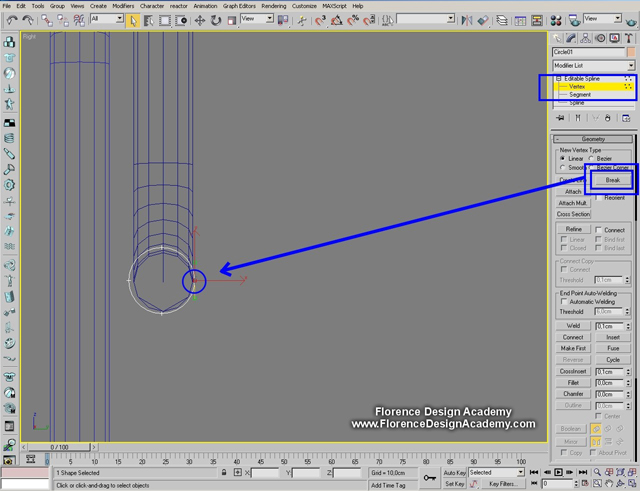
Change the left view to a right view. In this way we can see the circular shape of our spline. Now create a
circle (spline) in the center of the circular section of the spline like in the image. You need to convert it into
an editable spline to be able to work with the vertexes of the circle.

Select the vertex like in the image, and BREAK it. This will split a single vertex in 2 vetexes and break the
circle.
Select the upper vertex and move it to the right side. Transform the vertex with a right mouse button click
into a CORNER vertex.
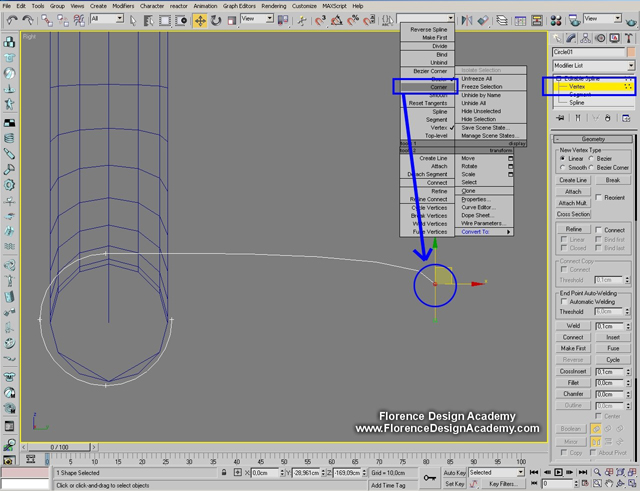
Move the lower vertex like in the image and use the Bezier (also Bezier-corner works very good in this
situation).

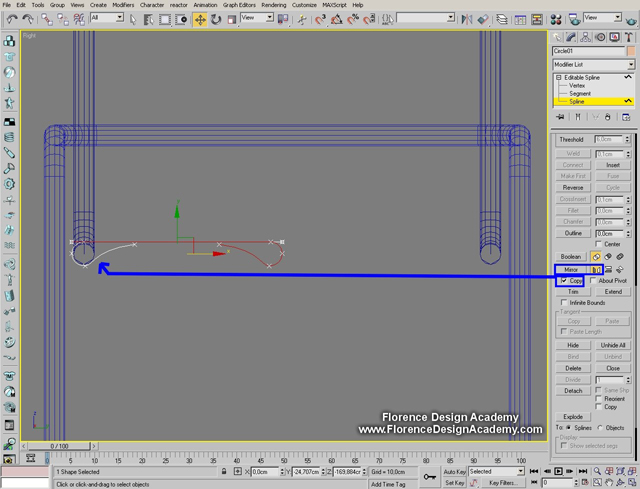
Now select SPLINE and MIRROR it with COPY. Move the copy to the opposite side of the chair. Move it
only from the X axis. You can mirror the spline from the modify panel or just using the Mirror tool. If you use the Mirror tool you have to ATTACH the two splines to be able to weld the vertexes.
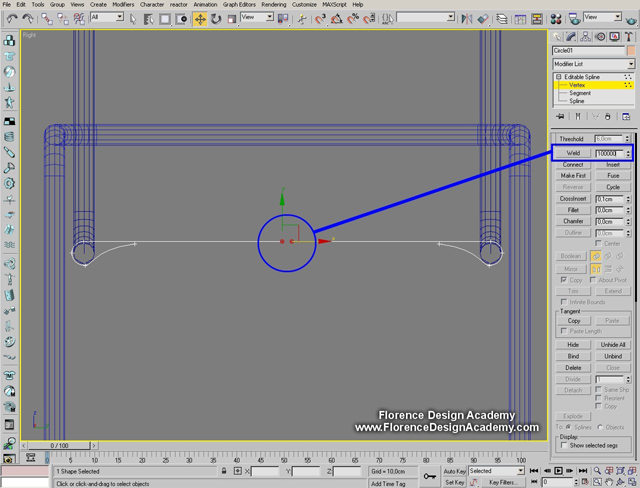
Select this 2 vertexes. Now go to the Weld button. Insert a big number in the weld slot and click weld. The number that you must write in the slot must be equal or bigger than the distance between the vertexes that you must weld. The easiest way is just to write a very big number like 100000.
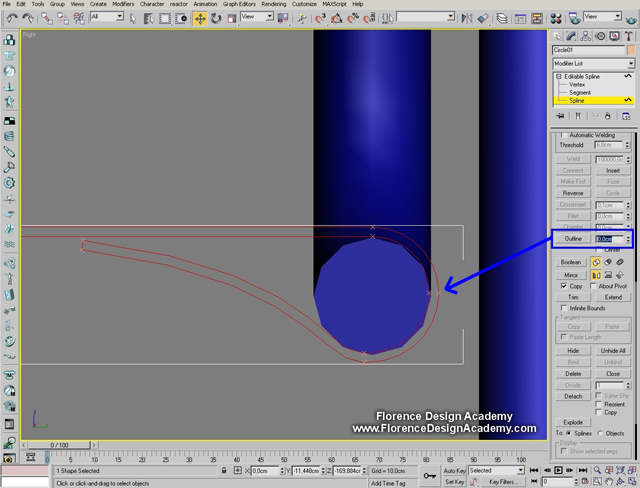
Now select SPLINE and outline the spline.

Add an EXTRUDE modifier from the modifier list to the spline and adjust the amount of the modifier.

Now you should have this result.
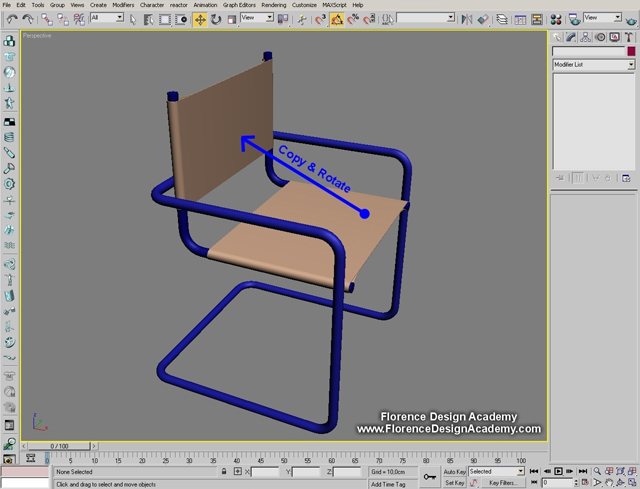
Copy and rotate the extruded object like in the picture.
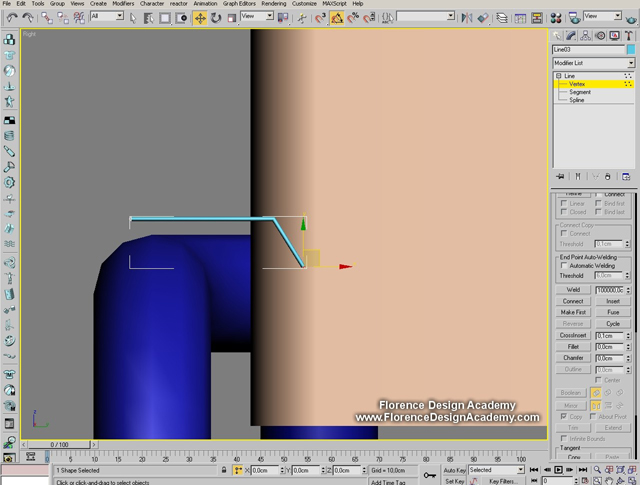
From the Right view create a spline like on the image above.
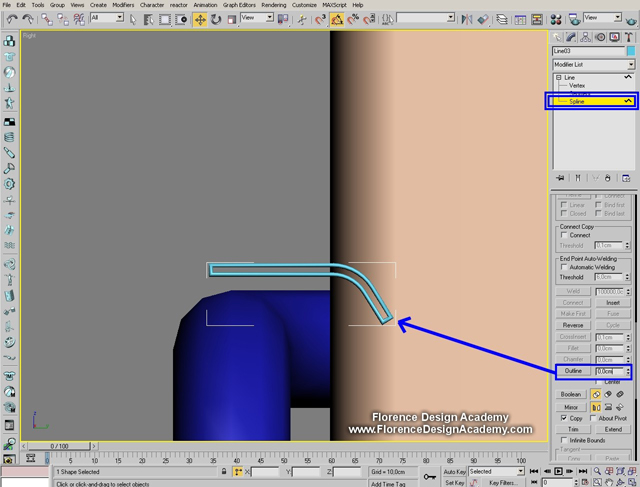
Now outline it (SPLINE).
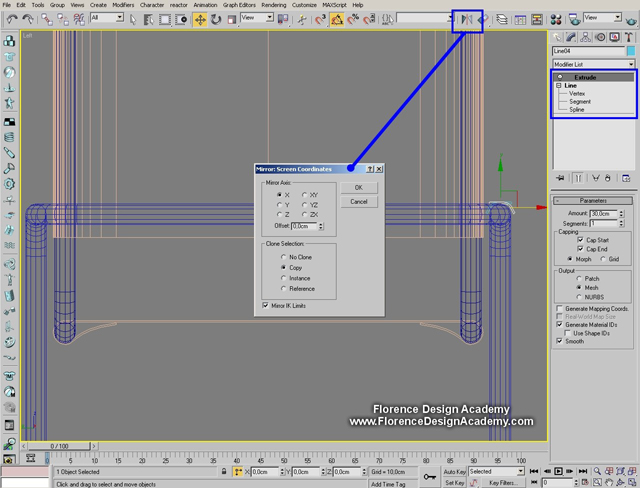
Extrude the spline and mirror it to the other side of the chair.

Now you should have this result.

Create a sphere and squeeze (scale) it in only one axis to make it flat.
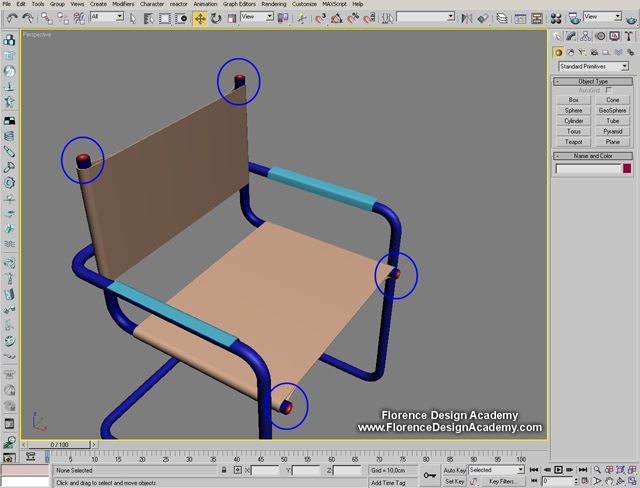
Create in each marked point a flat sphere.
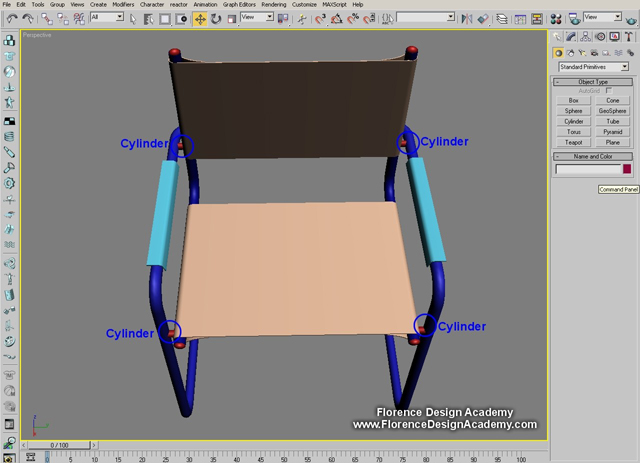
Create in each marked point a cylinder.
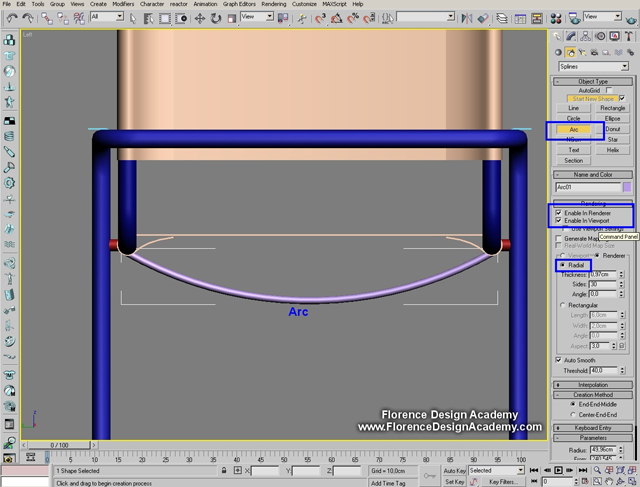
Create an arc (Spline), enable it in renderer and viewport like in the image.
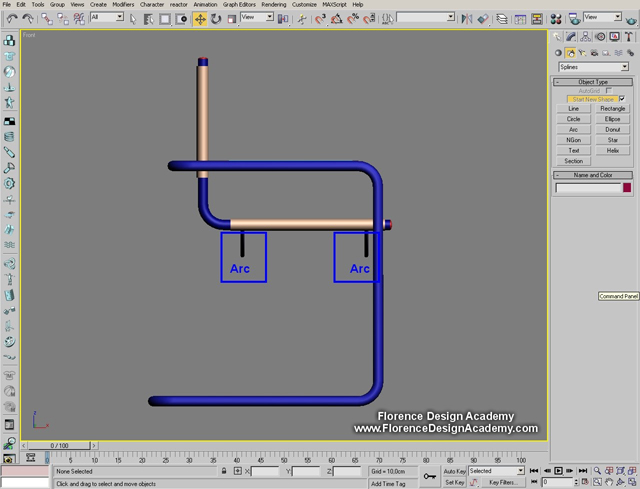
Copy the arc like in the picture

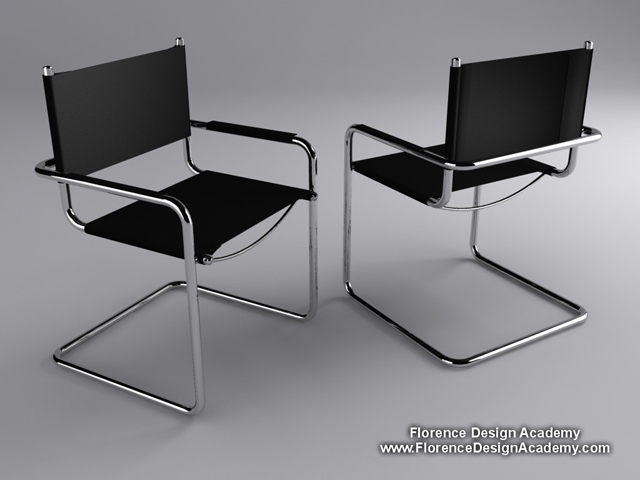
Here you can see the final result.
I hope you have enjoyed this tutorial.
Best Regards


About The Author
You might be interested in