Tutorial “Linear Workflow”
Linear Workflow: a guide
This has been the subject of discussions on many forums over recent years. I realised that there were all sorts of tutorials offering often conflicting information regarding the process. This is not the only way, just my way. I would like to thank my mate Ben Cowell and Phil Shoebottom for offering some clarity on a few points.
SO, WHAT IS LINEAR WORKFLOW?
(explained without maths, graphs and tables)

Look at the above image, what is the difference between the image on the left and the image on the right? Truth is, nothing at all, except the way your monitor is showing you the image.
Vray and 3ds Max process the data in which to make an image in ‘linear space’, also known as Gamma 1.0, but by default all monitors show you the image with a Gamma of 2.2 (sRGB), which basically makes the image ‘look’ dark, although it actually isn’t dark at all. The program just assumes that you are viewing the image with Gamma set to 1.0, instead of 2.2, until you tell it otherwise.
Unfortunately this has always been the case with 3D rendering, which means that many artists who don’t know about linear workflow learn to light scenes by using a handful of tricks to try and get results you’d expect in real life. Things like adding more lights, boosting the environment/GI levels to incredibly high values, adding some ambient lights with shadows turned off etc etc. This all adds to the amount of calculations being made by the renderer for no real reason as all of the data is in fact already there, providing you tell the program to show it to us correctly.
SETTING UP 3DS MAX:
As well as the image itself, textures and materials also need to be correctly converted to Gamma 2.2. Note that VRay will ignore all of the Gamma settings in the 3ds Max dialog. We do this step in order to set up the material editor to render its thumbnails with Linear Workflow so that we get an accurate representation of what materials in our render will look like. It’s worth noting that you can render in Linear space in Vray without touching these setting at all, but you won’t be able to use the material editor thumbnails to accurately tune your shaders.
Go to cutomize/preferences/Gamma and LUT. Change the settings as in the image below.
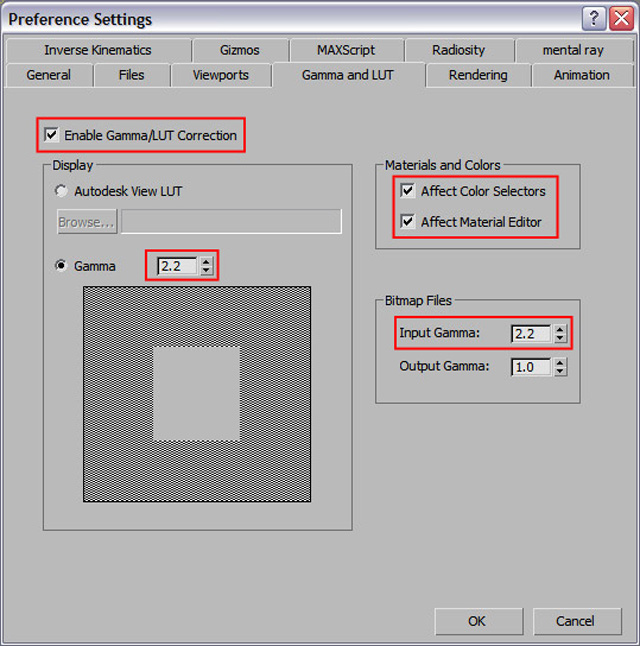
As I said Vray ignores the Gamma settings, but it doesnt ignore the input gamma in the ‘Bitmap files’ box. By setting this to 2.2 you will globally effect how textures are loaded in. Don’t change the output gamma as this will ‘burn in’ the gamma correction to rendered images, which limits what you can do to the image in post.
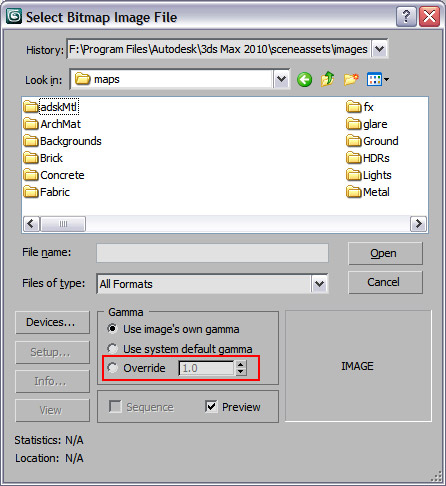
Most images you find on the internet or from your digital camera will be sRGB (gamma 2.2) already so it is just easier to assume 2.2 from the beginning. Some files are natively linear (like HDRIs) so will not require correcting to 2.2, you also do not want to correct normal maps or displacement as they won’t work properly. For these images the best thing to do is override the Gamma settings on a case by case basis as you import them into your scene (see image below).
3DS Max is now setup correctly, so set up your scene and create a render using the VRay Frame Buffer.
SETTING UP VRAY:
First step, go to VRay’s ‘Colour Mapping’ drop down menu and change the Gamma to 2.2 and tick ‘Don’t affect colours (adaption only)’

The advantage of ticking ‘Don’t affect colours (adaption only)’ is that the Gamma 2.2 will not be ‘burnt in’ to the final image, however V-Ray will proceed with all its calculations as though color mapping is applied. In effect this enables VRay to calculate better noise samples as it is sampling a brighter image, so the differences between light and dark tones are easier to detect.
The image you save out is still Linear, so we still have the flexibility of compositing in Linear space.
The VRay Frame Buffer also ignores the 3DS Max gamma settings, so the render may come out looking very dark. You will need to click the sRGB button at the bottom, which is VRay’s own gamma correction. Note that this is only for ‘displaying’ purposes, the image is still Linear.
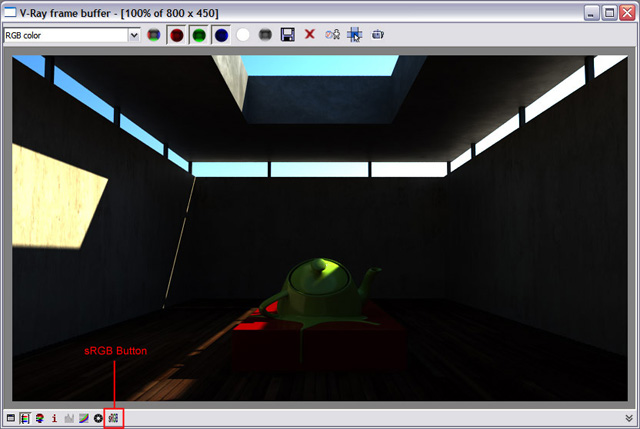
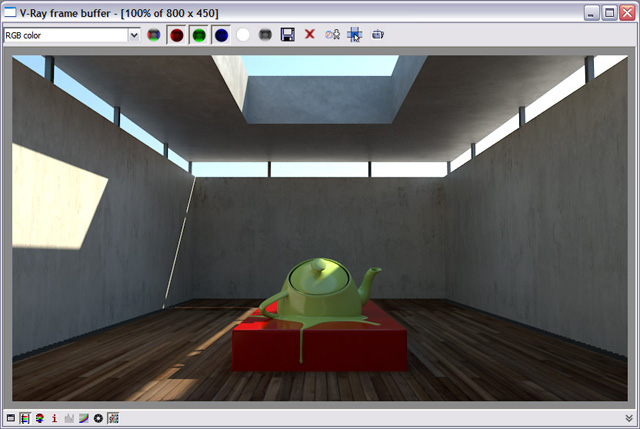
As you can see, the image above is now displaying a linear image corrected to be viewed at Gamma 2.2.
You will notice that from now on light will fill every corner of the image without the need to add a load more lights or boost any settings to unnatural levels. You will also notice that the image will not burn out nearly as much as before. This is basically because when you wanted to brighten the dark areas by adding more lights, this still contributes to the light areas, so you will inevitably end up with ranges that exceed pure white (255, 255, 255).
FILE FORMATS AND RENDERING:
Compositing in 32-bit has been used in feature films for years. Color correction is much more flexible especially when controlling highlights. The ideal solution is to export a linear image like EXR or DPX for example. With Linear images all of the pixel data is mathematically correct as opposed to ‘looking’ correct, resulting in accurate and predictable results when adding or multiplying in post. After effects and Nuke can be setup to view Linear images in sRGB colourspace, composited in 32bit and then exported at 8bit for broadcast.
When saving linear images, 8bit formats will most likely result in some colour banding. There often isn’t enough range in 8bit colourspace to represent a complete tonal range when working with linear images. So whenever possible always render out to either 16bit (TIFs or SGIs) or 32bit (EXRs, DPX).
Never use JPEGs for rendering as JPEG compression is optimised for nonlinear images and will throw away much of the data required for gamma translations to and from Linear space.
BURNING THE GAMMA IN
(only if you want to):
Burning the gamma in will limit what you do in post, but if you wanted to simply untick ‘Don’t affect colours (adaption only)’ in VRay’s ‘Colour Mapping’ drop down menu. (see image below)

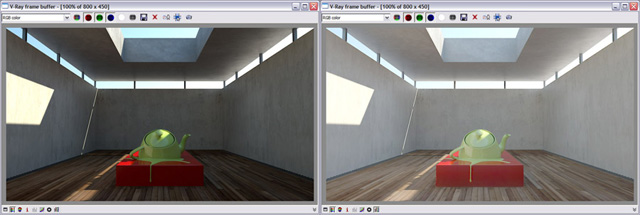
You can tell this has worked because you can view the same image but without having to click the sRGB button in the Vray frame buffer. You will notice that if you click the sRGB button it will preview gamma correction top of that, resulting in a washed out image (see image below). You get a similar result if you duplicate the image to the Max frame buffer, this is because we set Max to Gamma 2.2.
THE MAGIC LINEAR WORKFLOW BUTTON:
This button is a little misleading. It looks like if you tick it, then you will magically get proper linear workflow…but no, you don’t. This button is basically a quick and brutal way of correcting the Vray materials that were not set up and tuned with Linear workflow in mind. I wouldn’t use this.

That’s pretty much it really.


