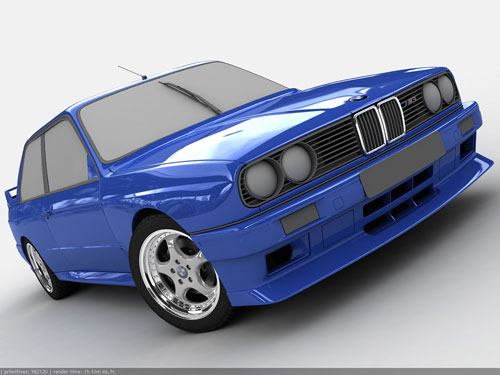
Modelling of cast disc
Part 1.(inner part of disc)
So,to create any disc we need no less than 2 photos of this disc:
a) in face (to be used as drawing)
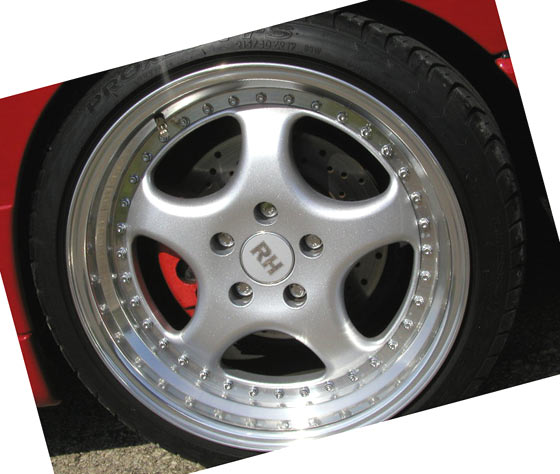
b) side-view (to visualize disc profile)

To begin with, one main advice-modelling any subject (not only the disc) every 2 minutes look at the photo
Open 3D Studio Max and in Front view press the next key combination on keyboard Alt+B and the window appears:
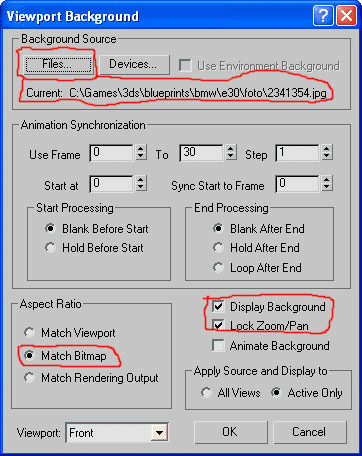
Where press File button and select our photo in face and set as in the picture.
Further it is convenient to draw the Circle splains for good orientation. Naturally, they must be drawn at disc outline
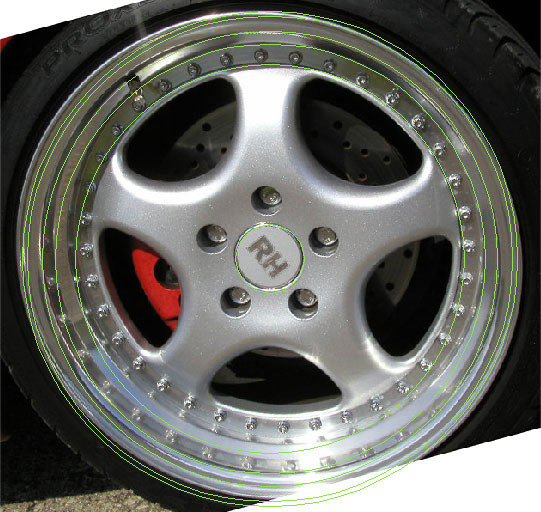
Then we draw another three lines as in the picture:
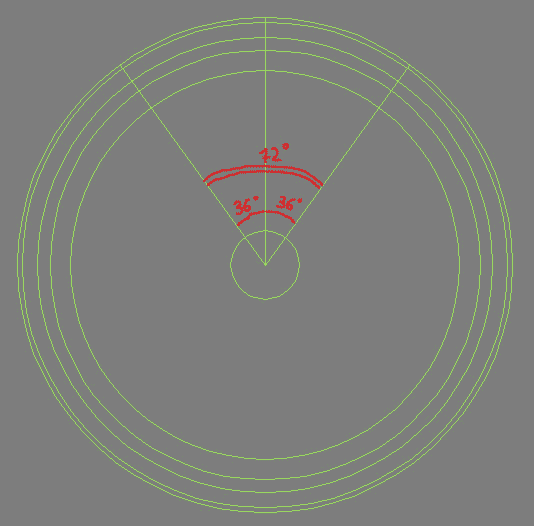
(If you don’t know geometry,it will be difficult to understand why lines must be placed at such angles). In each case you need to calculate these angles.(Note: Disc has 5 spokes, as the circle has 360 degrees to postition 5 axial lines of these spokes between them you need 72 degree angles. For normal connection of spokes in radial rotation,their edges should diverge from the central axis at 36 degrees…it is 72 halved.In the end we get 72 degree radial sector of the circle and having done this 5 times we get 360 degrees.
Create the cylinder as in the picture:
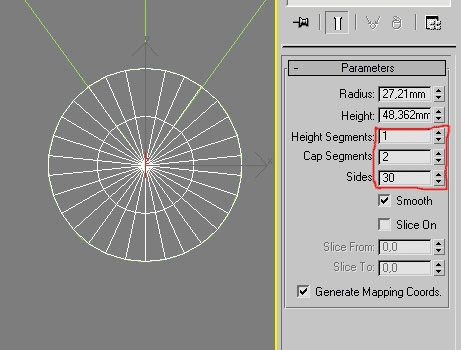
Click right mouse button on this cylinder and select convert to -> editable poly. Switch to polygon level and delete the odd polygons, we get this:
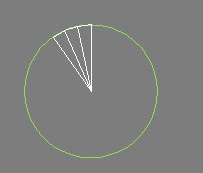
Then go to Edges level and choose three outer edges, and binding Shift on keyboard draw them up. Repeat the action and get:
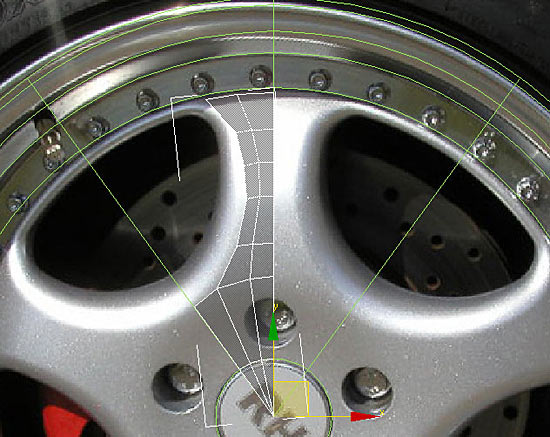
In Right plan give volume to the disc as in the photo:
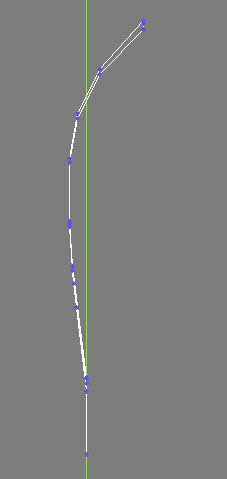
Next we create a new object – Tube:
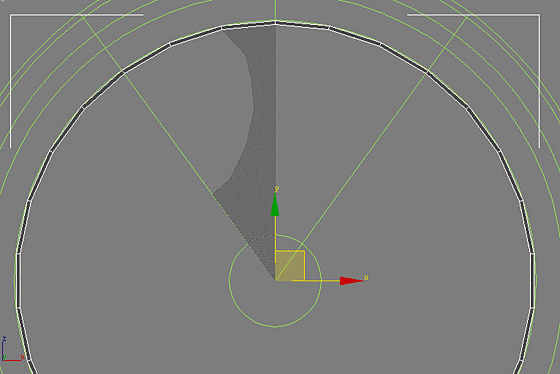
Repeat such actions as with the initial cylinder leaving only 3 polygons. Then select our disc blank and pressing Attach key press on our
Tube created. After that switch on points level and with Cut,Weld and Target Weld instruments get the following:
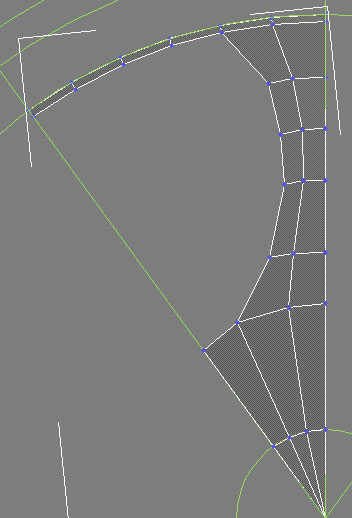
Watch that outside points lie on the lines drawn(IT’S OBLIGATORY!).
Now cut the the hole for the bolt. Cut as in the picture with Cut instrument and delete the polygons marked out in the picture:
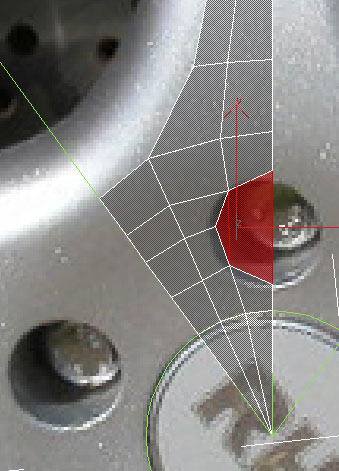
Further shape them as in the picture:
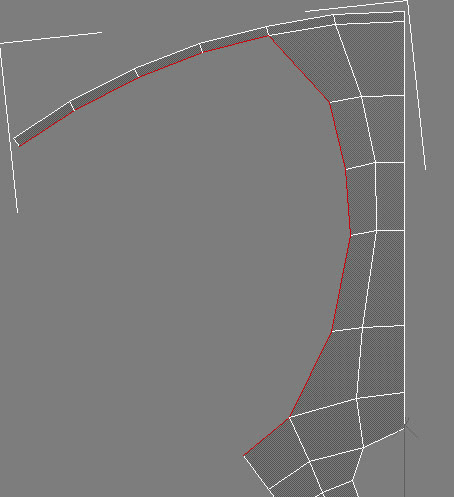
and with Scale and Shift button do as in the picture (we have to move some points there):
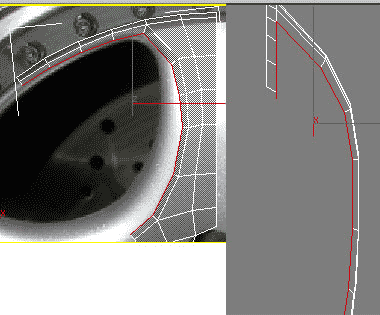
Repeat the previous action:
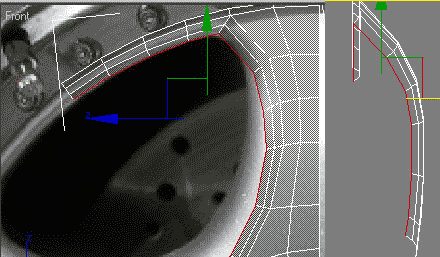
Repeat once again:
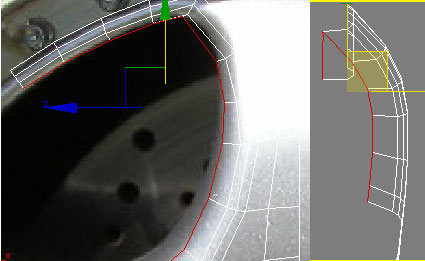
Then extrude the edges:
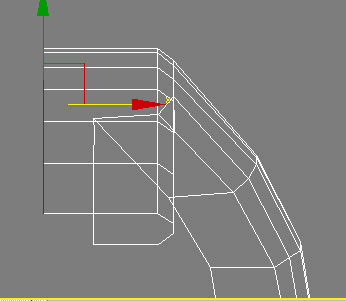
Apply the Symmerty modifier:
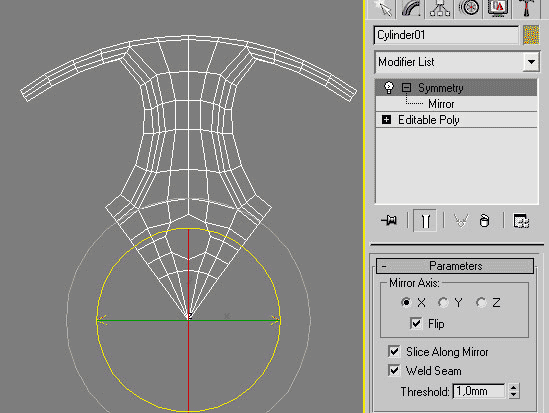
Maybe you will have to go to Mirror level and rotate the axis to place everything right. Also youmay have to set a Flip checkbox on.
Next select our disc and in upper menu(where File, Edit, View buttons are placed) select Tools->Array. After that do everything as in the
picture:
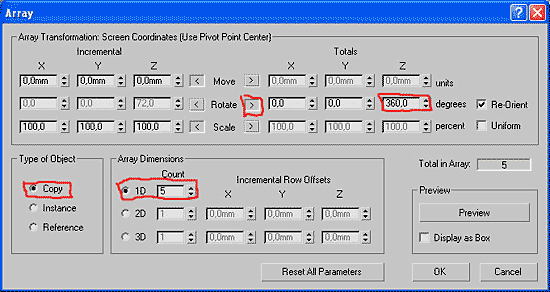
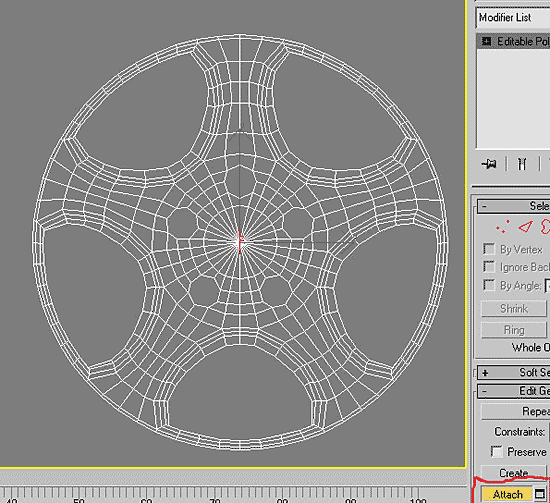
Get 5 details, select one of them and attach other 4 to it. Further, switch on to points level select all points and press Weld (value will have tobe matched)
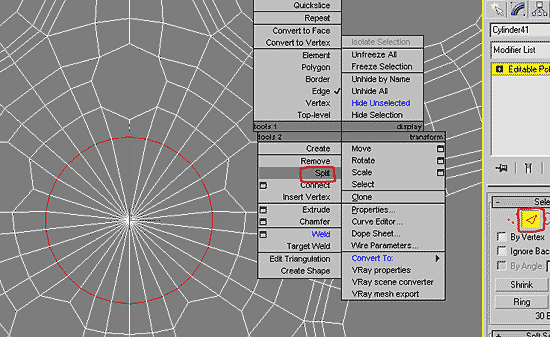
Select the circle of edges in the center and press Split.
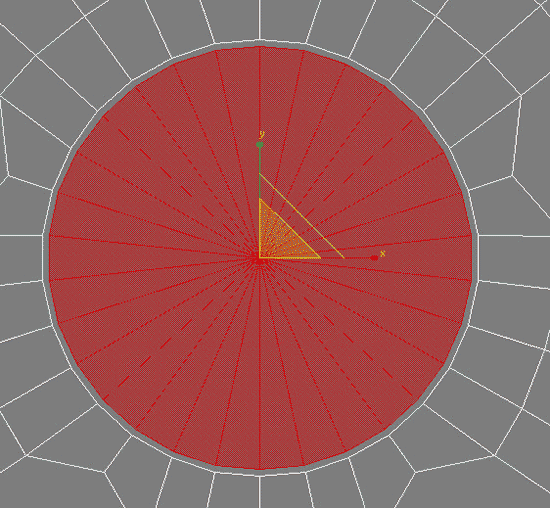
Switch to elements level and select the central part of the disc and reduce it with Scale:
Switch to Border level, select our edges and extrude them:
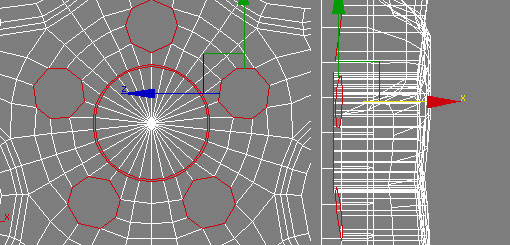
Right mouse click and Convert To Faces:
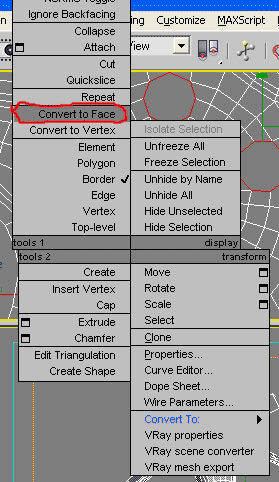
After that when we have selected polygons press Detach (and in the window appeared select detach to element)
At last our central part is ready.
Part 2. Rim
Now let’s create the rim. I won’t explain in detail cause the procedure is the same.
So, create the Tube
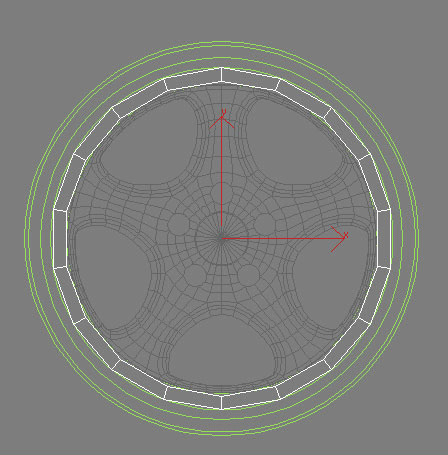
Select the inner border and extrude as in the picture:
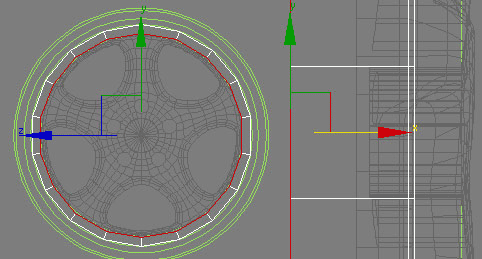
After that repeat the same with the outer border
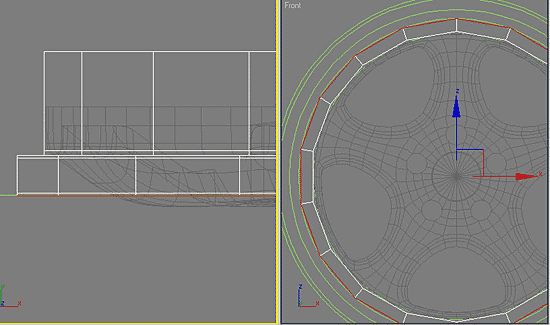
Finally, repeating these simple actions we get the following:

– top view.
Next apply the symmetry to the rim
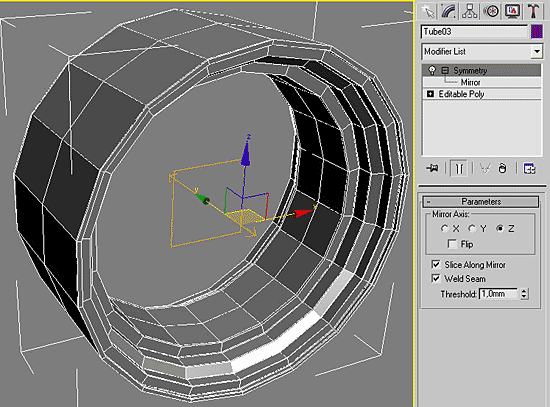
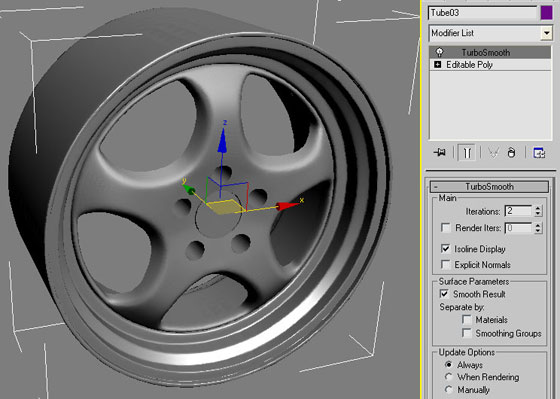
And convert it in Editable Poly. After that attach our central part to it and apply TurboSmooth modifier.
Part 3 (Nuts)
I decided to do low-poly nuts on the central part outer perimeter cause it’ll save many polygons. From the cylinder(above 20-30 sectoins)create such a form:
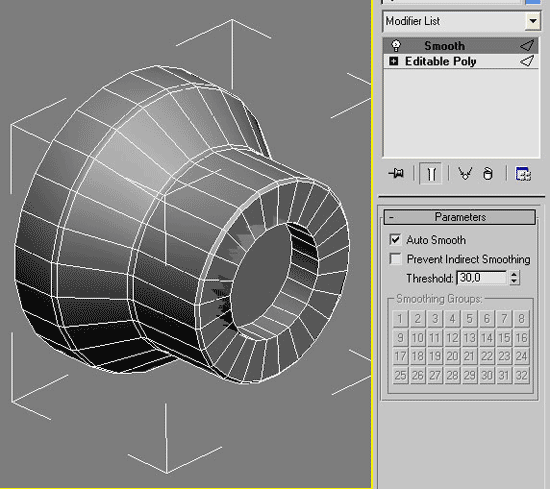
I think it’s not hard to do it yourselves. Then put this nut accurately into the disc center.
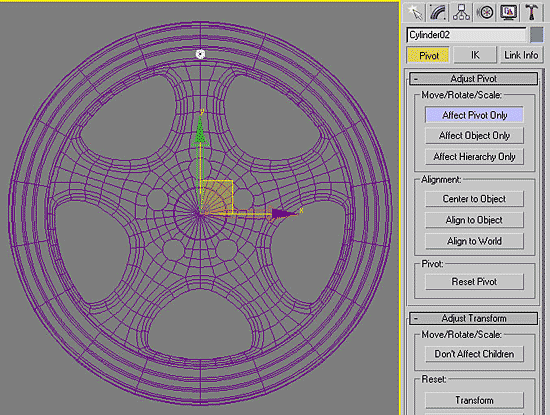
Now apply Array to the nut with parameters as in the picture.
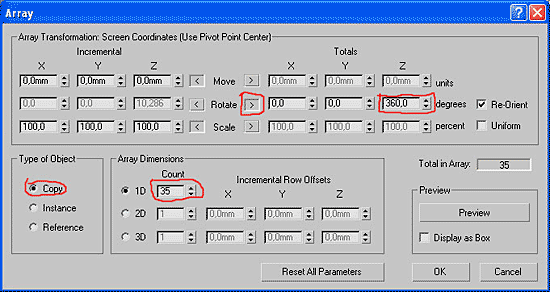
That is all, perhaps.


