Car-paint
How to make a car-paint without the use of additional plugins
Intro:
This is my first tutorial here, so I will try to explain things as good as possible. However, an average knowledge about 3dsMax is needed. Most people that make cars or other objects they want to give a car-paint to, have the problem of not having brazil or any other expensive plugin. However, 3dsMax has it’s own box of tricks. Read on to find out how easy a material setup can be with a realistic result at the end. Ofcourse, some things need tweaking, but that depends on your own view.
THE BASIC SETUP AND BODY MATERIAL
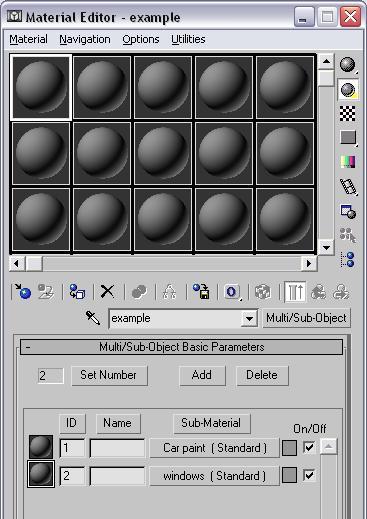
step 1
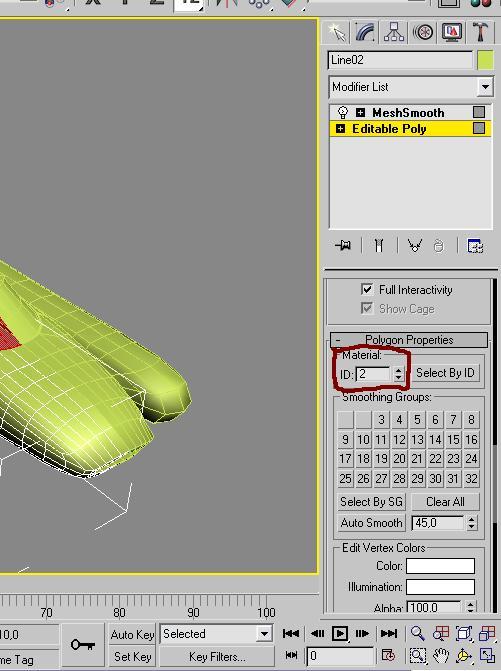
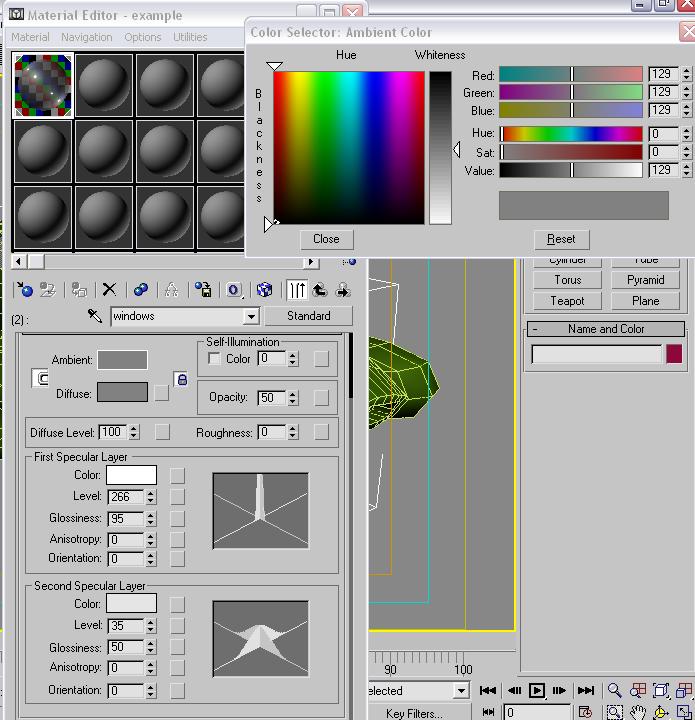
Before you get started with the material editor, make sure that you’ve given the object you want to paint, two different ID’s. In this case I’ve given the bodywork ID #1 and the windows ID #2.
You can do this by selecting all polygons that you want to give the same ID nr to and under the polygon properties menu change the ID-value to in this case 1 for the body-work and 2 for the windows. (see circled piece). I will explain in the next chapter.
step 2
You can make materials in several slots, in this case I have chosen for a multi/sub-object material, so I have all materials of one object in one slot. It keeps things organized. We will only use two materials in this case, so set the amount of materials to 2. Now you know why we’ve set the material ID’s.
step 3
Select the top slot (car-paint). Set the shader basic material to a multi-layered material. For now, try to get these settings. The material isn’t finished yet, but these settings give the shinyness for now.

step 4
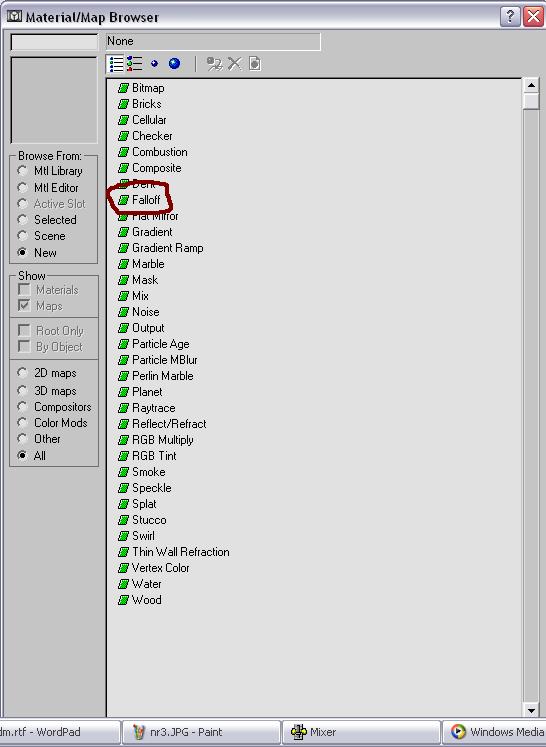
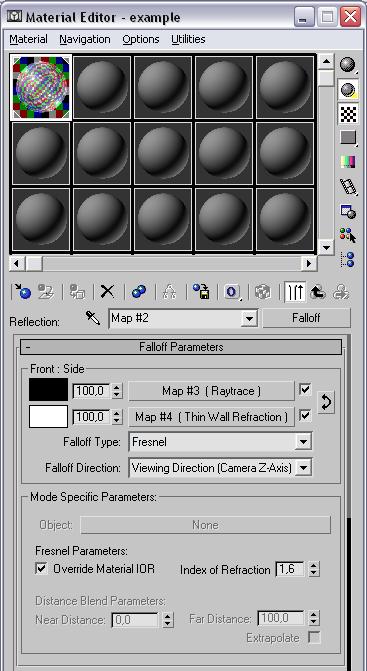
scroll down to the maps rollout and expand it. You will see a lot of things you can choose from, but we will only use the reflection map. First of all, set the amount of reflection to 50. 100 will reflect everything and will give a very unrealistic result. Don’t forget to click the checkbox next to it. Click the button on the right side and from the window, select falloff. (see image). When you’ve done that, you’ll notice a new menu.
step 5
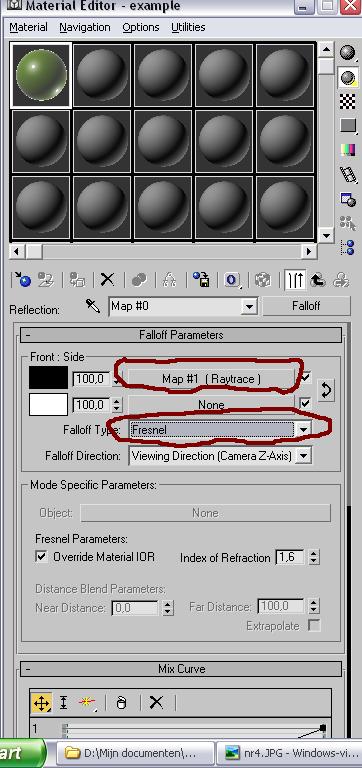
Under the falloff menu, try to set the settings as seen in the picture. Don’t forget to set the falloff type to fresnel. No other settings need to be changed then the settings seen on the picture.
Press the black arrow a couple of times to go to the mainpage of the material. You are done with the material of the bodywork. When you’ve gone back to the top of the material you can add the material to the object.
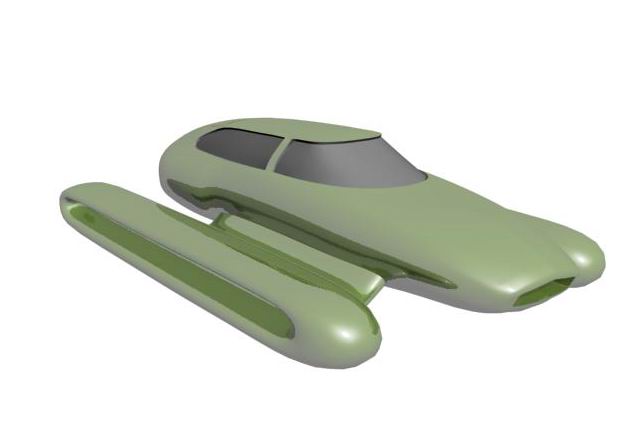
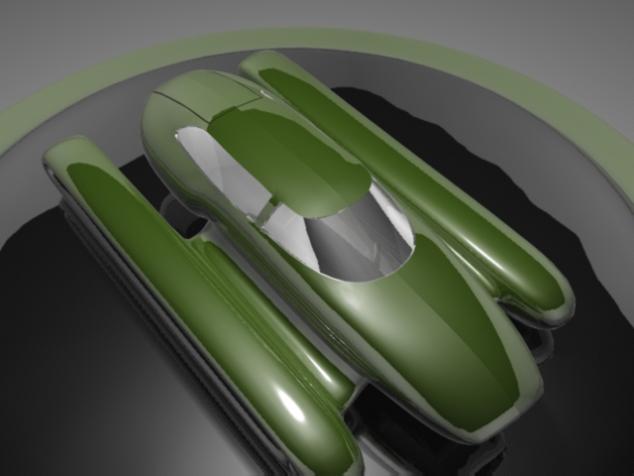
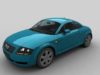
With these settings for the bodywork, I’ve gotten this result.
THE WINDOWS.
step 1
Go back to the material ID screen in the material editor and select ID 2. On the shader basic parameter screen, select multi layer and make sure that the two sided checkbox is enabled. Furtheron set the settings as seen on the next picture.
step 2
scroll down to the maps rollout and expand it. You will see a lot of things you can choose from, but we will only use the reflection map. In this case, leave the reflection amount 100. Click the button on the right and select falloff again. Change the falloff type to fresnel again. Try to set the other settings as shown on the next picture.
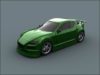
Add a little extra stuff and with the settings described, you can get this result
Now you’re ready. If you have questions, please leave them on my personal page.. Username Wackter.

About The Author
You might be interested in