Instancer And Curve Flow Tutorial By Aziz Khan
Hello Friends!
In this tutorial I will show you how to use (Curve flow) with instancer to create flock of birds, insects, Fishes, sheep’s, cows and etc. Maya has wide range of powerful effects to create unbelievable animations and visual effects, that is why the most film industries are prefer to work with Maya.
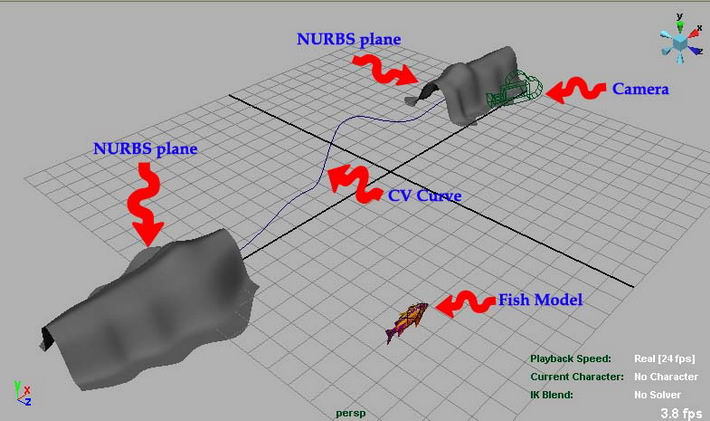
In this tutorial I will show you how to create flock of fish and how to control their random motion, before going to start this tutorial I assume that you should have some thing in your scene any object it dose not matter, what object is it can be fish, bird, robot, car any thing you have but I will use fish in this tutorial, when you working with (curve flow) you should have any (CV Curve) drawn in scene, like mine below. ok get ready we are going to start.
Fire up Maya if you already running just make new scene to work nice and neat.
1-First of all you should create some thing link in the image below if you have fish model do as same as me. otherwise you can just follow along with single CV Curve to experience to do on yourself later on. I am using fish here if you have any object will serve.
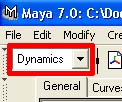
2-Now make sure you are in Dynamics type if you are not just change it to Dynamics like picture below.
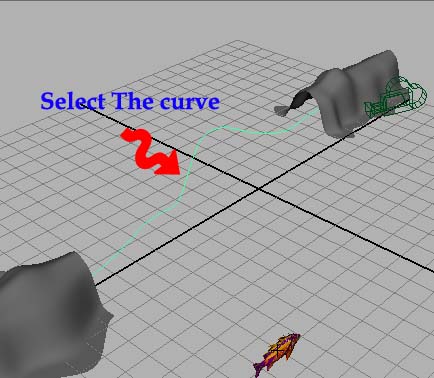
3-Now select the curve to use curve flow, like in image illustrated below.
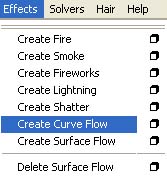
4-Ok with curve selected go to (Effects>>Create Curve Flow) as in picture down.
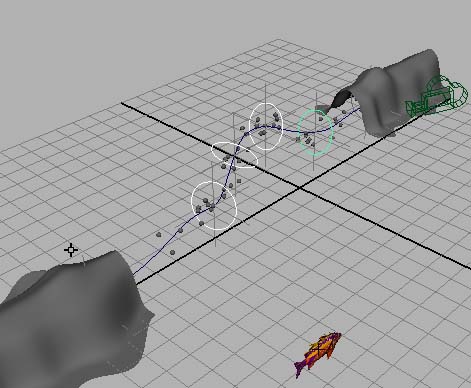
5-Now hit play and you should see the Particles are along the path moving like image below.
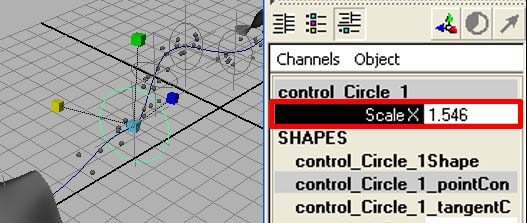
6-Now select one of the circles which is created by Curve Flow and then increase the value of Scale in Channel Box, you should scale it little bit to have realistic motion along the curve, I have scale just on of the circles if you like you can scale them in different Sizes, like the picture illustrating down.
7-Ok select the node which is in the picture below indicating.
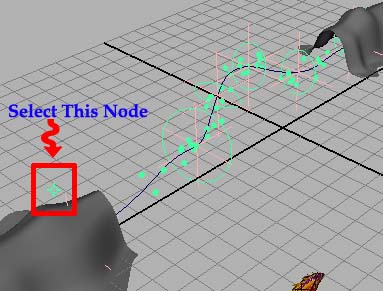
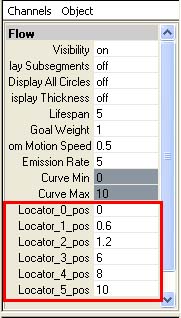
8-Now in channel box give different values in Locaters value box, basically locaters are attached to circles if you change the values in locater box you will see the circles are moving too along the path, if you provide long distance between 2 circles when particles are there what will happen, particles will move fast till next circle, where the distance is short or near between 2 circles Particles will move very slow to next circle, change the distance between these circles and you will see what will happen. like in the picture below.
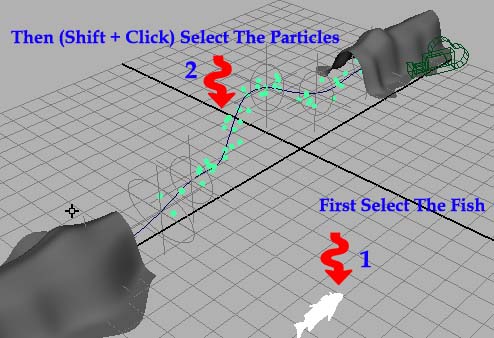
9-When you happy with distance of circles its time to Convert the particles to model in scene, ok to do this first select the model in scene which you want to flow along the curve in this case I am using fish model, as I told you before you can use any object in your scene no problem then hold down the (Shift key) then just use left mouse click. as in the picture below.
10-Now with the model and Particles selected go to (Particles>>Instancer (Replacement) hit the small rectangular box as like the image down.
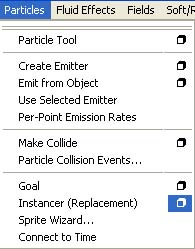
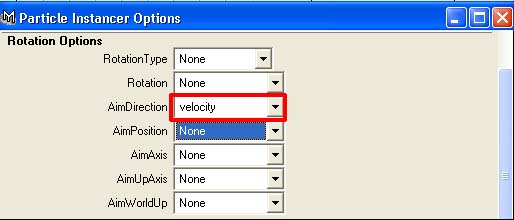
11-Now in (Particle Instancer Option) change the (AimDirection) to (Velocity) and then hit create, as in the image below.
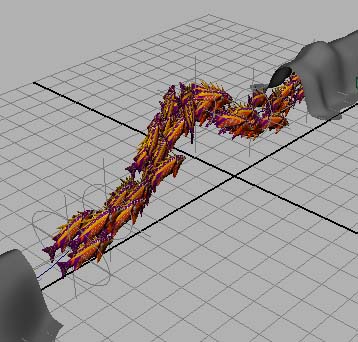
12-Now you should see something similar like mine here, if you notice one thing the quantity of fishes too much and their overlapping each other like the picture below, how to solve the problem? ok undo Instancer and to return to the pervious status. you think that what the hell is this I am doing? its because to enhance your practice don worry keep going on.
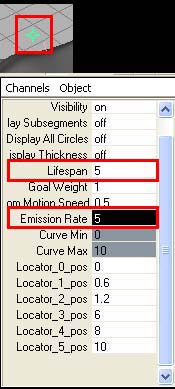
13-Ok when you done with undo, select that Node which we have selected in the Figure 7, and then change the values in channel box, as like the picture below,
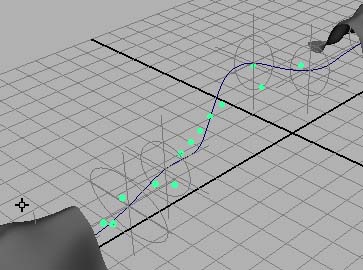
14-If you see now we have less particles like the picture below.
15-With doing these all we still need some tweaking around the particles, ok select the Particles and then go to channel box then change these settings as in the Image down.
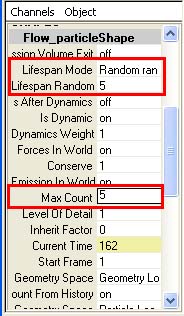
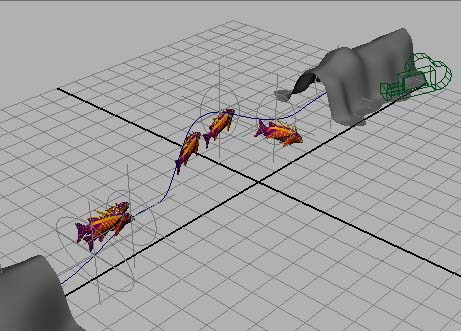
16-Now you are pretty done you are ready now to use (Instancer (Replacement) ok now do the same which you did in figure 9, and now you should see less fishes and with nice random motion along the path, like the image indicating below.
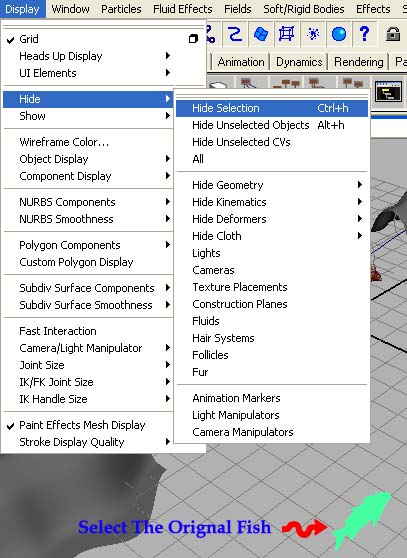
17-Vaila we are done now, and we need to hide our original model from scene, to do this first select your orignal model and then go to (Display>>Hide>>Hide Selection) and the model has hided, like the picture below.
And now you can play the animation and you are watching that objects are instancing very nicely along the path, you can use this technique to create Missiles, flock of birds, sheep’s, butterflies, cows, fishes, and many more.
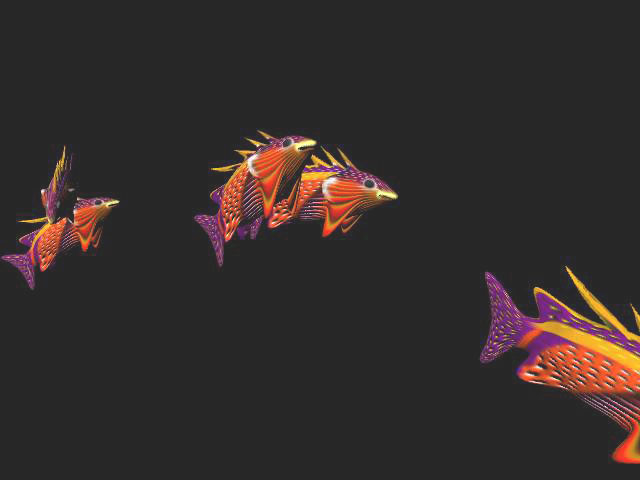
My final result is here below which I add a camera and took this final image.
Suggestions, Comments, Questions, and Feedbacks are welcome


