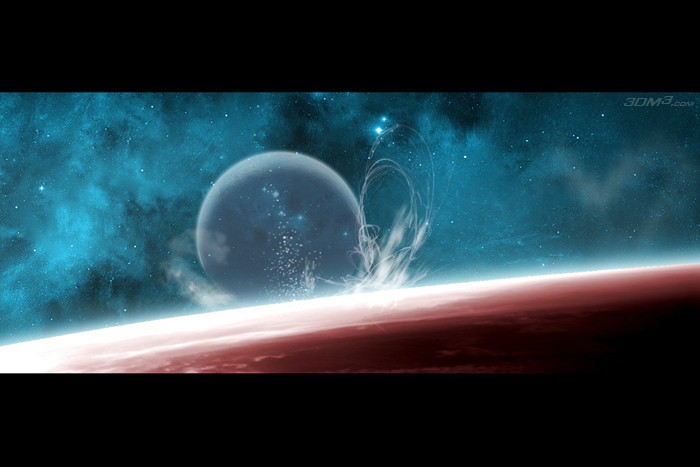
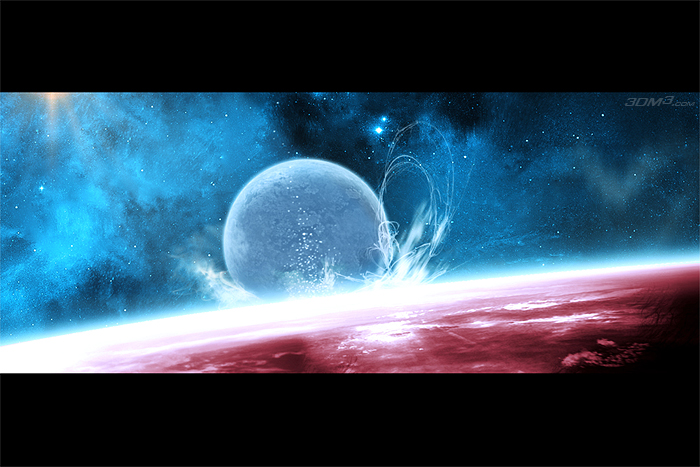
Fury of serenity by Henry Pashkov

We start with idea as always. Have to make up a mental image first to implement in 3D reality. Once I saw a picture in the internet. I forgot the content but color gamut of the picture stuck in my mind.Long time after that dreams were running away from me cause of this image. And I decided to play a little with these colors. Most of you have already seen the result. And someone asked me to explain how I achieved such result in details.That’s how this tutorial appeared.
Let’s start:
1. Start Photoshop. First of all create big resolution image (for example, 3600Х2400). I use high resolution from the beginning in case if the image would be printed. Small image will be blurry if printed. The second reason to create high resolution images is the possibility to improve quality of the final image. Decreasing image size to 1200Х960 on post processing removes all hard edges and other sharp transitions on the image.
Creating starry sky:
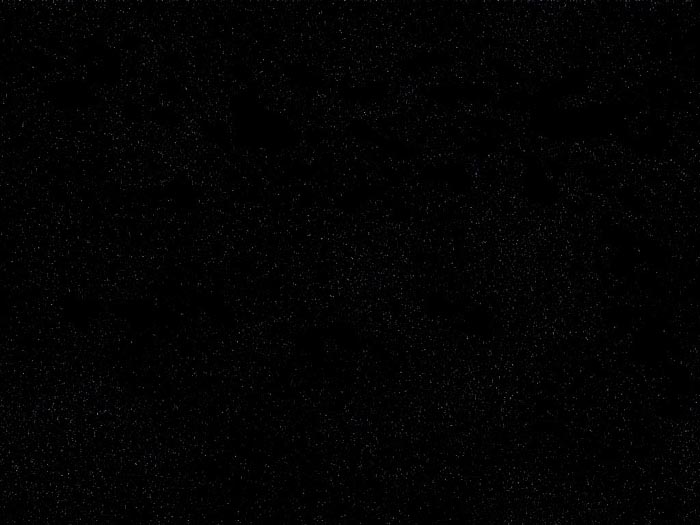
2. Create new set and name it “Stars”.Create several layers filled with the black color in the set. Then apply “Noise”filter (Mono) to each layer consequently. We’ve got several layers full of white dots. Increase 10% and 20% the second and the third layers according lyand set “Screen” Blending options to both. You should receive the following celestial map image that you can merge into a single layer:

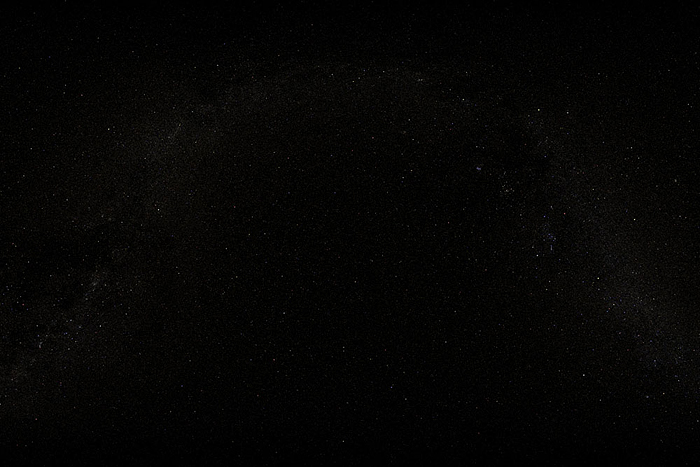
Note: Eventually you can use an existing photo of the night sky. For example, from NASA site (http://www.nasa.gov/externalflash/nasa_gen/index.html or http://maps.jpl.nasa.gov/stars.html ).
2. So as we have got the starry sky let’s start with a nebula.
3. The process of nebula creation is described in Tutorial 1: “Nebula For Half An Hour”. So we are not going to settle on it again. Also you have your own fantasy to help you experimenting on this issue.
4. Assuming that you have already finished your nebula let’s start with a planet:
Take an arbitrary planet render, for example,from Tutorial 2 “Creating A New World”. Best of all save rendering image as tiff or psd to have alpha channel mask created automatically.
Or you can use Tutorial “Modelling a planet” recently published of www.3dm3.com to create the other kind of a planet.
Follow the image given below to place the planet.You can stretch the image of the planet to accentuate the perspective effect if you wish. But it’s not necessary.
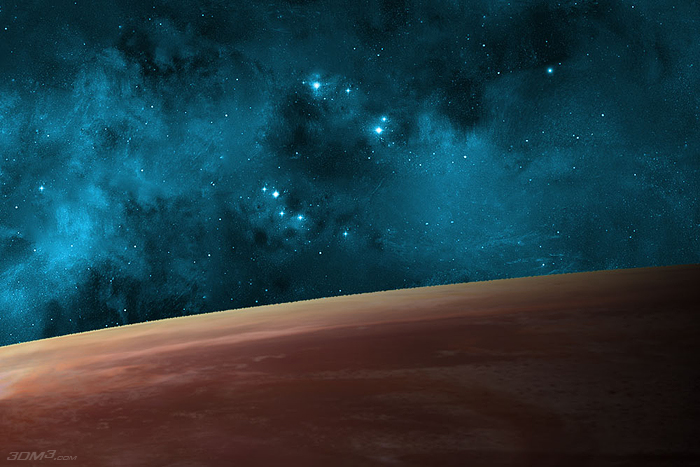
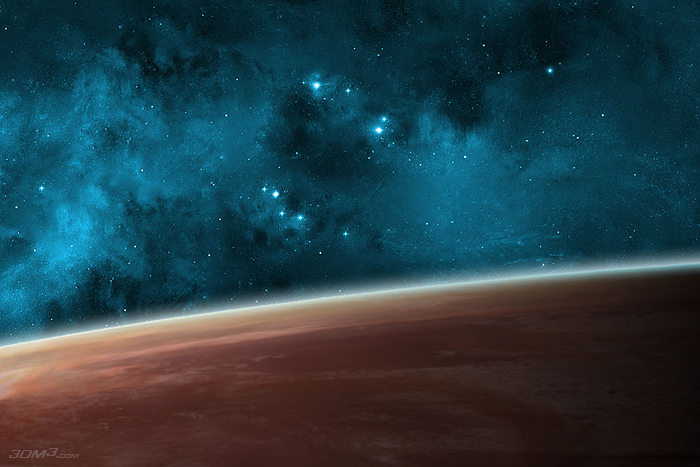
Thus you should have your image close to the following with the planet in front and the nebula on the background:
5. Duplicate planet layer two times. First layer remains at the bottom with “Normal” General Blending parameter. Set “ColorDodge” blending for the next layer and “Pin Light” blending to the upper one.
Let’s set blending options for each layer.
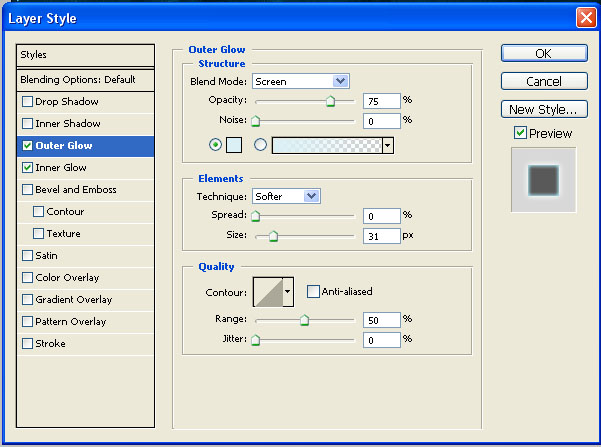
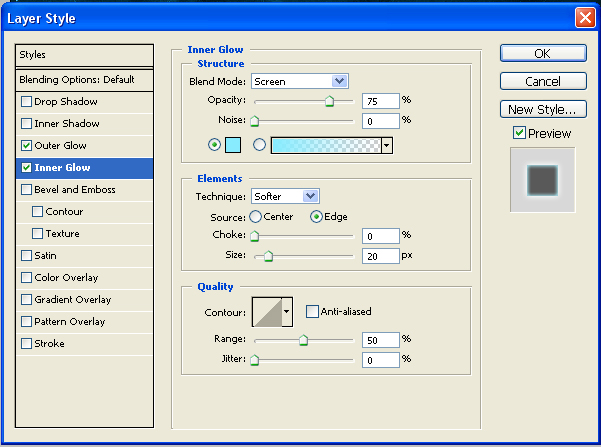
Open blender options window of the lowest layerand set parameters for Outer Glow and Inner Glow according to following images:
Receive the following result:
6. Open blender options window for the next layer and set parameters of Outer Glow and Inner Glow as shown on the images:

Receive the following result:

7. Open blender options window for the third layer and set parameters of Outer Glow and Inner Glow as shown on the next images:

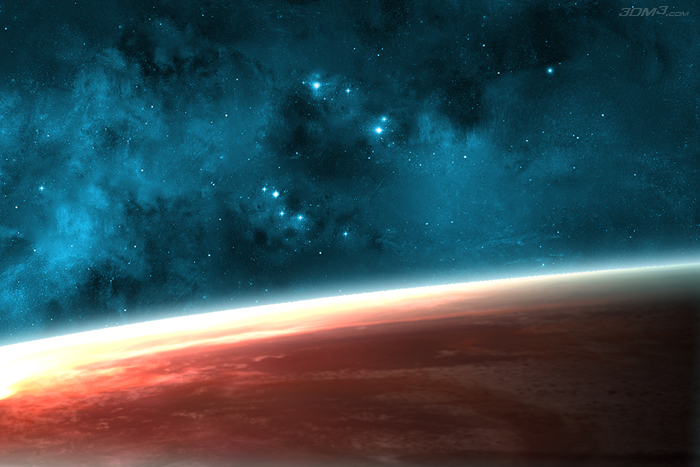
Receive the following result:
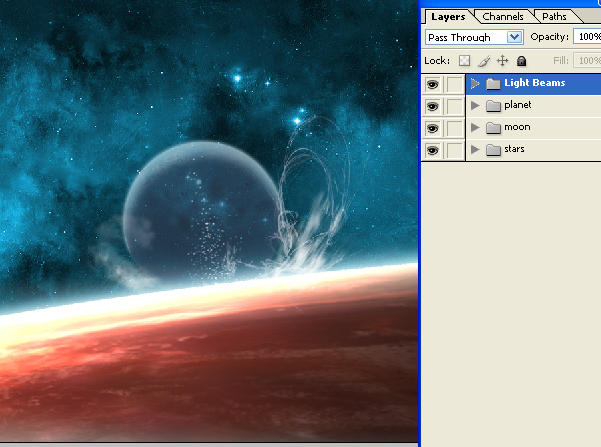
8. Then I used brushes from DeviantART site ( http://www.deviantart.com/ ). I selected brushed that are used to create abstract figures and cigarette smoke. I created several white flashes and protuberances and placed each element into a separate layer. I set “Screen” blending option for all flashes and protuberances. Move all these layers to “Light Beams” layer set.

9. The next step is to create a satellite planet behind the main planet. I used Tutorial 2 “Creating A New World” again, because I wanted to make the planet more realistic in this case. I moved created satellite planet layer into a new “Moon” layer set.
Got the following image as a result:

10. If you keep close to my sequence of hierarchy creation you would have the next layer set configuration in the Layers window:
And your picture is something like that:

It looks like everything is good but I’m still not satisfied because colors of resulting image differ from the color gamut I intended to create.
11. Now is the turn of special effects. We press the magic button:

And create the layer of Hue\Saturations with the followings parameters:

Remark 1:
Did you noticed that applying these effects you get a result different from mine? This is because you apply it toall the picture but applying to planet layer only needed.
Go to Channels book-mark. Copy the Blue channel and apply Image\Adjustments and Brightness\Contrast commands to receive contrast picture that have a strong division between planet and space regions.

Select the area of planet using Ctrl + «Left MouseButton» (click this combination over the resulting channel). Go to Layers bookmark and cut required area from the Hue\Saturations adjacent layer. Now the effect applies only to the planet area as we planned to. Obviously delete our assistant channel from the Channel book-mark list.
After all this we have the next image as are sult:

Looks better but color saturation is too low:
12. We press the magic button again:

After this operation we have got the next result:
Each step better but we should not stop on this result.
13. And again the magic button rescues us:
This time we create Curves layer. Set the RGB curve to look like the following:

Now our image looks different:

14. And the last step of the battle for saturation. However now apply an effect to the entire picture.
Create Photo Filter layer with the next parameters:
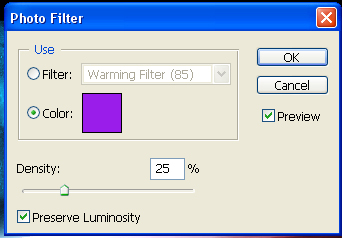
Now I like the picture.
15. Thus in the Layers book-mark you should seethe next set list of layers and layer sets:

“Mask” set is at the top as it is the layer set which contains upper and bottom black stripes.You may not create them if you wish. It is a matter of the personal habits.
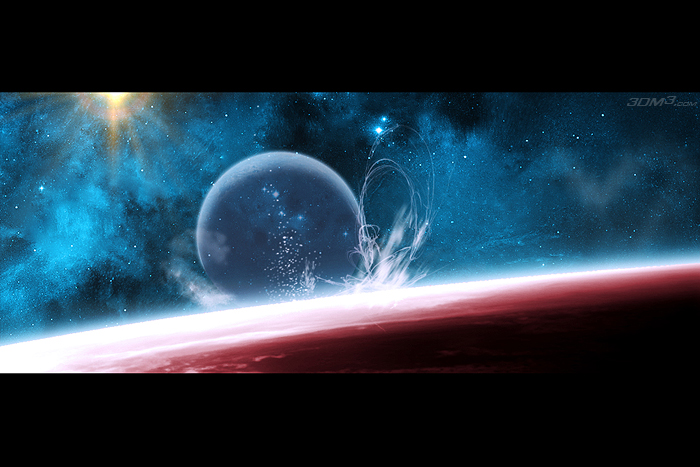
16. Then following the Tutorial 1 “Nebula for half an hour” create “Sun”layer set. Form “Sun” layer and “Rays” layer in this set. Create the following sun using Render\Lens Flare filter in the “Sun” layer:

Crete the next pattern in the «Rays»layer:

Set“Screen” Blending option for the layer. You should have something like that:

17. You should see the following result in the main window of your picture.
18. Applying Render\ Lighting Effects filter to all the layers of the “Moon” layer set except the first one will bring your picture to look like the following:
Thanks for your attention.


About The Author
You might be interested in