HDRIs using Vray 1.5 RC3 Renderer in 3DS Max 9
Hello, this is Shashank Sharma, or better known as shashanks18 on 3DM3. In this tutorial, we’ll work out to know how to do a decent lighting using HDRIs using Vray 1.5 RC3 Renderer in 3Ds Max 9.
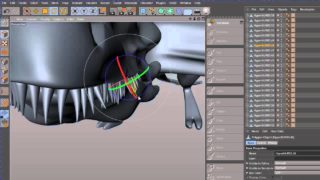
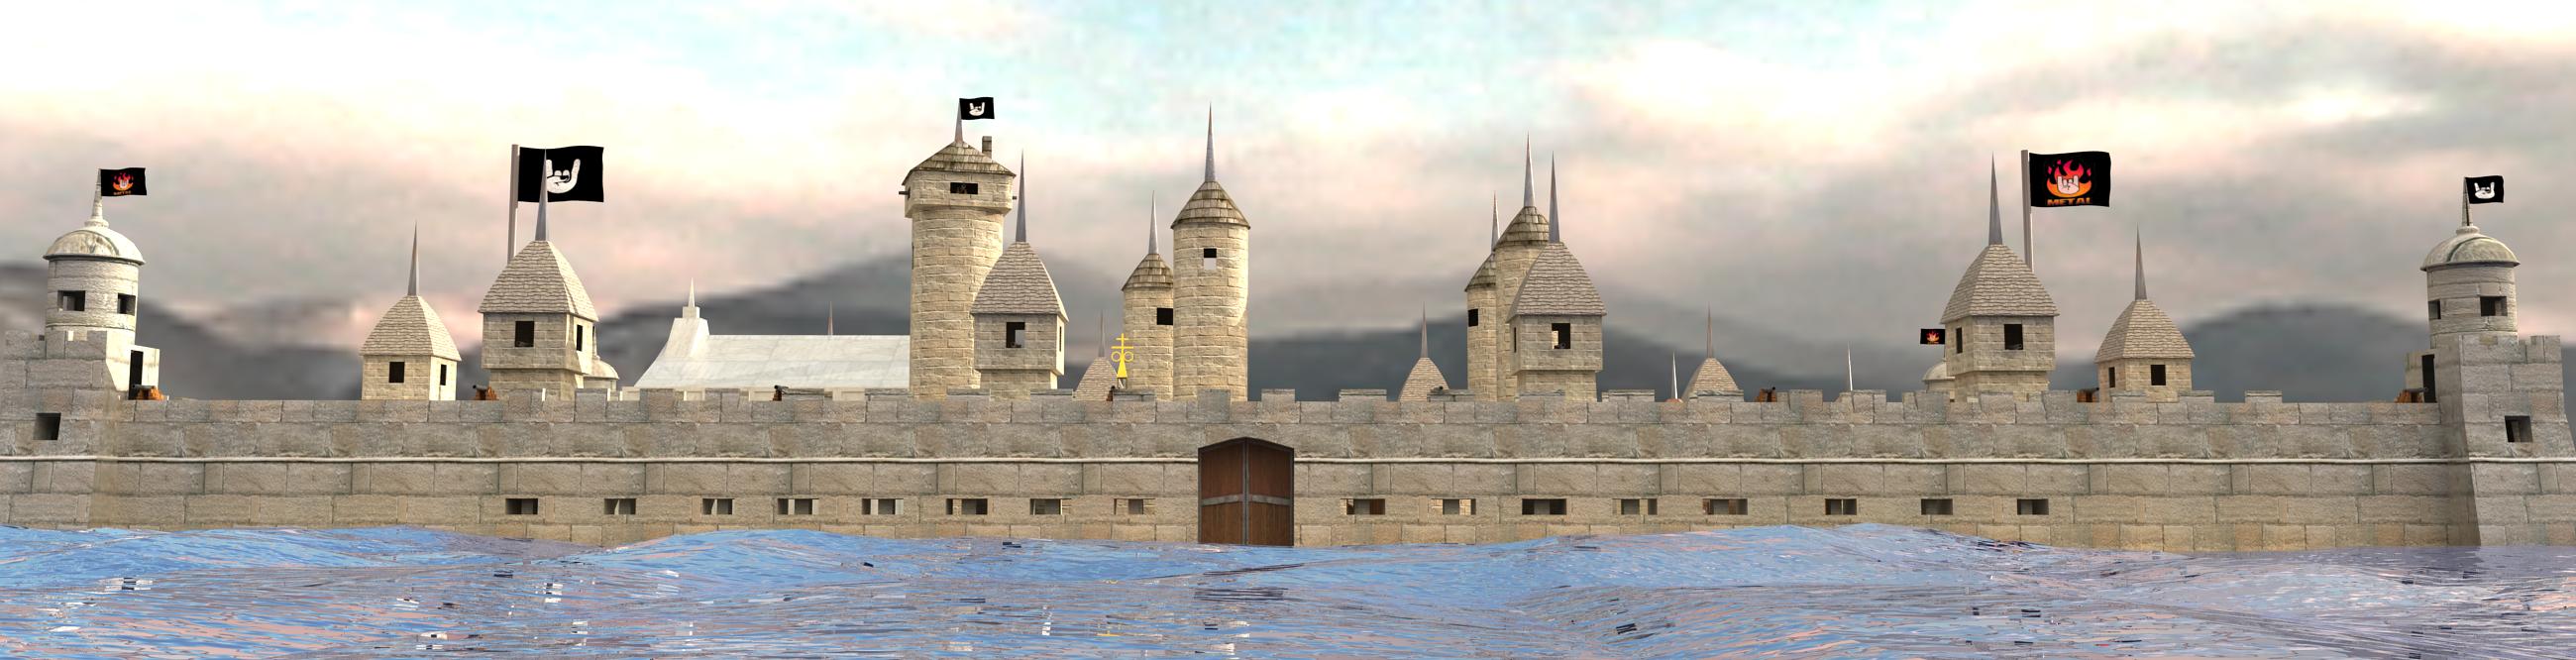
Here, I’ll be using a Castle scene for the example, that I have modelled, textured and lighted up.


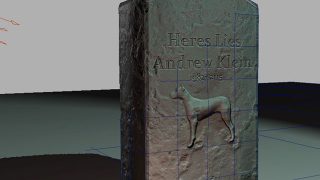
And here’s what we’ll be trying to acquire.


So lets start…
Firstly, lets try to get decent render settings in the scene wihout any texture maps or environments. Open your Render setting dialogue box(shortcut key F10) and in the "Common" tab, scroll down to "Assign Renderer" and choose "Vray Adv.1.5 RC3".

Now go to the "Renderer" tab and do the settings as below. We can get a good and fast render for previewing purposes with these settings:


This will give us an output something like this:

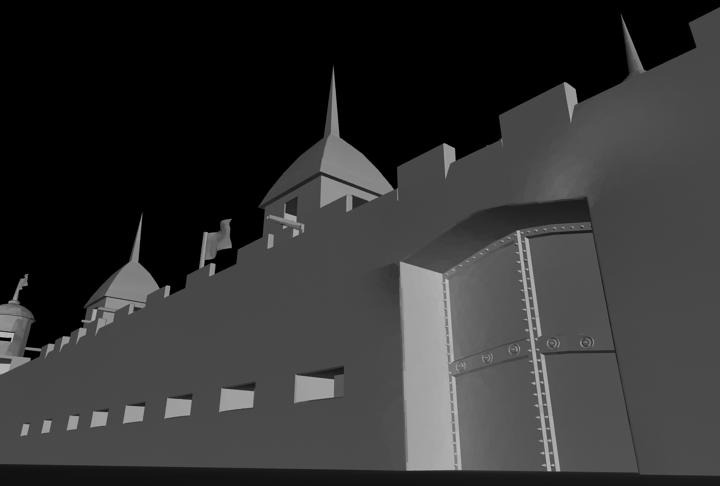
Always remember, that when we take a test output in Vray, with no lights put up, always keep the "Default Lights" option in "Global Switches" rolldown ON, else the output will be completely black, as there are no lights at all!.
Now, as we saw the renders above, they look dull; which is obvious as they don’t have any lighting done nor any textures put up. These renders are mainly to check the anti-aliasing in the scene.
Lets now add an HDRI in the scene. I, for this example will be using the one below. Its called "Snowfield".

For the people who would be new to HDRIs; HDRI stands for High Dynamic Range Imaging. An HDRI is a set of techniques that allows a higher range of radiances or luminances between light and dark areas of a scene than normal digital imaging. An HDR image is created from a set of photographs of the same scene taken with different exposure levels of the camera. Lets see an example of this in Adobe Photoshop CS3.

Check out the slider at the left bottom of the screen. With this we can see the different radiance values stored in the HDRI.


See how the scene naturally turns dark at one point and brighter at other point.
Well, getting back to the main point. Lets add the chosen HDRI in the scene. Here’s how you do this. In the "Renderer" tab, scroll down to "Environment" section. Switch ON the "GI Environment(skylight) override". Click on "None". It’ll show up a Material browser dialogue. Scroll down to find and select "VrayHDRI".

Now, this is not going to do any good to us, as here we don’t have any option to load a specific HDRI. This will keep the VrayHDRI map empty! So what we do is; open the 3Ds Max Material Editor(shortcut key M) and in an empty material slot drag and drop this VRayHDRI map from the renderer to this slot and say "Instance".

This brings up the VrayHDRI map in your Material Editor, where you can play around with the map, and as it has been Instanced with that in the Renderer, every settings you do will get reflected in the rendering output. So, click on browse and load whichever HDRI is suitable for you. I’ll go ahead and select "Snowfield" here.
When you have selected the HDRI, select "Spherical Environment" in the "Map Type" section on your Vray HDRI map.

Also, now that we’re going to have a certain Global Illumimation through the HDRI in the scene, we can go ahead and Switch OFF the "Default Lights" option in the "Global Switches" section of our Renderer settings, else our lighting in the output will go awkward.
Now lets take a quick render of this.


We can clearly see here that the ambience of the scene has been affected. It has more of the ambience of the HDRI now . Though we still don’t have good shadows and proper lighting, but this is what HDRI lighting is for; for ambience and realistic feel to the scene’s lighting. Lets see one quick render of what happens when we change the Intensity Multiplier of the HDRI in the material editor.


Well, the scene is more ambient and bright now. But we have a certain problem here. The scene is having many artifacts; for example take a look at the gates; looks quite ugly, doesn’t it? So here we change a few settings.
In the Indirect Illumination section of the render settings, choose "Irradiance Map" as GI Engine in Primary bounces and scroll just below to change the Irradiance Map settings


Now render this and see the difference. It will ofcourse take a bit more time as the settings are further raised to higher quality and when texture maps and ligts are put up, but will give much better results.

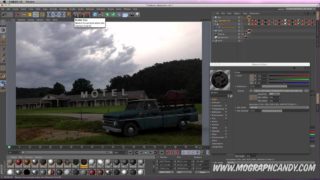
Ok. Work for HDRI’s ambience in our scene done, lets move ahead. For this scene we’ll also be putting the same HDRI as our background image. For this, first open the "Environment and Effects" dialogue(shortcut key 8). Now just drag the VrayHDRI map from the Material Editor(or from the Environment section in render settings, as both are the same) and drop on the "Environment Map" of the "Environment and Effects" dialogue and again say "Instance".

By the way, you can also see the image you just loaded in the environment by pressing ‘Alt B’, which gives you "Viewport Background" dialogue and selecting the given below setting:

If by chance you still don’t see it, just right click on the name of your viewport(eg: Perspective, Top, Camera02, etc) and select "Show Background". You’ll now be able to see the HDRI you just loaded in the renderer as well as your environment in you viewport.
Now that we have loaded the HDRI in our Environment, lets see a render.

And wow! we have a ready made background perfectly suiting the the ambience of the scene ;) (or vice-versa…hehe)
Now lastly, time to put some proper lighting in our scene. While doing this we have to be careful of putting the light approximately where the source of light in your environment image is. We can do this with the help of the image loaded in our viewport. In many machines, when you change the perspective of the scene to find the source of light or do anything, the image doesn’t get updated and stays in one postion, so you have to deselect and select the "Show Background" option in the viewport everytime.
In our scene here, as I’ve loaded a particular HDRI, the source of light in the image, which in this case is the sun, lies somewhere here:

Here in this scene we’ll be using a "Target Direct" Light and will be carefully placing it approximately at the same place as the sun by using different viewports to view where the light is being put up.

In this scene, the settings for the Direct Light go something like this:

Be careful to not use a very high intensity which can burn the output, and also to use the color of the light similar to the color of the ambience coming from the HDRI; which in our case here is pale yellowish.
Now when we see the render with the Target Light, it looks like this:


We can see some nice illumination as well as shadow casting taking place.
As we now reach the final stage of our scene lighting, we can do with some higher rendering quality. So open up the render settings again and change the settings something like this.


Remember though that this will take a bit more time, depending also upon the textures that we may give later. If patience is your thing, then you can also tweak the settings further to higher quality :)
Check out a render of this, and we’ll see the quality of the output is better.

So well lastly, we put up some nice textures(quite unnaturally neat in my case :P ) on the whole scene and the final renders will look like this:
I also took a few more renders from other views of the whole scene. Here I Did Not have to change my settings again and again to suit every render, which was achieved due to the uniform ambience from HDRI lighting in our scene


Oh and 1 last but important thing, here how you can achieve a Water texture in your scene. First again open your Material Editor and choose an empty slot dedicated to the object that’ll play as water in the scene. Now click on "Standard" Map, which will give you a material browser. Scroll down and choose "VRayMtl" which is short for Vray Material. Now change the diffuse color from the default grey to something like purplish blue or something. Also, in Reflection Map, put a Falloff material.

In the Falloff settings, change the color White to somewhere light grey. You can also change the Falloff type to "Fresnel" according to your reflection needs in the scene. In our case here, we’ll use "Perpendicular/Parallel", which means that the part of the water almost perpendicular to the view of the camera will reflect Black or No Reflection and part of the water almost parallel to the camera will reflect Grey or certain level of reflection. If this is to be kept totally white, it gives back full reflection of the environment.

Now again go to the Renderer Settings in your Render Dialogue box, and again scroll down to Environment. Here just below the GI Environment Override, we have "Reflection/refraction environment Override"

Here too you can do the same thing as you did with the GI override, i.e. drag and drop VRayHDRI map in Material editor and loading your HDRI on it, which in our case is the same Snowfield, with a lower intensity

In the end you can do with a good Noise map for the Bump map option.
This gives us the water that we see in our renders here in this scene.
So this is one of the ways how you can achieve a decent realistic output in VRay, by using HDRI Lighting. We also learnt a few basic other things like one of the ways to create water with Vray Material. You can further experiment your own scenes by making may be an interior and using some interior HDRI or something like that :).
Thanks for bearing with me in this tutorial; You can find me on this site here: shashanks18.3dm3.com
Cheers!


About The Author
You might be interested in