Details in materials by Smoke
I have mentioned step by step of how to light up an interior scene in my recent tutorials. This chapter will go into the details about material to enhance more realistic scene.
1. Quickly flash back to the recent tutorial, step 1, create the whole ambience of the area by placing omni lights (ambient only) in the middle of the room as the main ambient color, make the far attenuation range fitted to the room and placing skylight ambience (light blue omni with ambient only) on the roof top. This means to create the effect of the skylight scattered around the roof and walls. See picture the scene ,lit up with the “AMBIENT ONLY” omni. The ambient pass is successfully done.
step 1, create the whole ambience
Tips : Actually in this step, we might not put in all the real material into the scene first as some materials have reflection or whatever that make the rendering time longer . I assign a white color material to all the objects first. This is to make the entire scene easier to control lighting as we can see the brightest and darkest part of all the object clearer and more accurate with white color.

step 2, diffuse and specular pass created by adding 1. free direct (diffuse and specular) as to cast indirect illumination shadows (soft shadow) 2. skylight, placing blue omni (diffuse and specular) use cast shadow. May we replace white color with the real materials in this stage as to correct all detail of specular and diffuse color and level roughly.
step 2, diffuse and specular pass created
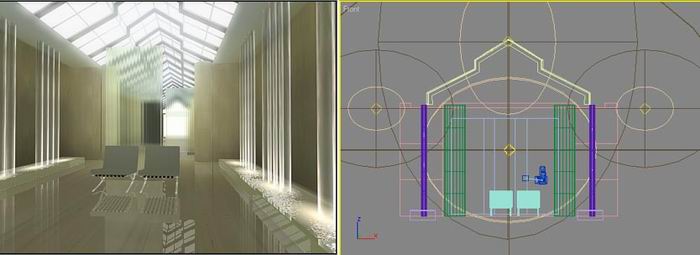
step 3, brightest part to be added in this stage. Sunlight and indirect illumination of sunlight from floor and wall.. See how and where I place these light in the scene.
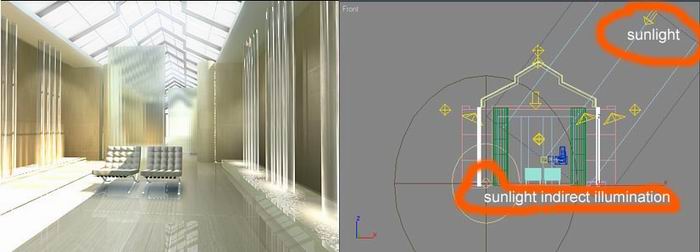
step 3, brightest part to be added in this stage
We might have finished the entire perspective here from the last tutorial.
2. details in mapping and materials.
Sometimes, we find that some material ,kept in our library before doesn’t have good effect when we reuse it again in a current scene. It doesn’t go well or match with the current lighting ie. no spcular or reflection is too bright. Making the realistic material in a big scene or a scene that is lit up with so many light is not as easy as a still light image that require less number of light. Suggest that we should go into the material’s details after we’ve finished lighting up the scene. The concept is to fake the material physical condition follow the lighting as to make it more realistic. In this tutorial I will mentionded to a few examples for you to have idea that can be applied to your own way.
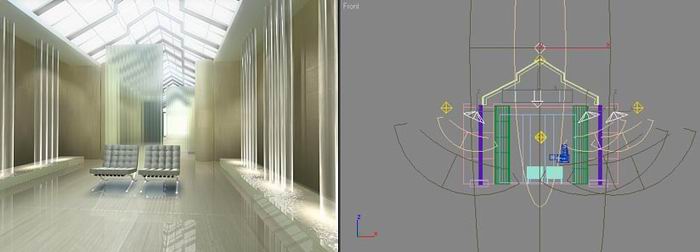
step 4, Coustic. I found that the sunlight illumination from floor to the environment is not enough realistic. I placed 2 omni at the small wavy water and apply projector map into it, using cellular maps. The cellular map on projector give the effect nearest to real coustic. Anyway, I still can not fake the coustic as realistic as some GI plugin but at least pust some more fuzziness into the images.
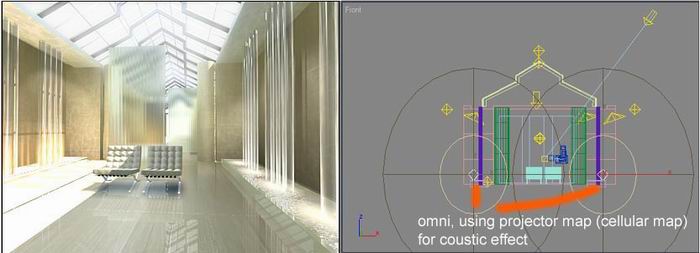
step 4, Coustic
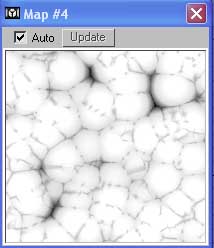
cellular map as a projector map
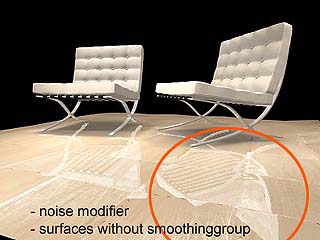
step 5. Go in to the material’s detail. One day I walked in to a huge lobby of a building with all granite floor. I notice that on the granite floor have an ood reflection even though it looked like smooth plain floor. The reflection looks distorted and scattered into piece by piece and doesn’t join together. I went back home and tried to fake such effect but no such option in raytrace (or have and I don’t know). So there is another way to do that is to draw a granite piece by piece join together but I find it wasting the time so much very much and the edge of each granite may not join correctly with our eye estimation.
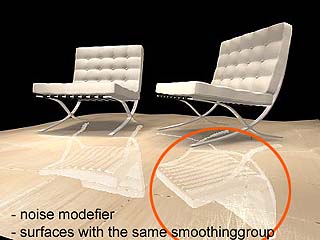
2.1 Distortation effect. In this scene, I drew a plain as another layer of the foreground floor with 8×8 segment, assign marble material on it and UVW map. Add noice modifier onto it. This is to give every pieces of marble not too flat. So when render, we will see the distorted reflection on the marble continually in every piece of marble because the whole polygon on plain is in the same smooth group. The distortation’s appeared on the marble because of the noise modifier. I added edit mesh modifier to give each polygon different in smoothing group numbers. Extrude some rectangle polygons randomly but give the amount as less as possible. Rendered again. The distoration of the reflection seems independent just like in picture… and that’s the effect I want.

picture. Normal reflection of flat marble floor
 |
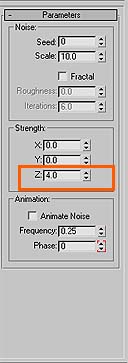 |
<< noise modifier |
picture. Distorted reflection appears continually on the marble floor as the whole polygons is in the same smoothing group number.
 |
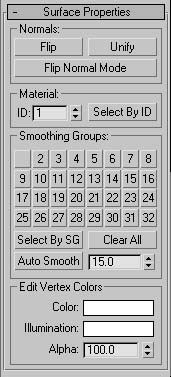 |
<< smooth properties |
picture. Distortation appears independently piece by piece as from the different smoothing group.
2.2 Faking phisical condition of materials to match the lighting in the scene. At the begining of this drawing, I used the material from my library but when I made the final rendering, the effect of specualr level appeared acceptable but didn’t have enough details to make the scene more realistic. Actually the specualr level of the original material is adjusted correctly. I faked the rendering again by increase the specualr level as to make the scratch (I use scratch map for specular level map) appear more obvious and that’s another idea to make the scene more reallistic. Not only the specular, the diffuse level or bump map parameter may be changed to be more obvious in other scene and I hope you can understand this concept more or less hope you can apply to your own way. Remember that material follow light whenever there are more light in the scene but light can follow material when there is lesser light numbers in the scene.
 |
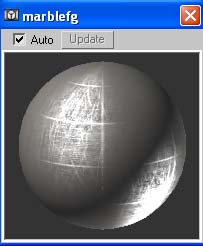 |
| normal material in library | when increase the specular level to enhance the realistic and match with the light. |
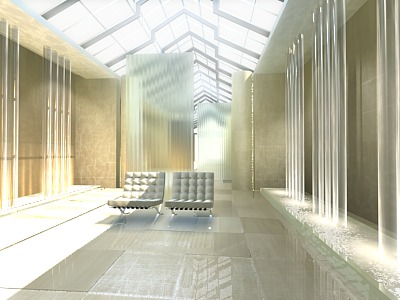
final rendering

About The Author
You might be interested in