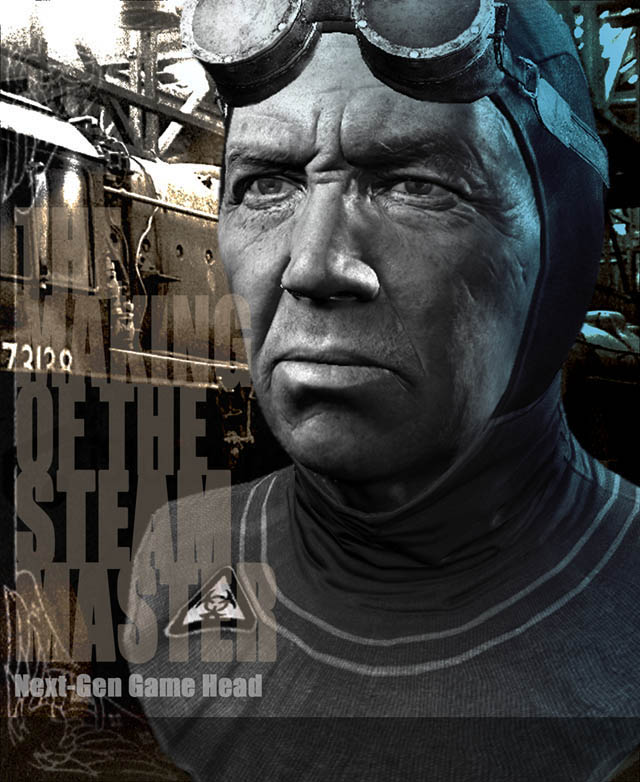
The Making of “The Steam Master”
Being a “making of”, this tutorial is intended for people with a prior understanding of the basic tools used for modeling and texturing. This is not a step by step walkthrough, but more of a project overview.
This tutorial will present the workflow used by the character artists working at AMC Studio when creating a Next Gen character. There are alternatives to this, but prior production
experience has led me to believe that this method gives the best satisfactory results.
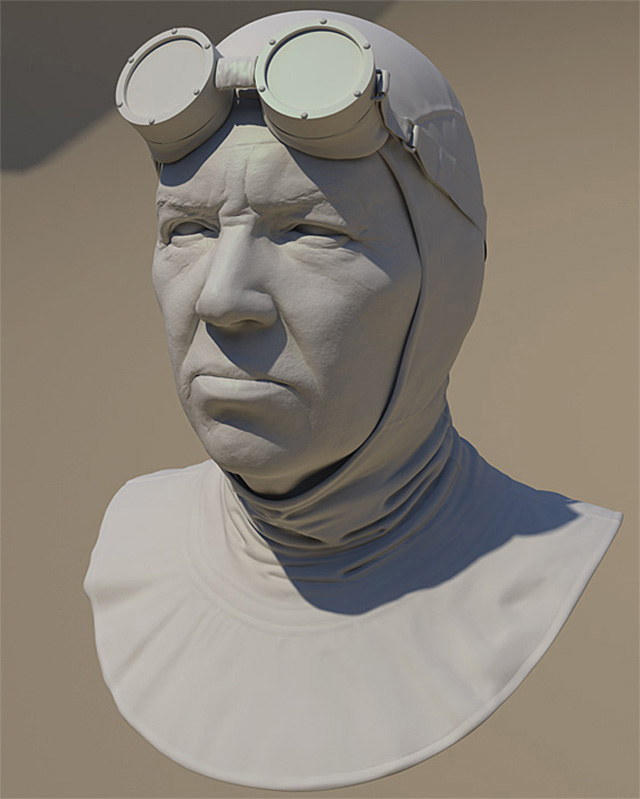
The inspiration for the character comes from Asimov’s sci-fi novels, with a bit of Steam Punk, Fahrenheit 451, Ray Bradbury’s dystopian novel, etc.
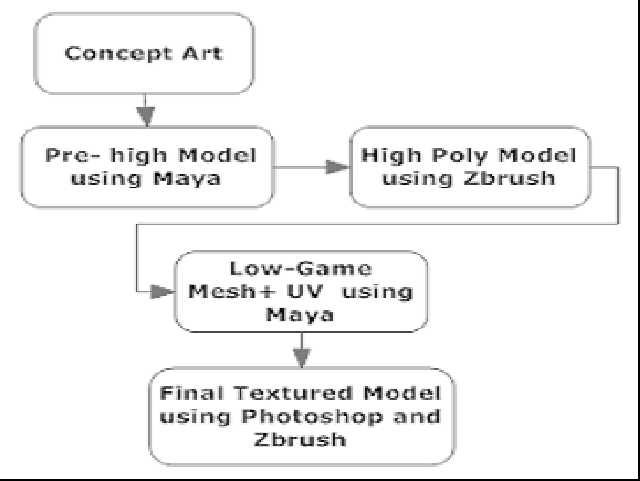
Basically, there are 5 phases to be followed:
1. Concept
2. Prehigh Modelling
3. High-res modeling and face textures
4. Low-res ingame mesh and UVs
5. Texturing
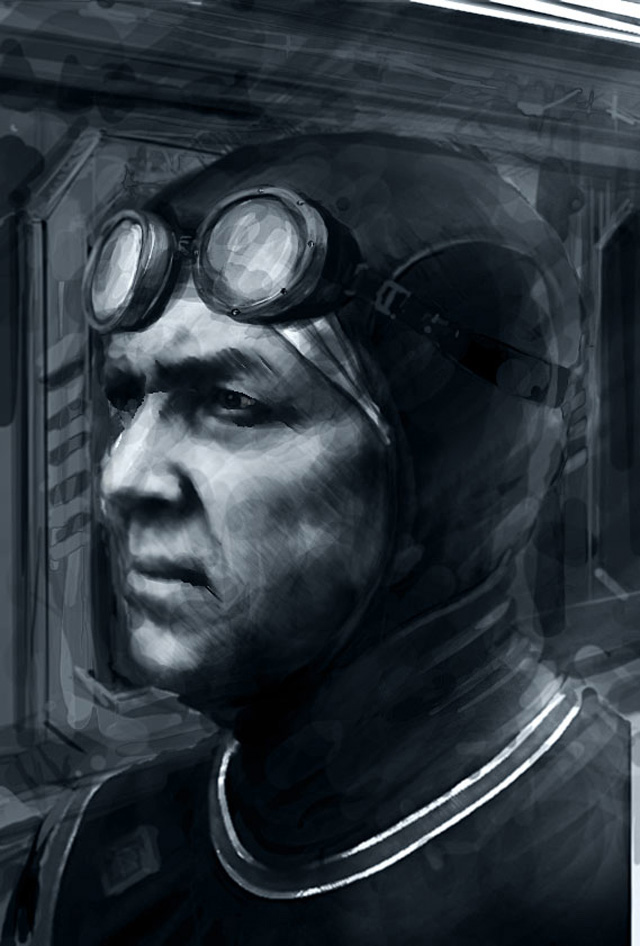
Concept
Here’s a quick sketch I did. It doesn’t contain too much detail in it as I’ll probably change a
couple of details during this tutorial. Working with technical restrictions usually causes this.
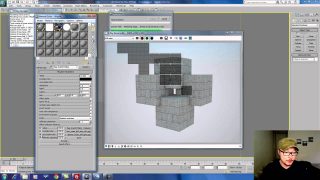
Prehigh Modeling
You can use any 3d modeling package for this stage. I used Maya, but that shouldn’t be a problem for people using other programs as the descriptions are pretty general and can be
easily applied to other 3d packages. This phase is very important as it defines the
proportions of the characters, its silhouette and functionality.
Now is the time to decide which parts can be modeled separately. Most of the times, the accessories should be separate geometry which can be modeled fully in Maya. It’s also very
important to keep the entire mesh built out of quads so that the work we’ll be doing later in
Zbrush be easier.
Here’s a break-up of this model:
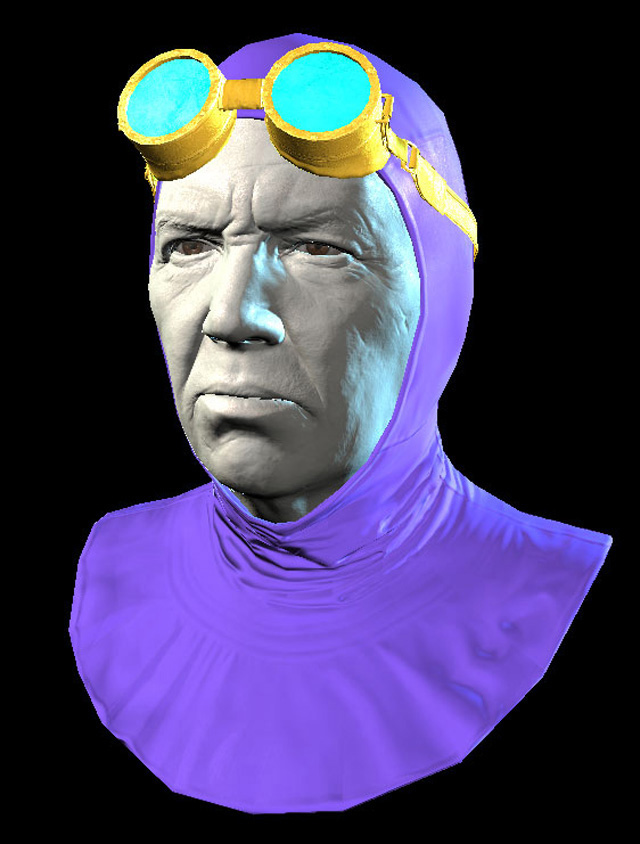
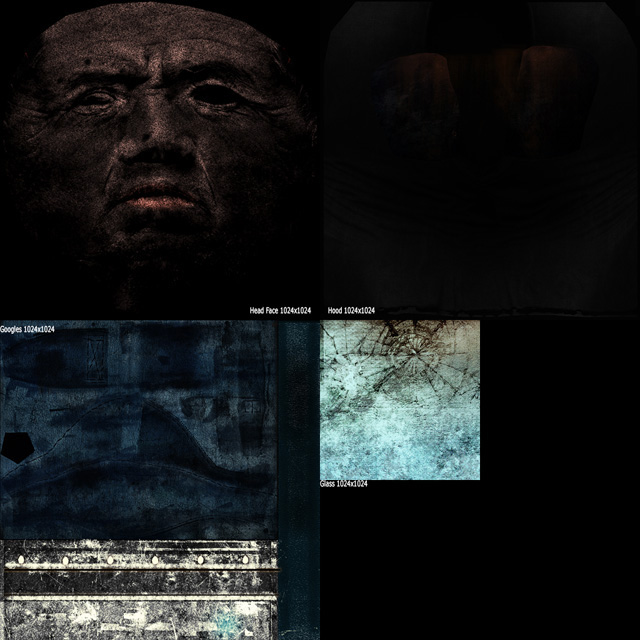
Each part has a different material to it:
1. Skin Face
2. Hood
3. Goggles
4. Glass

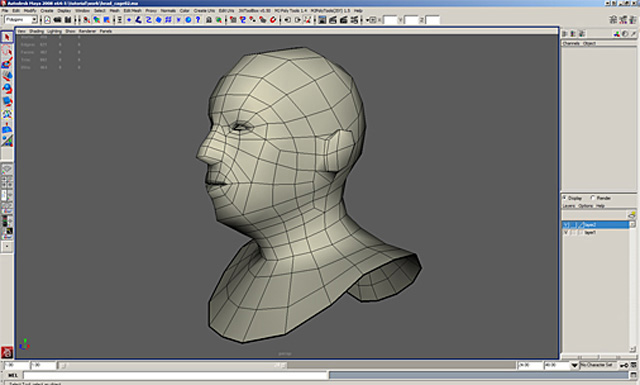
I usually use a generic head made earlier. For now I’m not interested in details and anatomical features, I’m more concerned about the general proportions of the head I won’t go too much into details unfortunately as it takes a lot of time to go through this stage step by step. Therefore, I’ll concentrate on the general aspects of getting the natural proportions of the
head right. I use lots of anatomical reference and photographs when working and so should
you. Even if you have your own concept for a particular character, the subtle details require
photographic reference.
On this particular model the ears are not visible so I won’t pay too much attention to them.
Same goes for the neck area. This is good, because I can concentrate on the face and the
shape of the head.
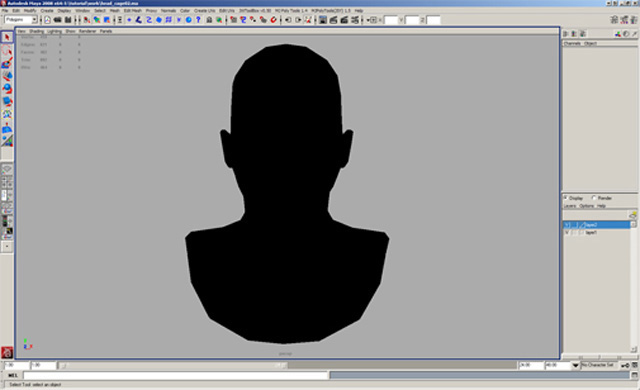
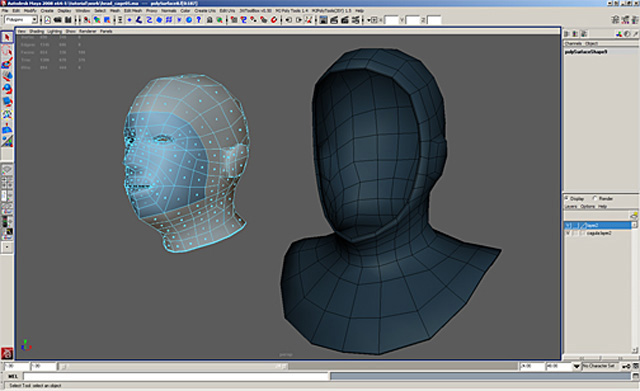
I use a flat black shader (Surface Shader in Maya) to check the silhouette. After I’m happy with it, I move on to modeling the hood. As the hood is shaped by the head, I start the hood’s geometry by extracting a part of the head I modeled earlier. One very important thing is that the hood should retain the initial head’s topology so there won’t be any problems at the seams, especially since the part of the head that’s not visible will be deleted.
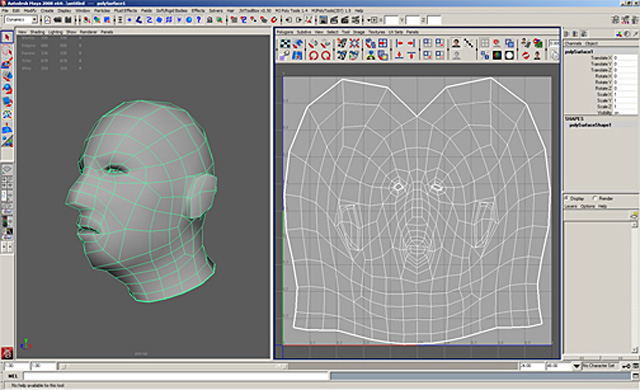
I’ll give the head a basic cylindrical UV and then use the Unfold command to improve it. Later I’ll texture it in Zbrush using the Image Plane and Projection Master.
Next up are the glasses. I want them to look retro, so I’ll make them from simple materials, like bronze and leather. I use a torus as the basic shape and continue from there, extruding my way to the final desired shape.
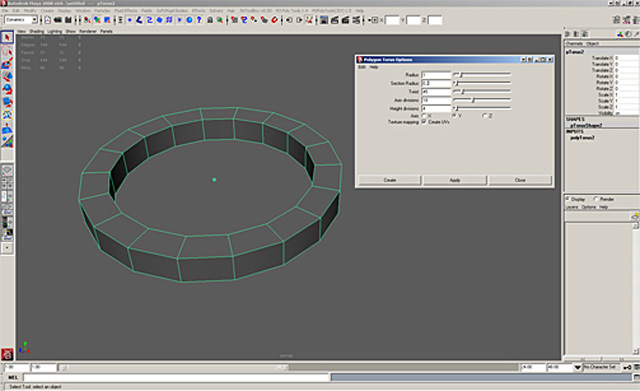
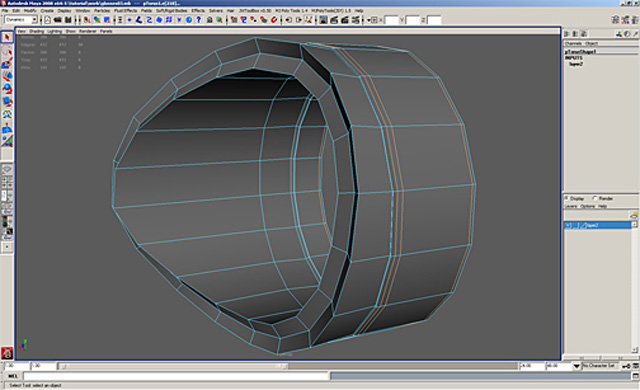
I then add divisions where I want sharp edges, especially on the metal parts.
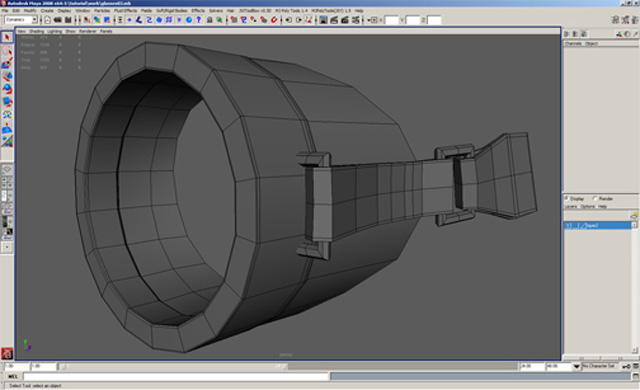
To make the Zbrush work easier, I’ll split the glasses based on materials: bronze, leather and
rubber.
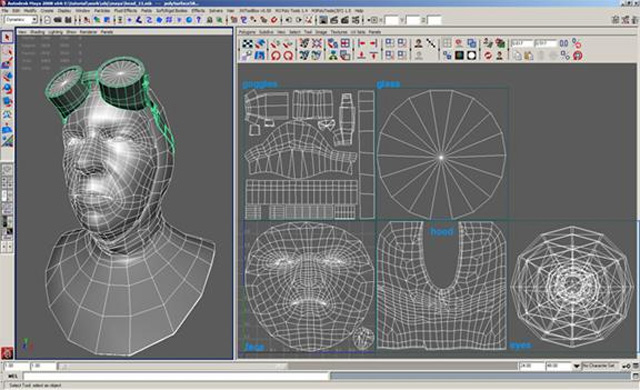
High-res modeling and face textures
Before I export all the parts to Zbrush, I double check for polygons with more than 4 sides.
These can cause nasty problems when sculpting so avoid them at any cost.
I import each mesh in Zbrush 3.1 as a subtool. I use this feature as it allows me to import a
lot of geometry into the scene. It’s a lot easier to split a very high-polygon model into lower
resolution parts and work on each of them individually, which means better performance in
Zbrush.
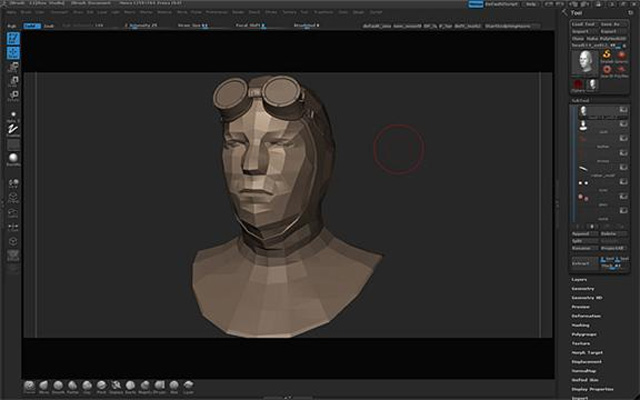
This is how the imported objects look in Zbrush. I import them one by one as subtool starting with the head.
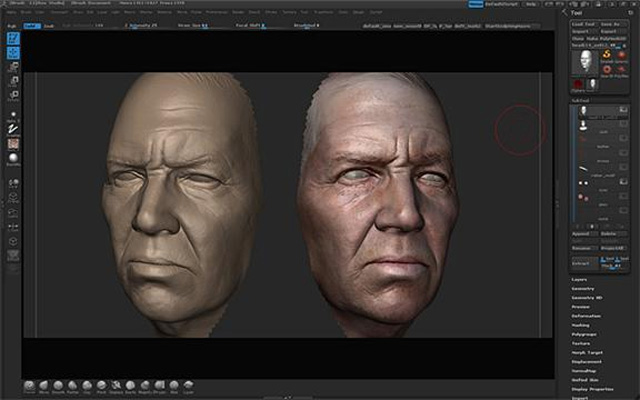
So, the head is first! I gathered a pretty large collection of pictures of old people, wrinkles
and other details. Google is my best friend!
I won’t go straight into details yet. I’ll take the natural approach of doing the big shapes first.
It’s very important to be aware of the skeleton and muscles that give the face its form. As the character is meant to be an ingame model, I’ll have to amplify some of the shapes.
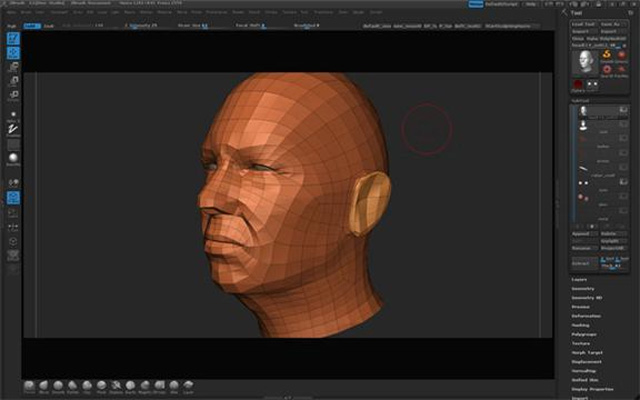
Level 02 Zbrush
Level 04 Zbrush
Starting from the level 4 subdivision, I start adding the details. I’ll try to add some
asymmetry to the face to give it a natural, realistic look. I’ll use this level to start texturing.
The most important plugins here are Image Plane and Texture Library together with. Most of you are probably familiar with those so I won’t go into more details. You can use Zbrush’s
website for more details on these plugins. www.zbrushcentral.com.
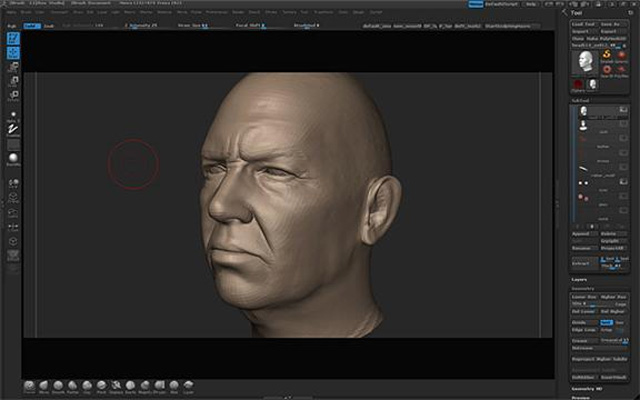
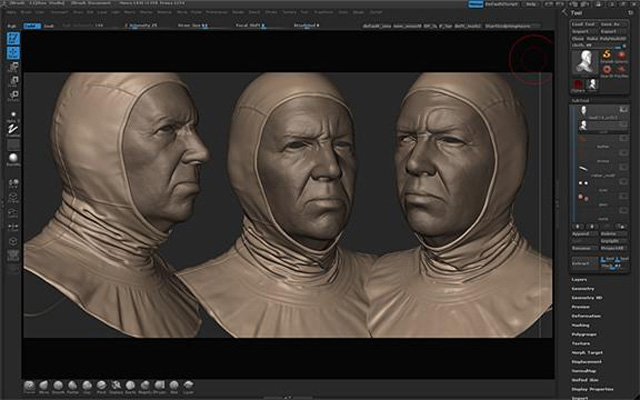
I won’t add further details to the geometry until I’m satisfied with the texture. One big advantage to
working both geometry and texture in Zbrush is that you can have the same level of details on both.
Also, you’ll know when to stop adding details into the hires mesh.
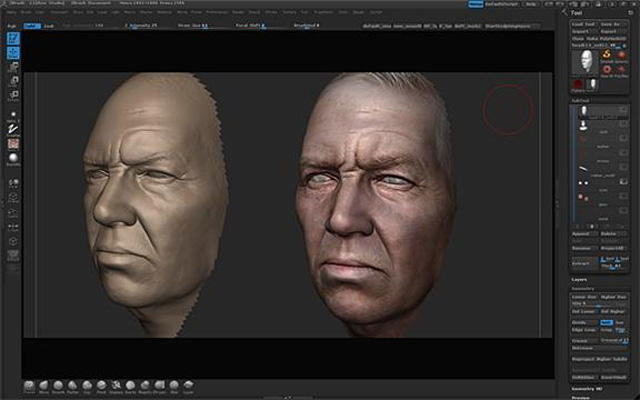
For this head, I used a lot of alpha brushes to add different surface details. I used skin textures to
create them. The target for the Zbrush generated textures is 2048×2048, but the final texture to be
used ingame is 1024×1024. I won’t add any more details so I won’t have details that are finer than
one pixel.
Lev. 06 Zbrush
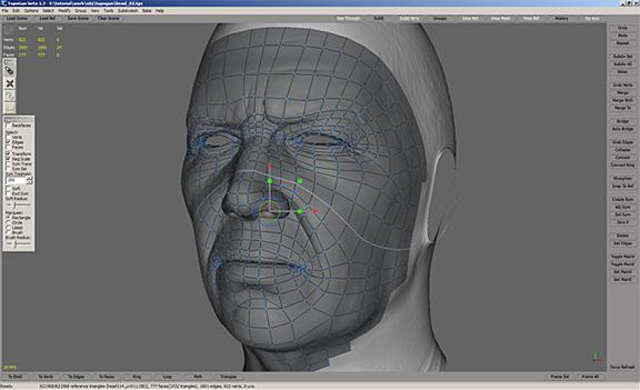
Next step is the hood. I’ll use the same workflow I used for the head. The neck area is a
particular hard area, as reference is hard to find for this type of hood. This is where
improvisation comes into play. Just remember to keep everything looking as realistic as
possible.
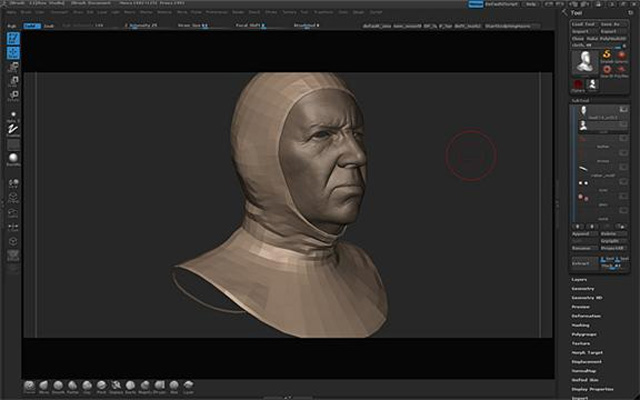
Hood Lev. 02
I won’t add the weave texture in Zbrush as it will probably be lost when I resize the textures
from 2048 to 1024.
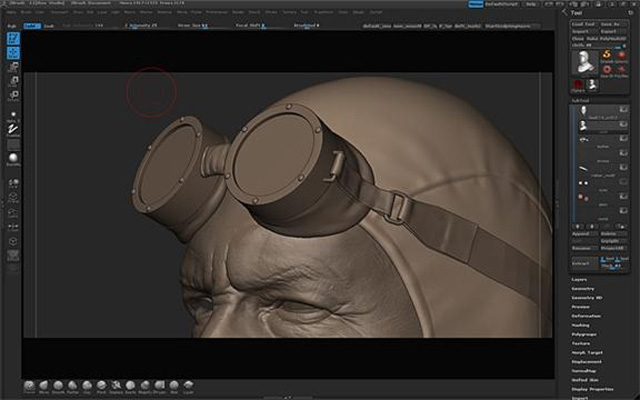
Last but not least are the goggles. The metal parts were pretty much done when I exported
them from Maya, so I’ll concentrate on the leather. One important thing to remember is
that the leather strap is tightly strapped to the head, so it should look accordingly.
Low-res ingame mesh and UVs
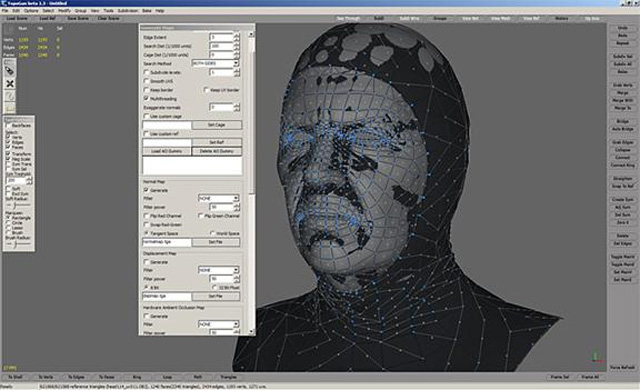
This phase can be done in almost all of the well-known 3d packages. You can use Zbrush Topology or Maya Live to do it. I’ll use Topogun, a tool developed by Cristi Prefac, one of my
colleagues at AMC Studio. Topogun will allow me to redo the entire topology for the lowpoly model and then bake the normal map, ambient occlusion and color map from the highres model to this low-res one. I decided to keep the polygon budget around 4500 triangles,
so I’ll have plenty of geometry for the character’s facial features.
I’ll import the last level from Zbrush as reference into Topogun and use the second level as a
starting point for my ingame mesh.
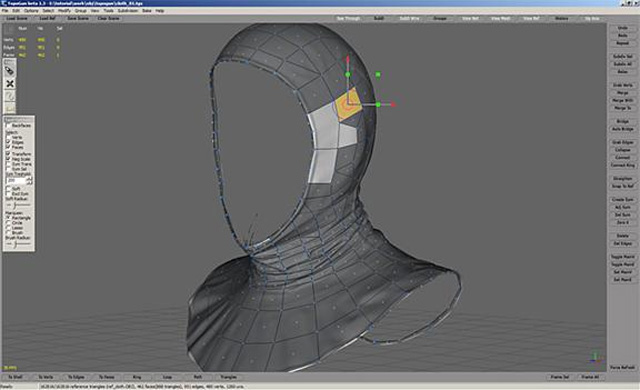
After I redo the topology for all the parts, I go back to Maya to build the final ingame mesh. I
take this chance to optimize what I can by reducing the poly-count and tweaking the UVs.
I do this by either using Maya’s Unfold command or Road Kill UV, a cool free UV tool. Here you can see the way I’ve split the UVs into different layouts. Each will have its own texture.
Texturing
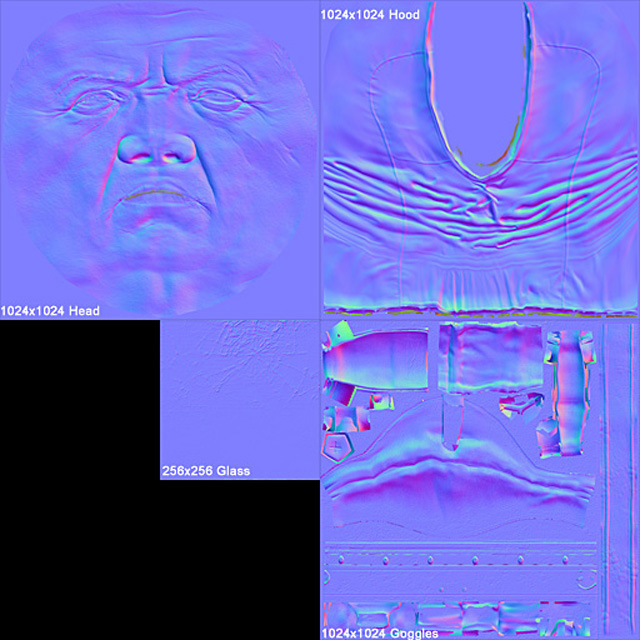
After making sure that the UVs are properly layered, I go back to Topogun to bake the normal map and ambient occlusion map. In the next image you can see the settings I uses when doing this.
The generated textures will be combined in Photoshop. I usually work directly on the normal and ambient maps in Photoshop to correct the errors produced by the baking. You could try re-baking the textures until you achieve a satisfactory result, but usually it’s faster and easier to just paint,
clone stamp or smudge the errors.
Tip: You can add details from the diffuse textures by transforming it into a normal map using Crazy Bump or NVIDIA’s NormalMapFilter. This resulted normal map can be overlaid on the baked one to achieve the
surface detail needed
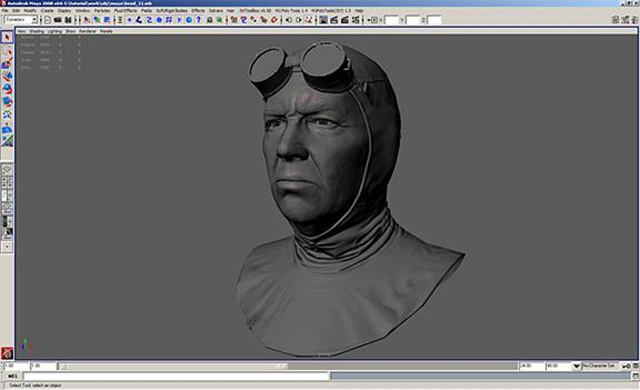
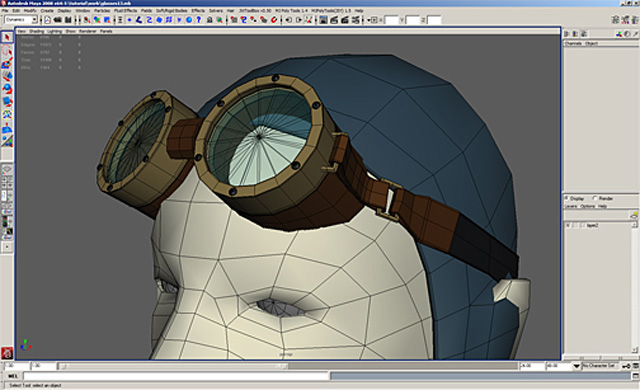
Here’s a quick view of the character with normal maps applied.
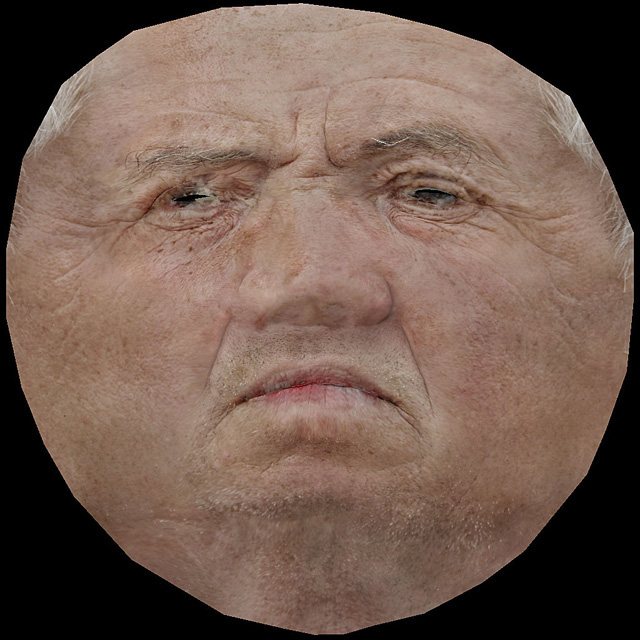
The diffuse texture is baked in Topogun from the Zbrush high-res model created earlier.
For the hood and glasses, I create the textures in Photoshop by using the normal map and
ambient occlusion as a starting point. The surface detail was created using a weave pattern
and a crumpled paper texture to give it that old, used look. The glasses use different patterns to define the bronze, leather and broken glass. I also added some dirt textures to enhance their look.
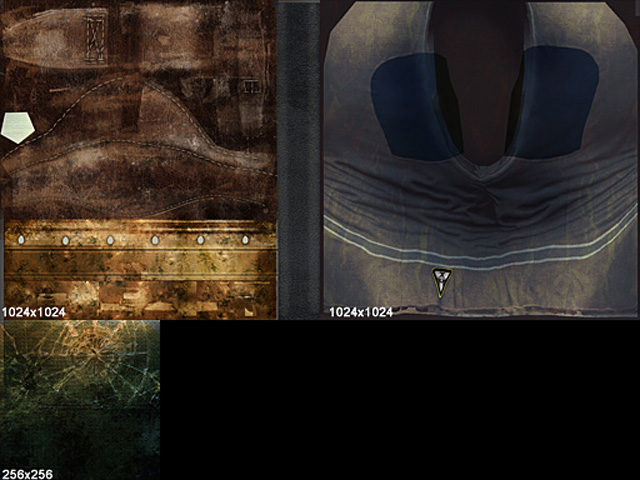
Diffuse Maps

Flat shaded (diffuse only) model
The specular maps are built using the color maps as base. I start by de-saturating the image
to get a better view of the grey shades. For the shiny areas, I enhance the lightness,
sometimes to near white. For some materials (metals for example) the specular looks best if
its color is complementary to that of the color map. I know that having too much contrast
on the specular map can make the character look unrealistic from up-close but actually this
effect is preferred because it enhances the look of the character when viewed from a
medium distance, as most game characters are meant to be viewed. To give the specular
map variation I used “dirt” maps that unlike the dirt maps used in the color texture to add
small details, add variation on a larger scale. Also, I try to vary the specular as often as
possible, for example I defined the hood as being made from two different materials by
giving it two distinct areas with different specular color.
Tip: To achieve a realistic skin look, use the Noise filter from Photoshop on the specular map. You can also add specular noise to other surfaces like metal.
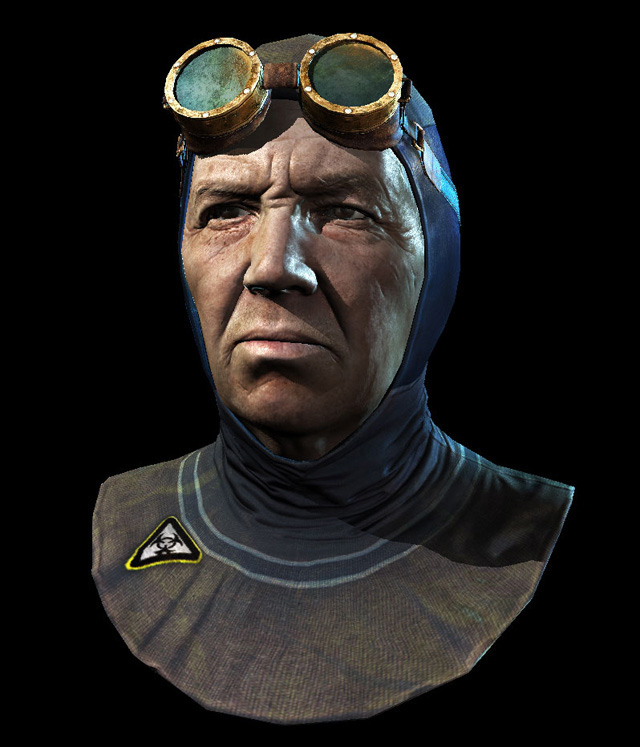
Here’s the final Maya scene viewed in High Quality Mode. Final poly-count: 4400 polygons.
Final words
Making a realistic head requires a lot of anatomically correct references. The best ones are
pictures of normal, everyday people. The character’s expression has to be natural so a lot of
attention has to go into detailing the face. As I mentioned at the beginning of this tutorial, a
strong silhouette will also add to the quality of the final result.
As this head is intended for use in a game, the edge loops are very important, as correct and
natural looking deformations will give the animation a more natural, believable look.
At first the entire process might seem long and complicated, but by splitting the work into
different phases, everything is going to be much easier to follow. The last couple of years
have brought a tremendous leap in what can be done with ingame characters by allowing
the artist to use more polygons and textures to accomplish his work. This means we can do
we could only dream of before Next Gen games.
I hope you enjoyed reading this tutorial,
Thank you!


About The Author
You might be interested in