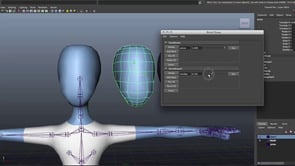
Modeling a Soda Can
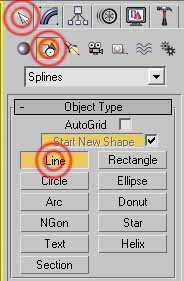
1) Open up 3ds Max. Go to the Create tab, click on Shapes, and then select Line. This will allow us to draw an outline of the soda can.
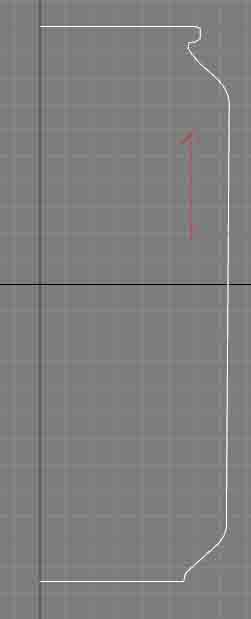
2) Go into the Front viewport and draw the outline like you see below. Make sure you don’t connect the first and last vertex.
3) When you finish drawing the line, go to the Modify tab. Click on the dropdown list and select Lathe. Lathe will make the line spin around the center and create a shape similar to the effect on clay on a spinning wheel. Make sure your Lathe options are exactly like the picture below.
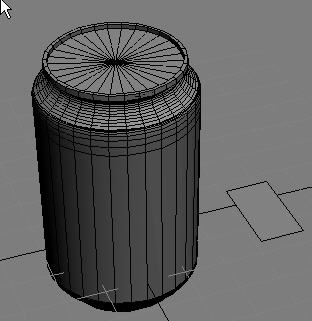
4) You should see something like the picture below if you did everything correctly. But it might be out of proportion. It will be either a little too wide or a little too tall.

5) To fix the strange proportion, click on the scale tool, but make sure it is on ‘Select and Non-Uniform’ scale. Not on the ‘Select and Uniform Scale’. Then you can select your can, and scale it to proportion. ![]()
6) Select your can, right click on it, go to Convert To, and select Editable Poly . On the top of the can, select where all the lines meet up in the middle. Zoom in until you can see that there is a hole where all the lines meet. We can’t have a hole or else all the soda will spill!

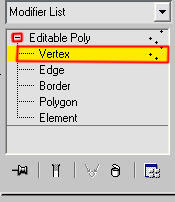
7) Make sure your can is selected and go to the Modify tab again. You will see that it says Editable Poly there. Click on the plus sign next to it and it will open up. Then click on Vertex.
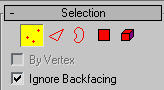
8) Good. Now that vertex selection is enabled, put a check mark in the ignore Backfacing box, and select the vertices around that hole.
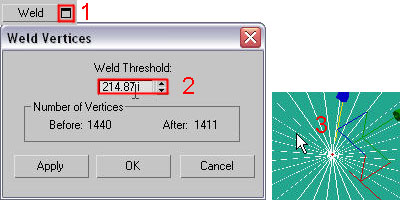
9) Now locate the Weld button on the right. Click on the little button to the right of it. A window will pop up. Put the Weld Threshold up until you see that all of the vertices are joined into just one vertex. You are done with it.
10) Now just do the same to the bottom of the can.
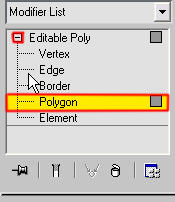
11) Now go back to the Editable Poly options and select Polygon (pictured as a red square, not a cube.) Again make sure that you put a check in the Ignore Backfacing option.
12) Select all of the polygons on the top of the can.
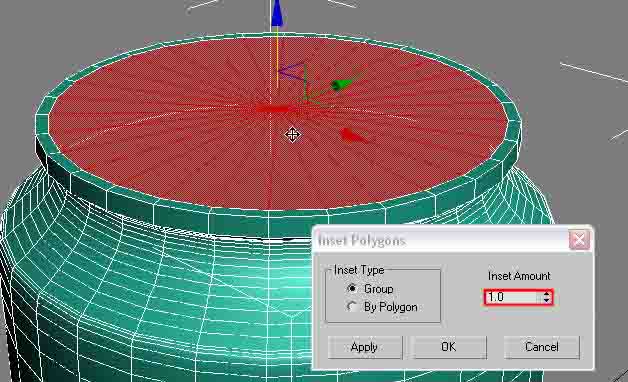
13) Then find the Inset button. Click on the button to the right of it. This will bring up another window similar to the one we had before. Crank up the number, you will see that there is another circle forming inside the top of the can. Increase the number until it looks good.
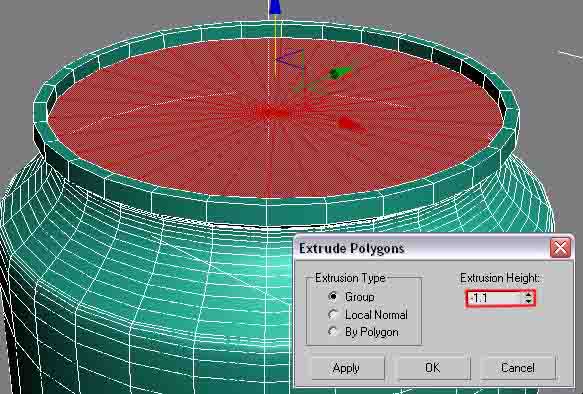
14) While those polygons are still selected, click on extrude, and extrude the polygons down until there is a nice pit.
15) Click on Editable Poly to deselect it. Good, now we have to make the little metal thing to open your can with.
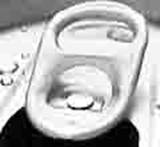
16) To make it, first make a plane that is about proportional to what the real thing would be compared to the can.

17) Good, now zoom in on the little plane so you can have a good view of it by selecting it, and pressing the “z” key on your keyboard. While the plane is selected, right click on it, go to convert to, and pick Editable Poly. Ok, now we can shape it.
18) Select Edge tool from the Editable Poly list. Then select the Quick Slice tool. This will let us make a nice quick cut through the whole object.
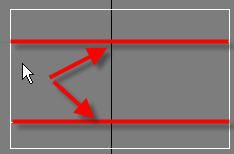
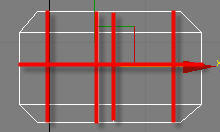
19) Go to the Top Viewport. Now make two cuts on the object so the cuts are parallel to the longer sides. Such as this.
20) Now select the Vertex tool, and move the vertices around so they are in this basic shape.

21) Then select the Edge tool again and cut four edges like you see below.
22) Select the Vertex tool and move the vertices are like so.

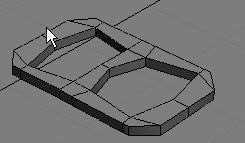
23) Select the Polygon tool and select these four polygons and delete them by pressing the “Delete” key on your keyboard.

24) Click on Editable Poly so you deselect it. While your object is selected, go to Modify, click on the dropdown list select Shell. This will give some height to our object. Select the appropriate amount.
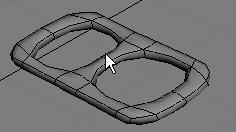
25) In the dropdown list, select Meshsmooth. This will smooth out the object.
26) Now just use the move tool to position the metal part onto the top of your can. Remember to use all viewports to make sure it is in the right place.

Congratulations, you are finished modeling a can.


About The Author
You might be interested in