Modeling a Chair
Hey, another simple model. Why not make a chair to accompany your table?
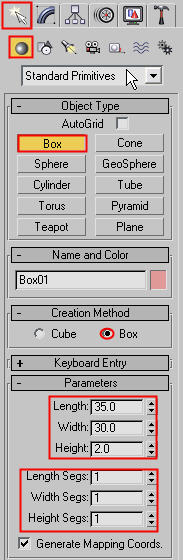
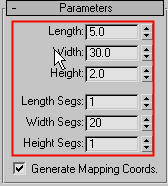
1) First of all, make a box that is 35 by 30 by 2 units. And make sure that the length, width, and height segments are 1.
2) Select the box, right click it, go to Convert To, and select Editable Poly. Now we can shape it.
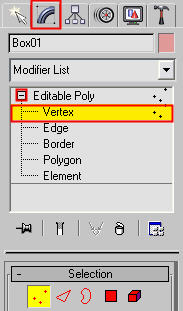
3) Go to the Modify Tab, click on the plus sign next to Editable Poly, and select Vertex.
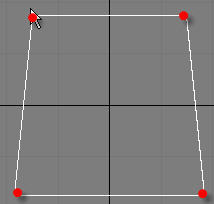
4) Go to the top viewport and move the vertices so it looks like this.
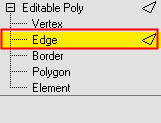
5) Select the Edge tool and select all the edges on the box.
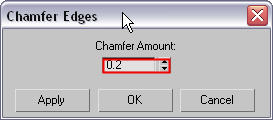
6) Once all the edges are selected, go to the Chamfer tool. And put all values like the picture below. Good, now you finished the seat portion. Now we make the legs.
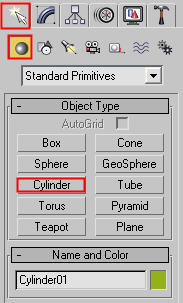
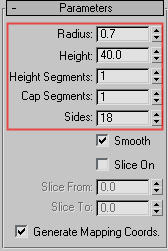
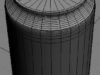
7) To make the legs, make a cylinder with the values in the picture below.

8) Convert the cylinder to an Editable Poly the same way we converted the box.
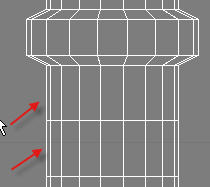
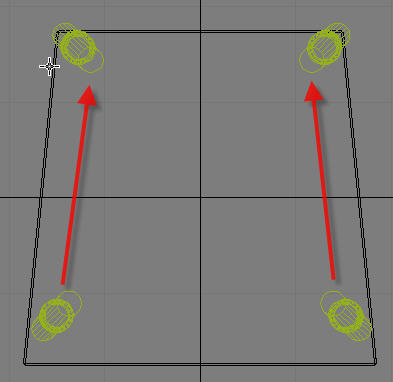
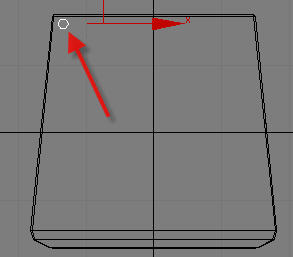
9) Go into the front viewport and move the vertices so they look like the picture below. Also make sure the top edge of the leg is not going all the way through the seat of the chair. Make sure its in the middle as the arrow indicates.

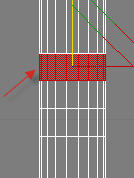
10) Use the Polygon tool and select a band of polygons like this. Make sure that the ‘Ignore Backfacing’ box is UNCHECKED!
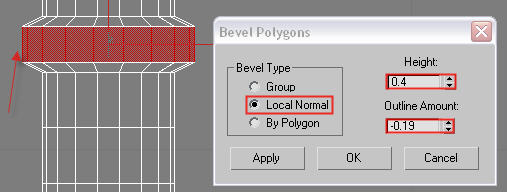
11) Now use the Bevel tool with the following parameters to get the following picture.
12) Great, now do the SAME thing for the other 2.
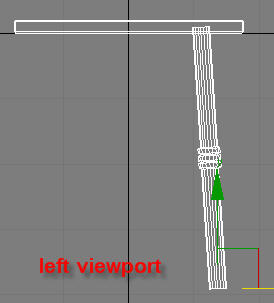
13) Now go into the left viewport. Rotate and Move the leg so it looks like the image below.
14) Now go to the front viewport and position the leg to look like this.
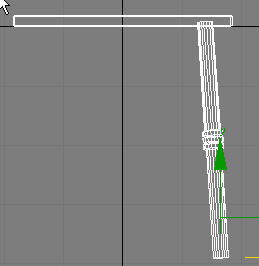
15) Go into the top viewport and select the leg. Then click on this button. This is the Mirror button. You can mirror objects on any axis.
![]()
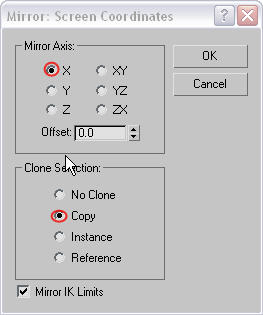
16 )When the pop up window opens, choose the same settings are below.
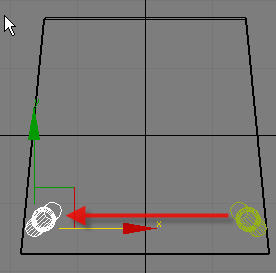
17) Move the new leg to the left so it goes to the other side of the chair.
18) Now select both legs by holding the control button and selecting both, and use the Mirror button again. This time select the “Y” axis but still make it a copy. Press OK and move the new legs to the top and position them according to the picture.
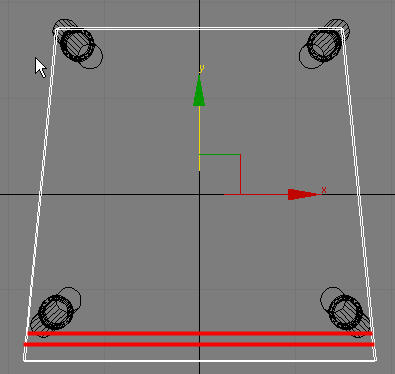
19) Ok back to the chair SEAT again. Select the seat and use the Edge tool in Editable Poly. Use the Quick Slice tool to make cuts along the places shown in the picture below.
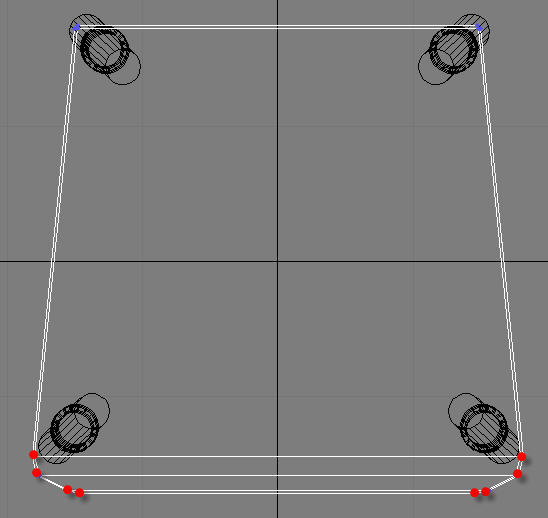
20) Then with the Vertex tool, move the vertices so they look like this.
Now we are finished with the seat and the legs. We shall now move on to the backrest.
21) Go to the top viewport and make a cylinder with the following values.
22) Position it in the corner as so
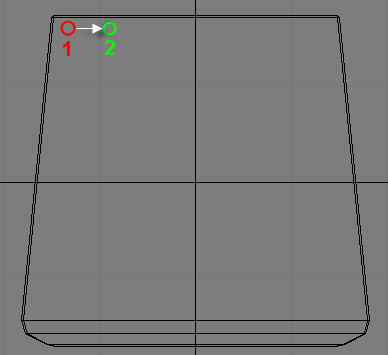
23) Now, hold down shift and move the cylinder from its original place( 1) to the destination (2) shown in the picture below. When a window pops up, select Copy and put a 6 instead of the 1.
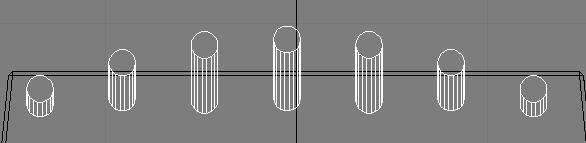
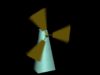
24) Now you will have 7 cylinders. If they are not evenly spaced, space them out yourself. Then select the middle one. Go into the left viewport and rotate the middle cylinder so it looks like this. Then rotate the two beside it but rotate it a little less that before. Then rotate the two beside those but rotate them a little less that before. Do this and you will have a picture from the left viewport like this.

And from the top viewport it should look like this.
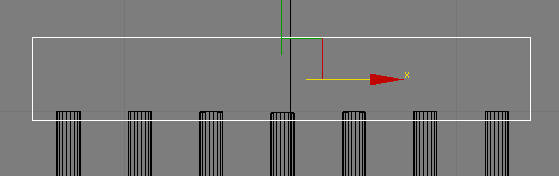
25) Ok, now go into the Front viewport and make a box that looks like the picture below. This will be the top of the backrest. Make sure the values are as follows.
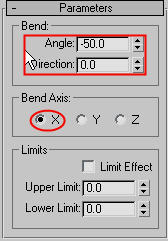
26) Ok, select that new box, go to the Modify Tab and click on the drop down list. Select Bend . This modifier will, well…bend your object. To bend this back rest the correct way, put in the following values. After you bend it, move it to line up on top of the cylinders.
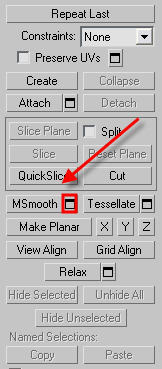
27) Wow, you have almost finished the chair. Just one more thing. Those blocky legs need to be smoothed out. Click on one of the legs. You will see something called “MSmooth”. This is basically like Mesh Smooth, but it’s inside the Editable Poly options. Click as shown, and put in the exact values.
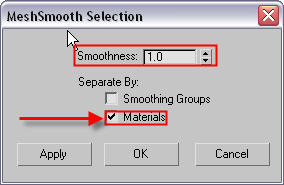
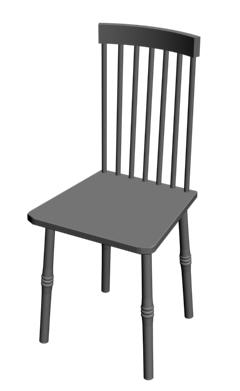
28) Great do the same thing to all of your other legs and you will be FINISHED! Here is the finished product you will get.


About The Author
You might be interested in