Modeling a Stool in 3DS MAX
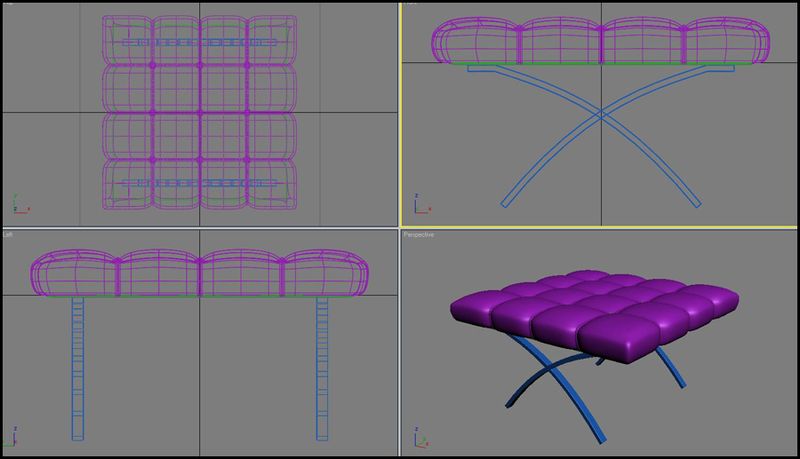
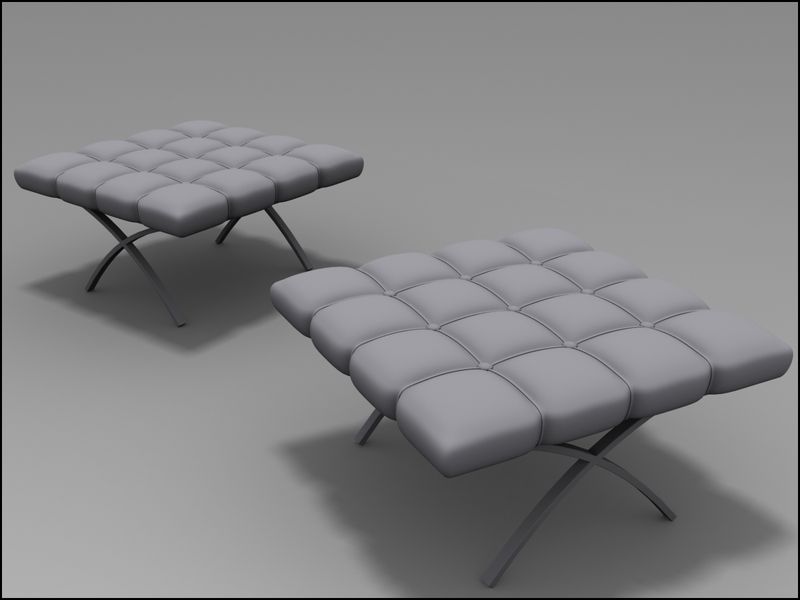
In this tutorial, I will show you how to model a stool in 3ds max
Step 1 – Max Setup
In this tutorial, I’ll be using 3Dmax. So first thing would be open-ing your max program and on the menu choose Customize>Unit Setup>Metric>Meters.

Step 2
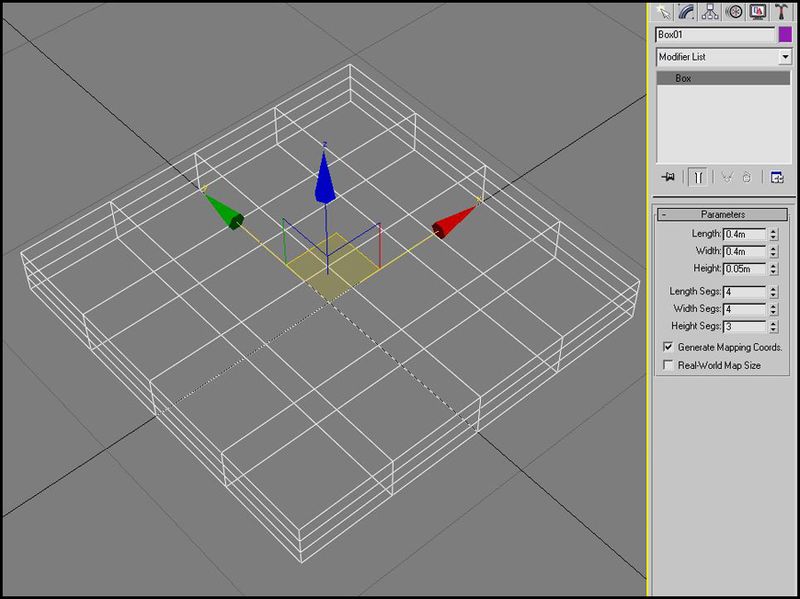
On the Create Tab, choose Box and enter this amount on the Key- board entry and parameters and click create.
Step 3
Now while the box is selected, right-click the object and Convert to Editable Poly.
Step 4
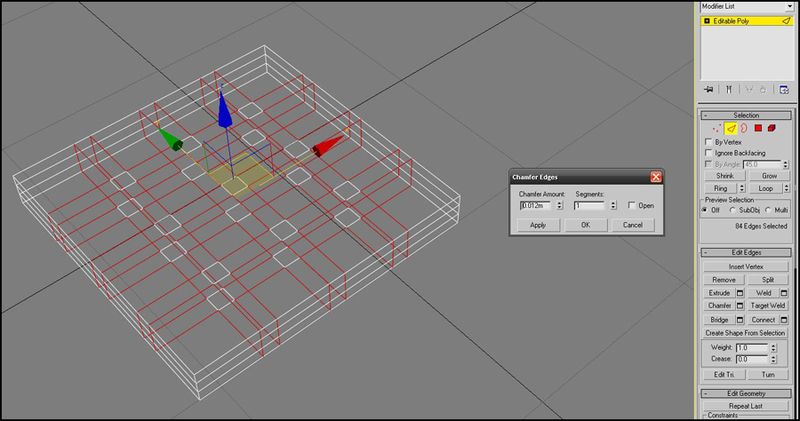
Ok then, while the edges are selected, right-click and choose the icon beside the word Chamfer for we will enter and amount or you can do it manually. As you can see, i’ve entered .012m. Then press OK
Step 5
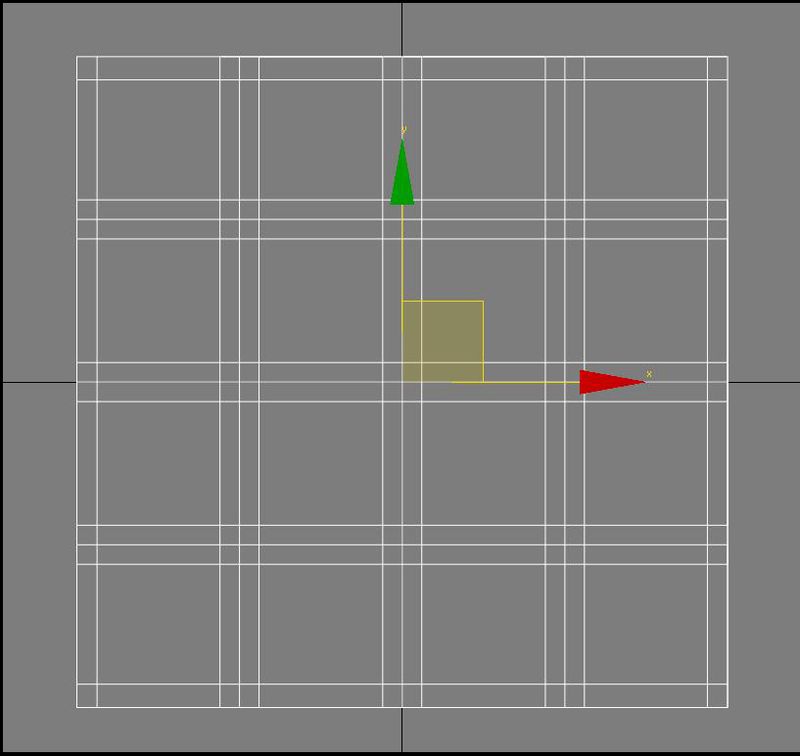
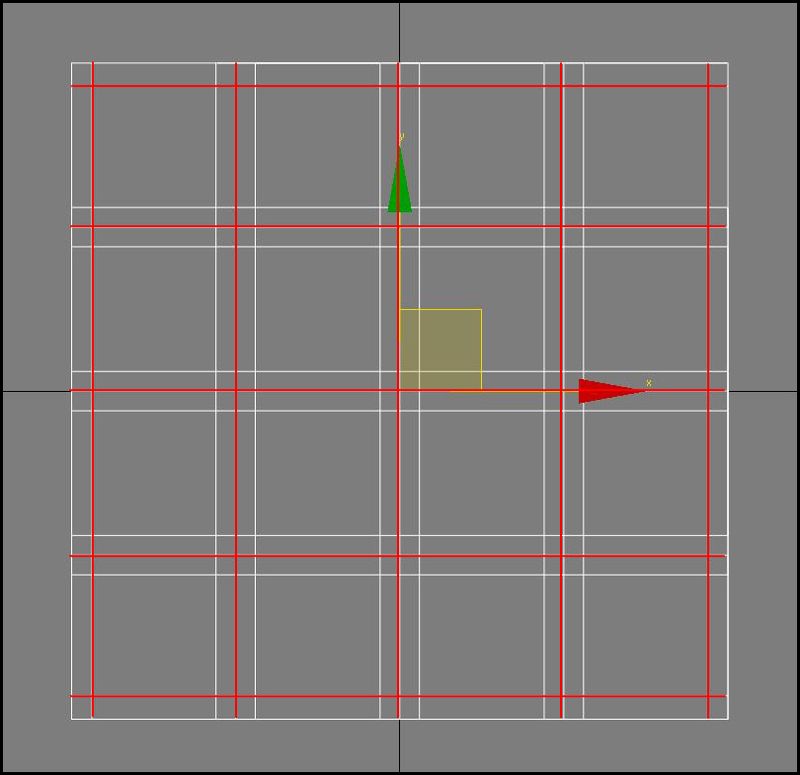
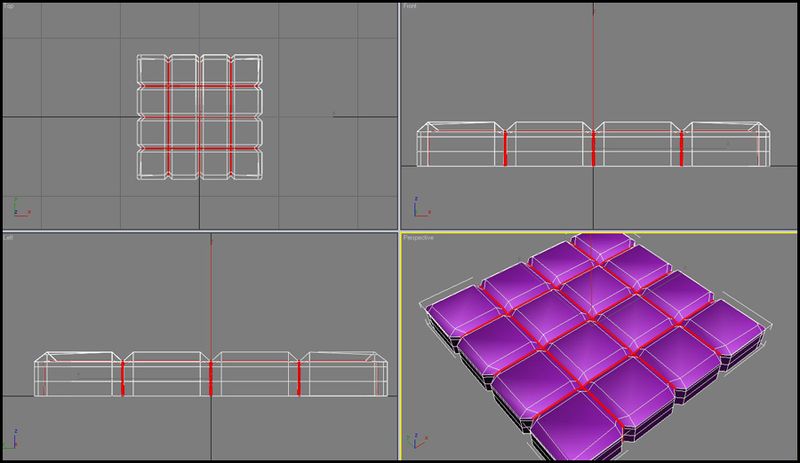
Choose Quickslice under Edit Geometry rollout and start slicing as per the image. (red line)
Step 6
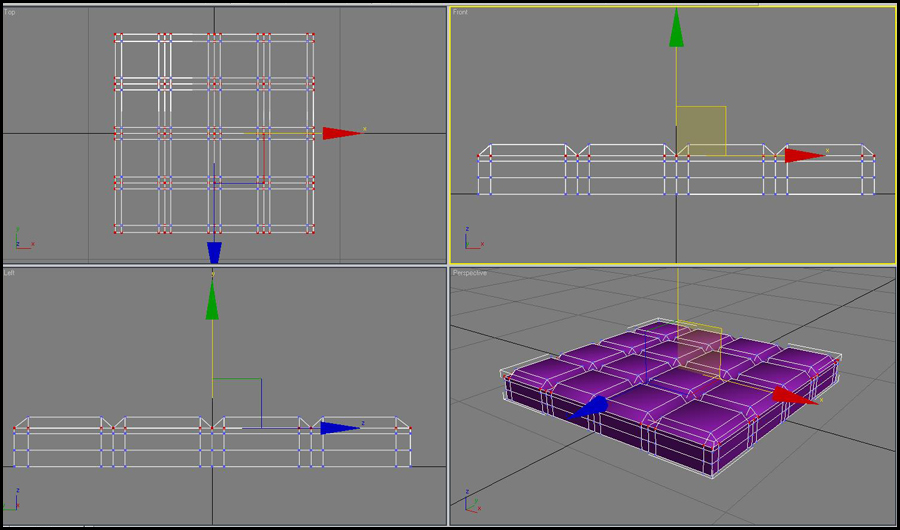
Select the vertices from top first then deselect the vertices that are not required as you see in front and left viewport, then move them down as you see in prespective view
Step 7
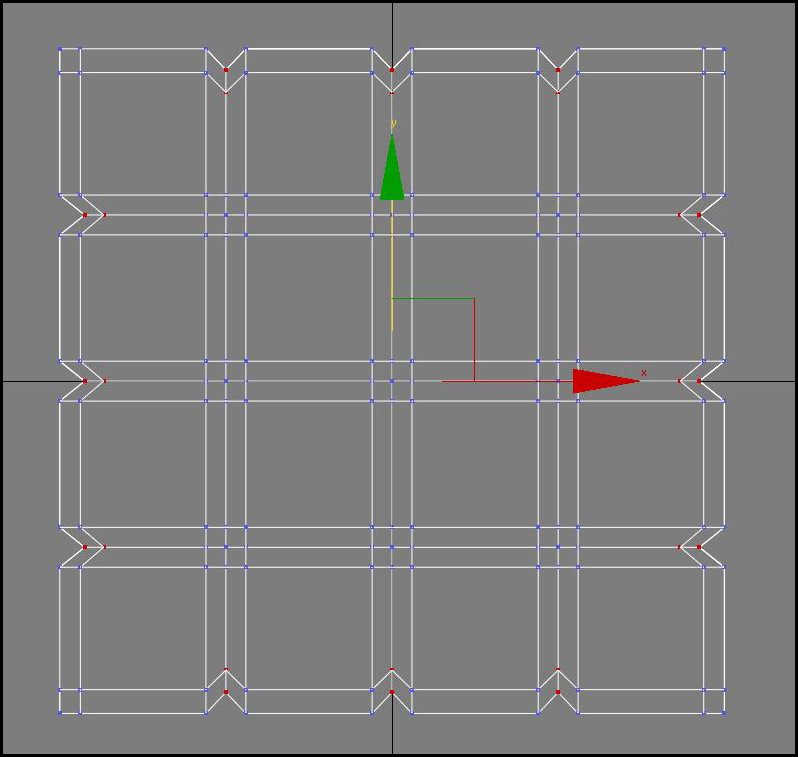
Again select the vertices as you see in the top view and push them inwards
Step 8
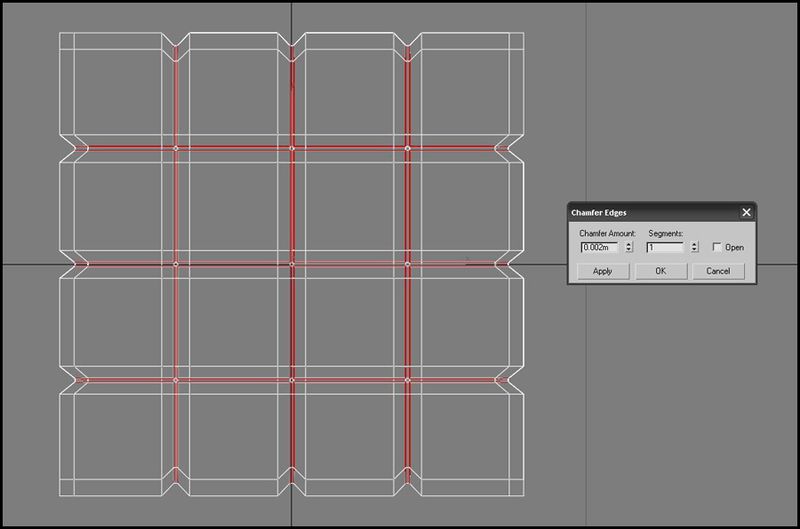
Now, go to Sub-object and choose Edges and select the edges between the sections (red line) and Chamfer it at around .002m
Step 9
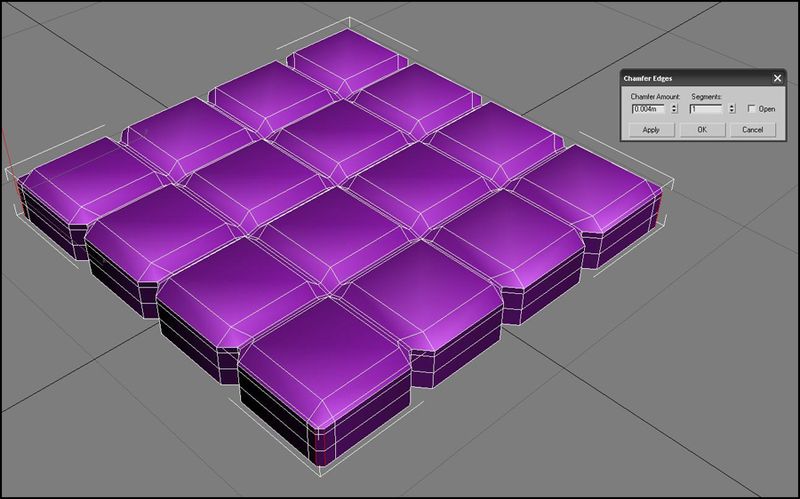
Select the four edges on the 4 corners of the box and chamfer them too chamfer amount – .oo4
Step 10
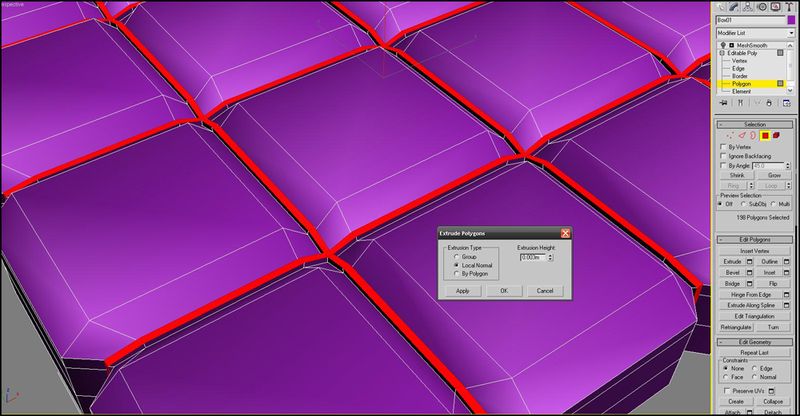
Then, go to Sub-object and choose Polygon and select the faces which was produced when we Chamfer the edges.While selected, right-click and choose Extrude and enter .001m (.1cm) and highlight Local Normal and click Ap- ply click OK. Deselect the object and apply Meshsmooth so we can see what we have so far.
Step 11
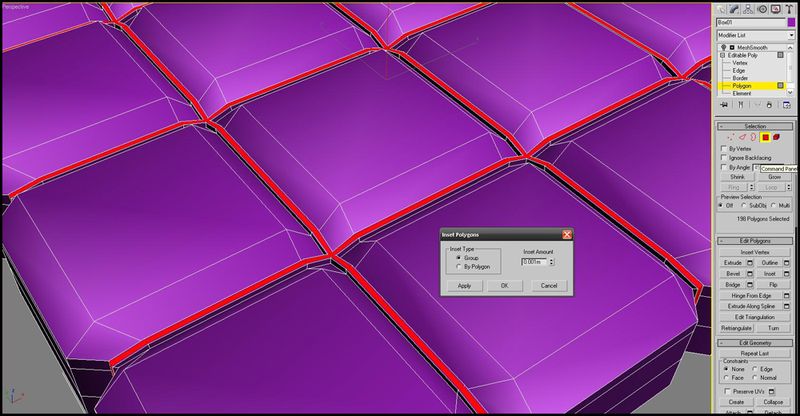
Then select the extruded face and inset them with .001 value
Step 12
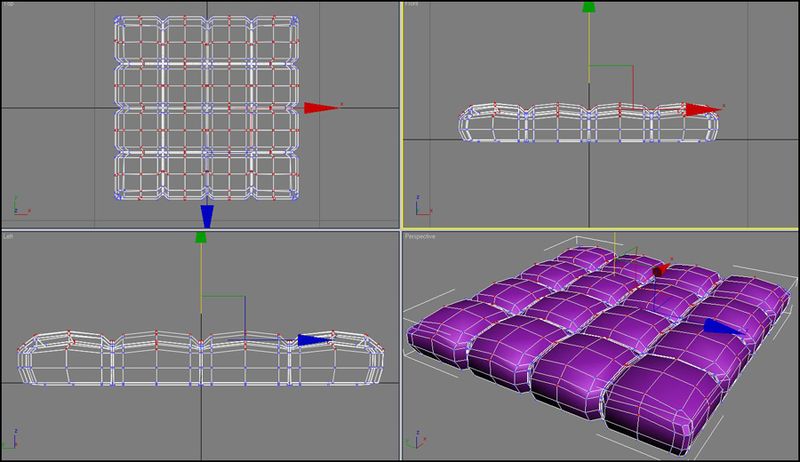
Some more tweaking. On the left viewport select the vertices and scale.

Step 13
Roughly create a sphere in top view and then scale it in y axis in front view then place it in all 9 intersections as seen in top and prespective view use shift + drag to copy or instance the sphere
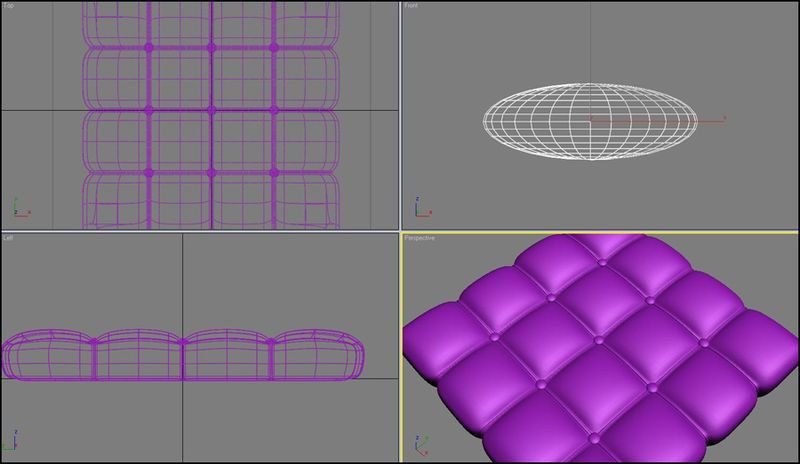
Step 14
Now we create a box like you see in the image as base of the cushon the dimensions of box are length .328m width .377m height .003m

Step 15
now we select all the edges of the box and chamfer them chamder amount .0001 segments 2
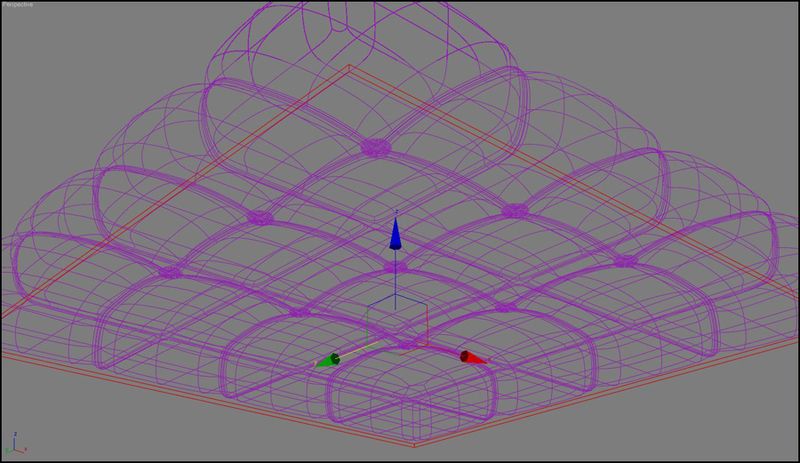
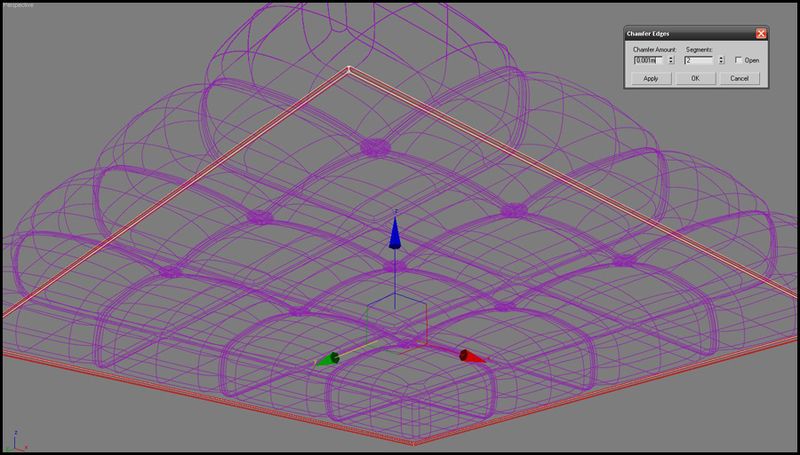
Step 16
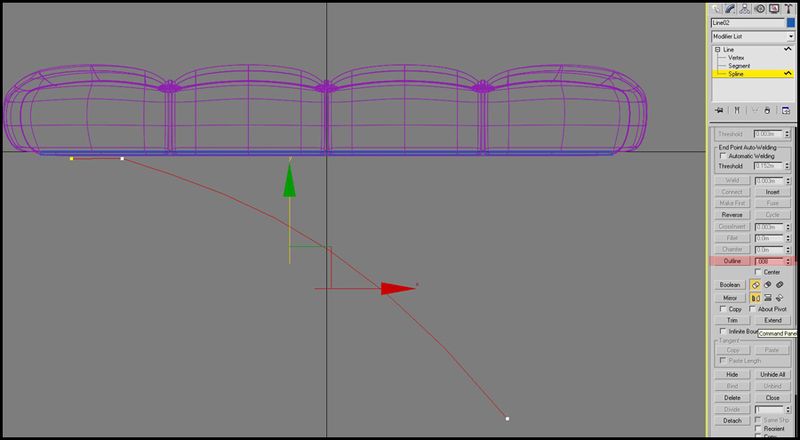
Now lets create the legs , create a aline as you see in the image then select the middle point and right click and select smooth and move the point to make a curve
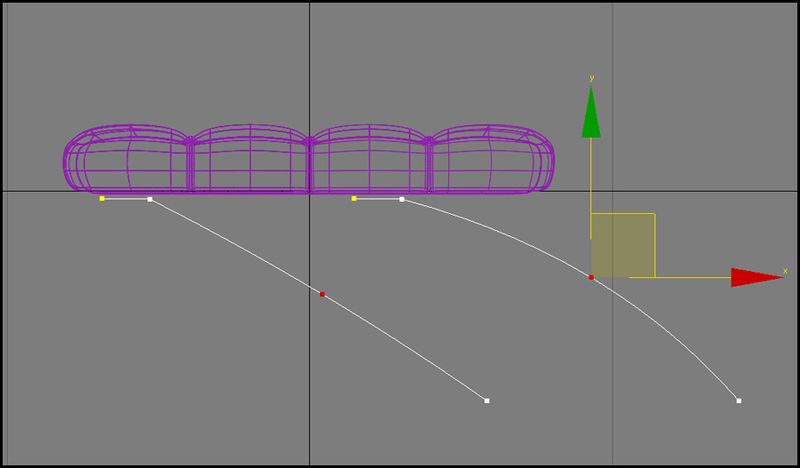
Step 17
Now select the line in spline segment mode and use the outline option with a value of .008m
Step 18
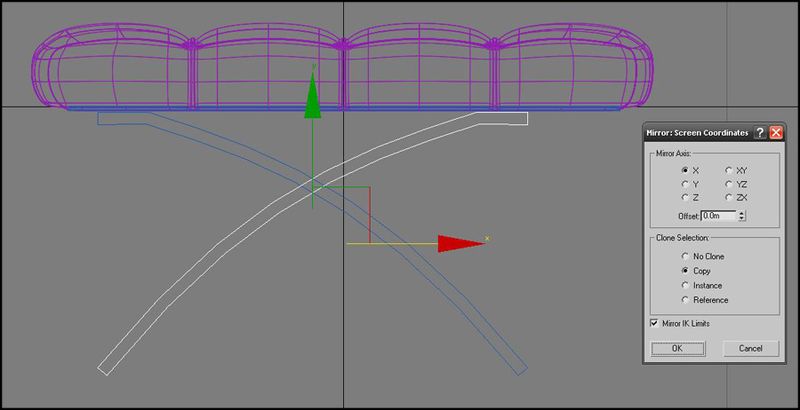
Now we selected our completed spline and make a copy of it using mirror tool in x axis we also attach both of them
Step 19
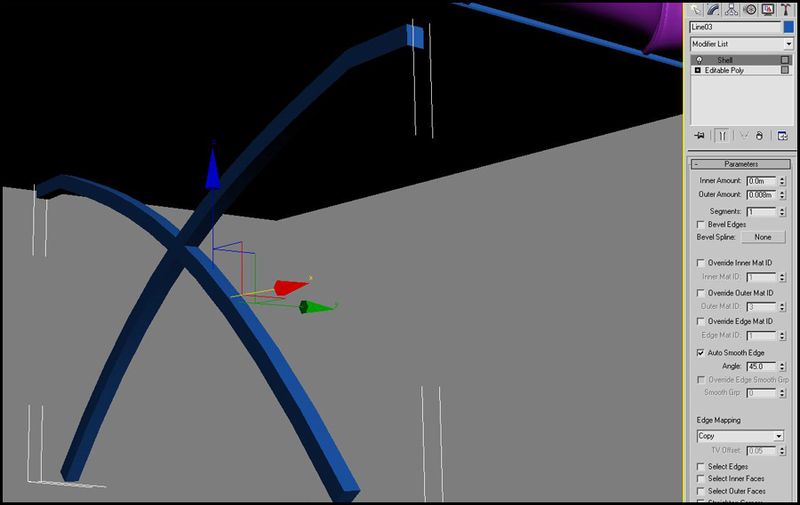
Now i convert the attached spline to an ediatble poly and apply the shell modifier with the outer amount of .008m
Step 20
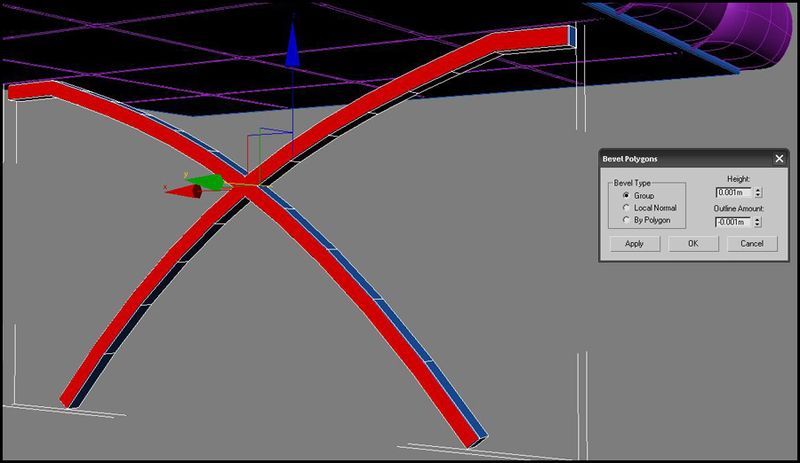
Now we select the faces from front and side as seen in the image and bevel them , bevel value-height .001m outer amount -.001m
Step 21
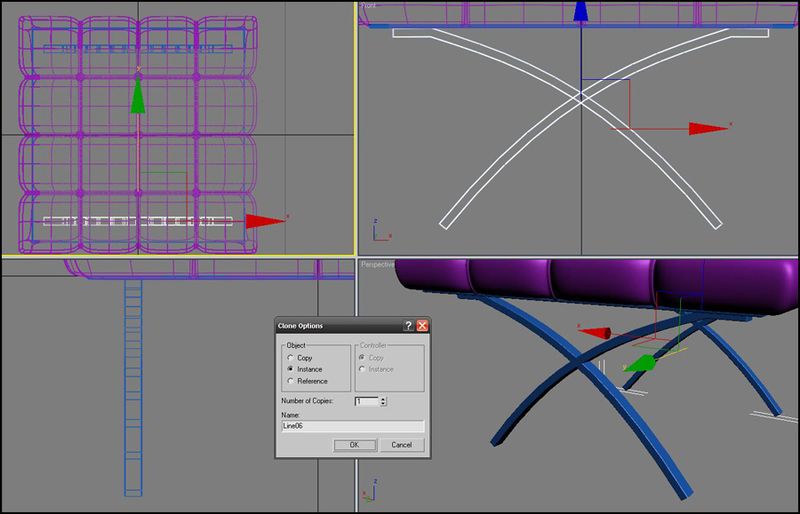
Now we select the beveled leg and shift +drag it to create a instance of it ,ad place it as you can see in the top view
About the Author
Hi friends, this is Pratik. I am a 3d artist from India. My areas of expertise include texturing, lighting and rendering. 3d art is my passion and profession; my hobbies are Photography ,music, movies, computers, latest gadgets, cars and all sorts of tech stuff. Here to learn, inspire, and grow!


