Studio Lighting Tutorial
In this tutorial, I will show you how to setup a studio lighting rig that I use mainly for vehicle rendering.
Basic to intermediate knowledge of 3DS Max is needed for this tutorial. I will be using 3DS MAX 9 for this tutorial, if you have a different version, your button configuration may be a slightly different. This process will take about 10-30 minutes, depending on your particular skill level.
First, you open MAX and go to the Left view port. I like to maximize the view port that I am working in so I would hit ALT+W.
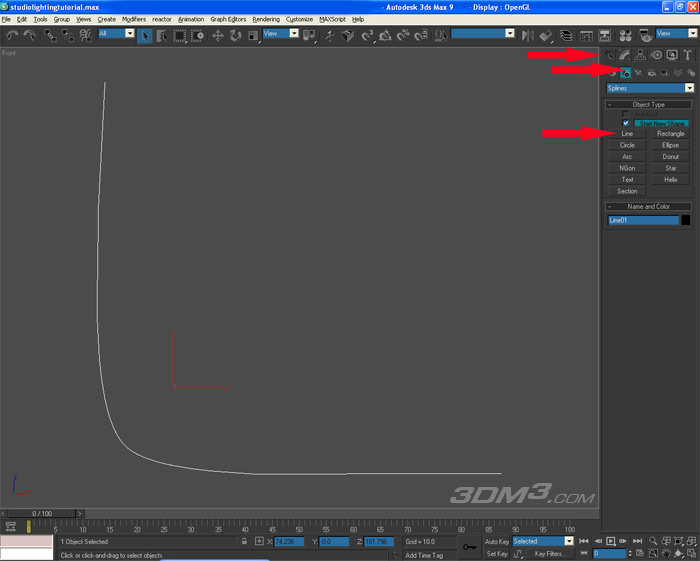
Ok, now you need to go to the Create tab, select Shapes, and then select Line. Draw a line like I have done in the picture below.
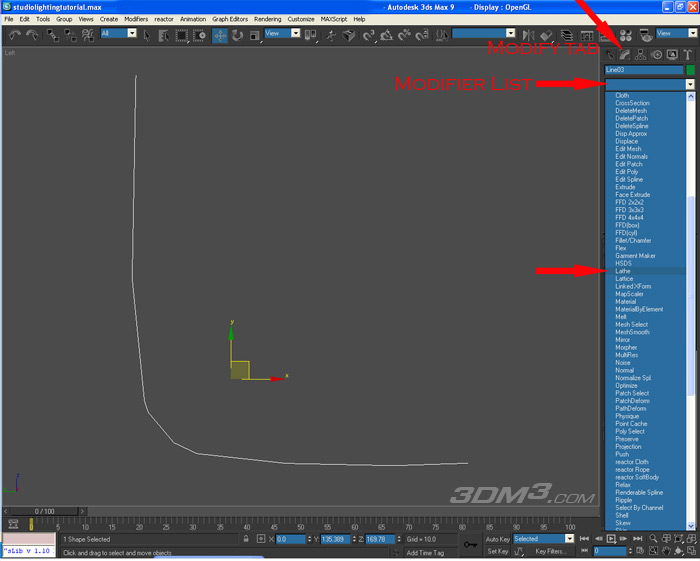
Next, go under the Modify tab and open the Modifier List and scroll down until you see Lathe.
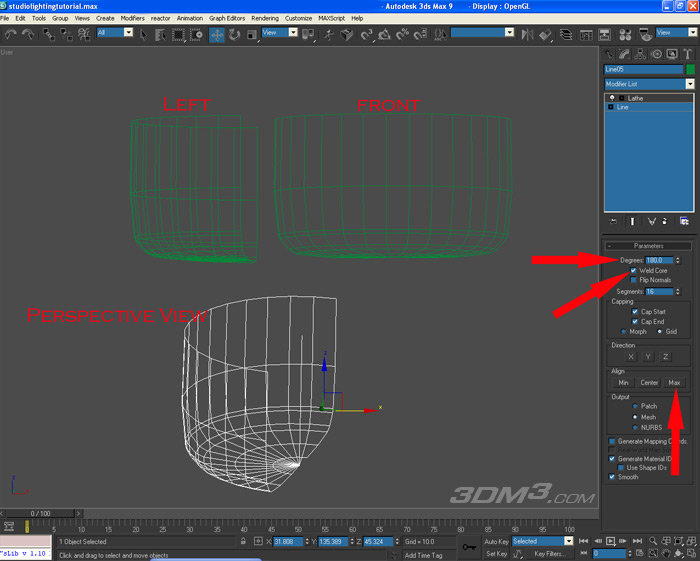
When you first apply the Lathe modifier, your line will look really weird. Simply go under the Parameters Menu, and then under the Align sub-menu select Max. To get the shape that we want, while still under the Parameters Menu, change the Degrees to 180.0. Make sure the check box next to Weld Core is selected.
After you do that, you should have something like I do below.
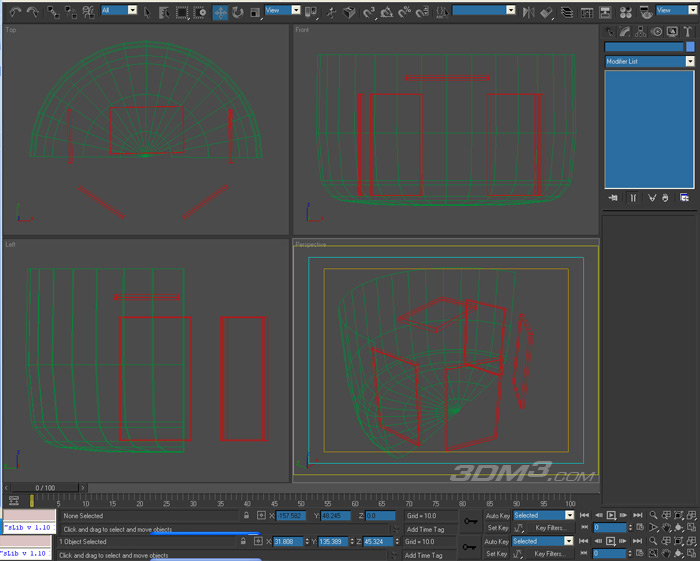
Ok, once that is done we can move on to more fun stuff. Create five (5) boxes and position them in the image below.
Next, we move on to the lighting. Under the Create Tab, select Lights. Then from the Object Type Menu, select mr Area Spot.
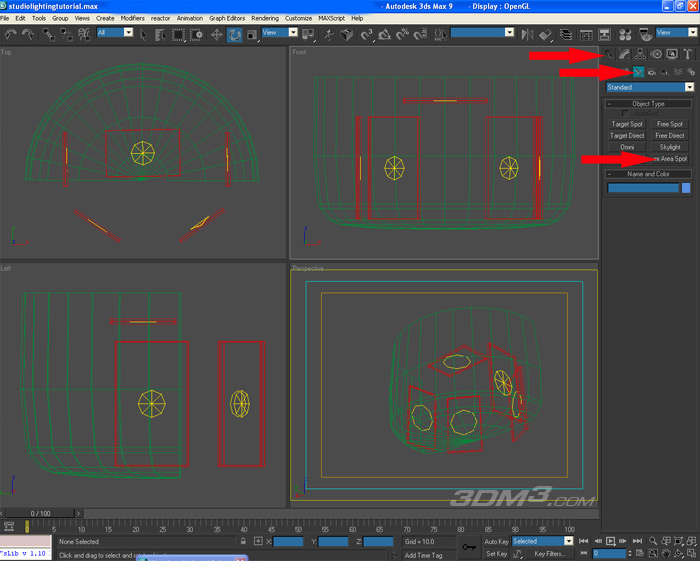
Once you have done that, place the lights like the picture above.
The settings for the lights are as follows:
Under the General Parameters Menu
Select Ray Traced Shadows.
Under the Intensity/Color/Attenuation Menu
Leave the multiplier at 1.0
Change the Decay Type to Inverse Square
Under the Spotlight Parameters
Change the Hotspot/Beam to a very small number, I changed mine to .5
Then change the Falloff/Field to around 150. Anywhere between 150-200 is ok. I have mine at 170.
Leave everything else at the default value. Now you should have something like the picture below.
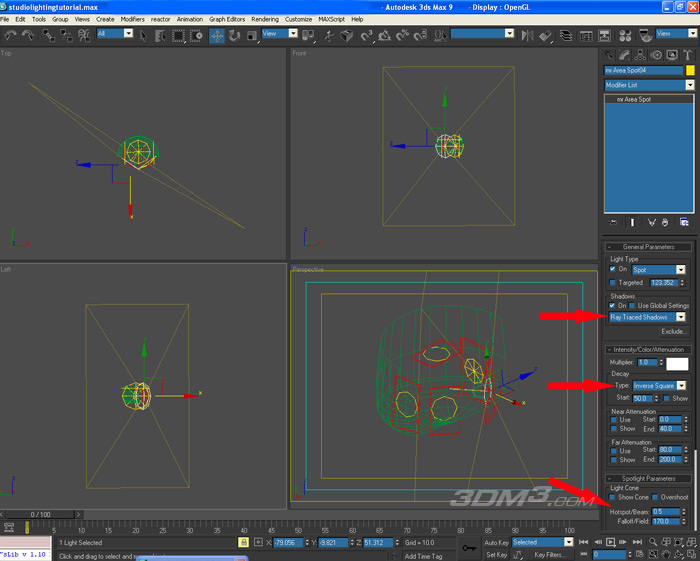
Make sure the lights are facing inward so that they will hit your object.
Now all you have to do is put your model into the scene, place a camera, and render.
For my model, I will be using my Bugatti Veyron, which I also have a tutorial for, so simply place your model like I have in the picture; place a camera in your scene. Camera placement is important to get a good scene.
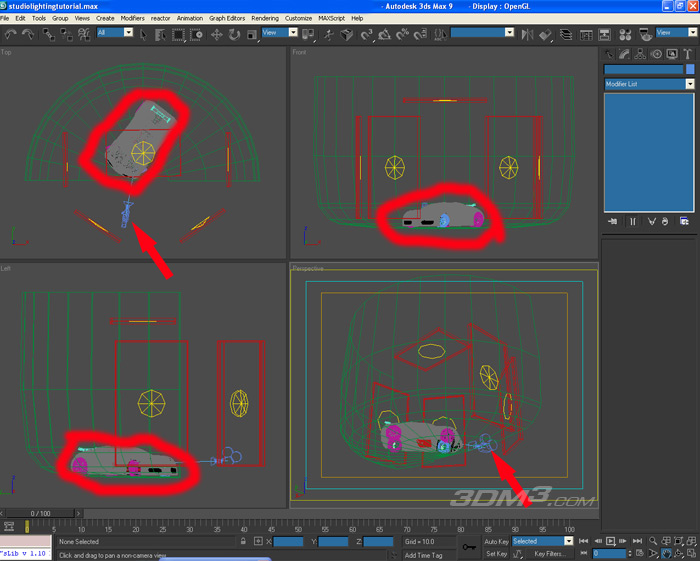
Now you have to go into the Camera View port. Do this by right clicking anywhere in your perspective view port and using the keyboard shortcut key C for Camera.
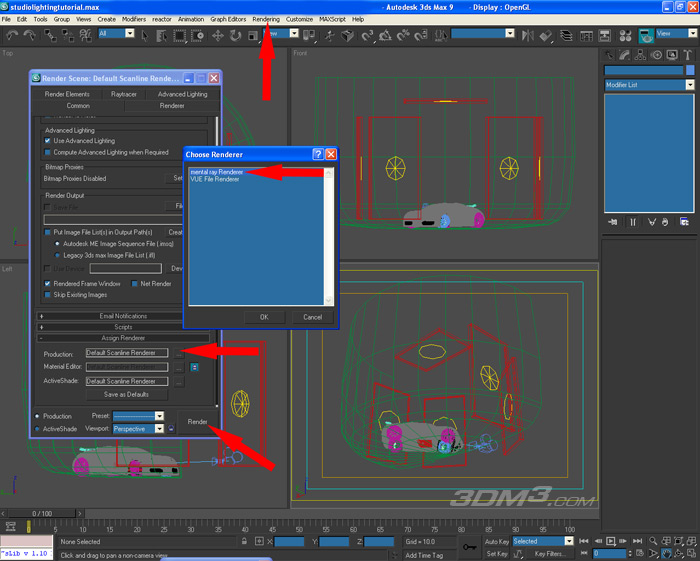
Next, on the top tool bar find Rendering, when the pop-up menu comes up, select Render.
From there, the Render Scene dialog box will appear.
Click on the Common Tab if it is not already; scroll all the way to the bottom, and under the Assign Renderer menu click on the three (3) little dots next to Default Scanline Renderer. A dialog box will pop up. Select mental ray Renderer and hit ok.
Then all you have to do is hit the big render button at the bottom of the Render Scene Menu or hit SHFT+Q, which is Quick Render.
Here what I ended up with for my render.
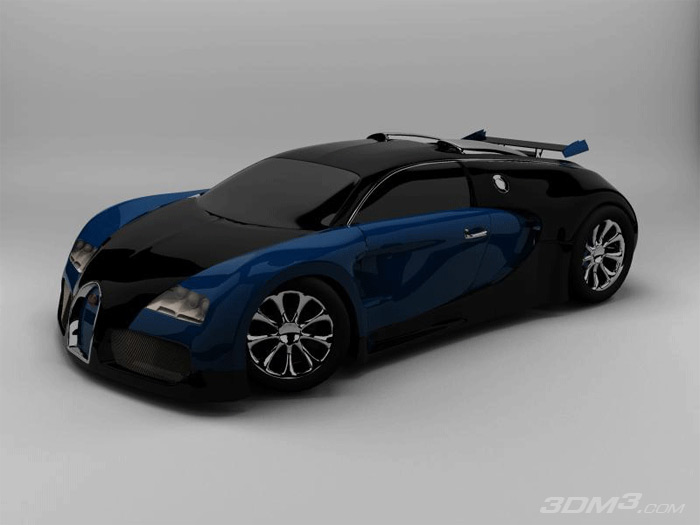
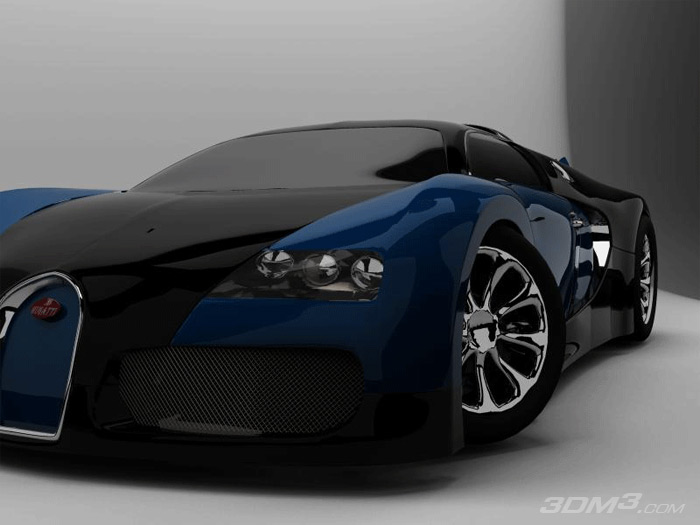
This studio setup is very nice to have when you do not have access to rendering systems like Brazil R/S or VRAY, and as you can see, you get almost as good of results. I hope this tutorial was helpful for you. If so, please feel free to check out my other tutorials.
Tutorial by Joshua Murphy. All rights reserved.


