Procedural Shaders
Intro: This is an introduction to procedural maps. I wrote an article in 2000 explaining roughly how I created a magma shader I had created earlier, unfortunantly during that time I didn’t really have any free time to really focus on it. So the article became a bit hard to follow, plus my shader was a lot more complicated than necessary. This shader however is as efficient as it can be and shouldn’t create and confusion.
What I plan to accomplish in this tutorial is showing the power of procedural shaders and masking as well as trying not to make it too confusing at the same time. You’re first going to need 3dsmax of course, but you’re also going to need a freeware plugin called electric, it’s a procedural texture map from Blur Studios, you’ll also need blurlib which is pretty much required for electric to work. You can grab both of these below:
Electric Blur Studios
Blurlib Blur Studios
First of all create a sphere, give it 200 segments so later when we displace the geometry it’ll have enough segments to form the contours of the rock surface we’re going to create.
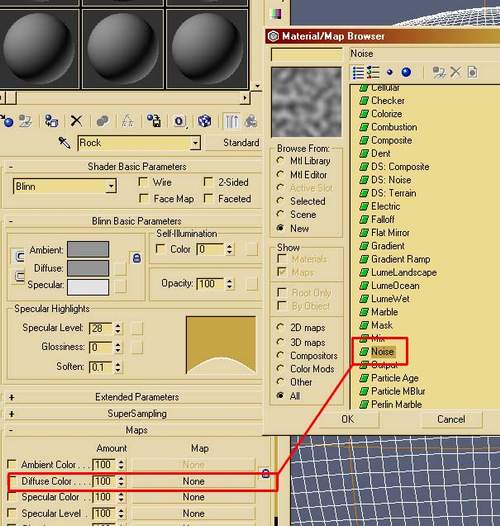
Once you’ve created the sphere load up the material editor, pretty much all of what we’re going to do now is through the material editor. First of all choose a new blank material to start fresh and clean with. Okay to start off we’re going to create a fairly simple rock surface which will be the base of the surface before it cracks apart revealing lava underneath. First of all we’ll make a diffuse map to give a bit of colour alteration to the surface. So click on the diffuse slot under ‘maps’ and when the map navigator window pops up choose noise from the list of map types.
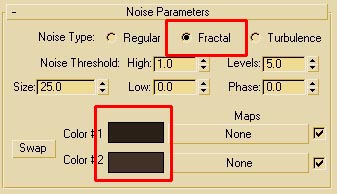
Once you’ve chosen noise as the diffuse map, the material editor will display the noise maps’ parameters. Keep the size on 25 but choose Fractal as the pattern instead of Regular. And then click on Color #1 color box to bring up the colour palette (it’s the black box) and type in the RGB values Red: 42, Green: 32, Blue 24. Click on the colour #2 box directly below and change it’s colour values to Red: 66, Green: 49 and Blue: 40.
This gives the surface colour more of a brown dirty look which is what we’re trying to achieve.
Next click on the ‘go to parent’ icon located two icons to the right of the blue and white cube in the horizontal row of icons in the Material editor up the top.

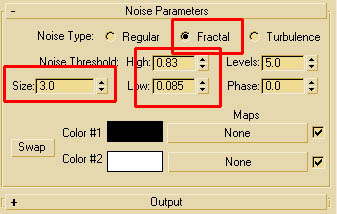
This brings you back up to the top of the material hierarchy. Now we want to create the surface texture’s bump map to give it less of a flat look. Click on the noise slot and choose noise again. This time after the material editor displays the properties adjust the size to 3.0 and make it Fractal. Make the high value (just below the ‘Fractal’ checkbox you just clicked on) 0.83 and the low value 0.085. This makes the white and black colours stronger so the soft gray values in-between aren’t as present. Also the size makes the rock texture smaller and more tiled, giving it more of a jagged look opposed to big flat and less appealing. Now click on the ‘go to parent’ icon again to go back up to the top of the material tree. Now adjust the bump map’s effect value to 83 opposed to the default 30. This is just bringing up the amount of bumpiness in the texture so it stands out more. Now drag the bump map slot over onto the glossiness slot and when the pop up window comes up click on instance. Having the same map in the glossiness slot will control how the surface reacts to the light when it hits the surface, also bringing out the bump map’s contours better.

Now name this material ‘rock surface’ and apply it to the sphere.
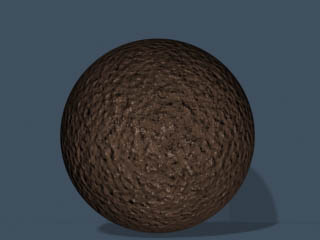
This looks pretty basic but you get the idea that it’s a rock. Now onto the fun part, lets create some lava! Choose a new empty material to start with. Name it Lava. Now change it’s self illumination colour to 61 and adjust the specular level to 55. We want the self illumination to be up because we want to blow out the colour a bit and let it simulate it’s emitting light, plus later we’ll animate these values so it brightens and darkens over time, And the specular level so light reacts better to it.
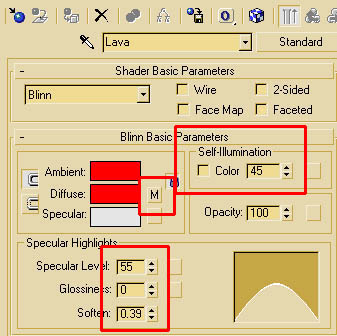
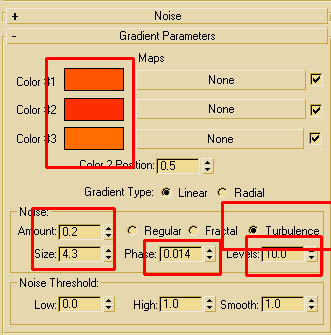
Now go down the diffuse slot and instead of choosing a noise map when you click on the empty diffuse slot, choose a gradient map. Now the material editor should display the gradient properties, so make colour #1 a kind of red orange (Red: 255, Green: 84, Blue 0) and colour #2 nearly the same (Red: 255, Green: 47, Blue: 0). Lastly make the third colour Red: 255, Green: 110 and Blue: 0. Also to give it a less linear transition between the three colours change the noise value to 0.2 to mess up the pattern a bit, and make the noise size 4.3. Lastly change the noise type to turbulence to get the murky water look we want in the gradient noise pattern. Now go to the last frame of your animation and click on the animate button. What we’re going to do is animate the colours changing over time to give it a bit of a hot lava kind of look. So click on colour 1 and change the colour values to R: 255 G: 50 B: 0, colour #2 R: 255 G: 58 B: 0 and Colour #3 R:255 G: 56 B: 0. And adjust the phase value under noise to 1.425 so the noise pattern shifts over time. Now click on the animate button to turn it off!
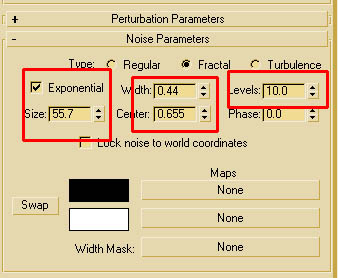
Now click on the go to parent button to go back up to the top of the hierarchy and go down to the bump slot, instead of noise or gradient this time we’re going to choose electric (remember that blur studios electric plugin I mentioned at the top?) If you installed it and it’s not there, make sure you restart max (save your work of course) before you go any further (max needs to load electric at startup for it to work) (and make sure you have blurlib installed as well). Once you’ve chosen electric from the map navigator list it should display the properties for it.
First of all click on exponential first to give the stronger colours more better falloffs. Change the width value to 0.44 and the center value to 0.655 and the levels value to 10. Levels basically gives it a bit more cpu calculating power when rendering the electric map, the others just shift the position of the pattern around a bit. Now click on the animate button and go to the last frame and change the value to 0.142 so the electric pattern phases over time. Lastly click on the ‘go to parent’ icon again to go back, and change the bump value to –30 to invert the pattern of the bump.
Apply the lava material to the sphere and render it to take a look, looks lava’ish right? Cool, lets go on.
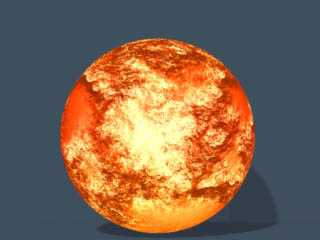
Now what we want to do is make a blend material and blend the two shaders together, and then make a mask to control how they blend together. Luckily we’ve already made the mask… The mask controls where the lava and the rock go, white bits of the mask place the lava inside of them, and the rock inside the black bits. So we’ve already made the bump map (the electric one) which we made as a bump map to give the mask a bit of elevation. So now go to a new material altogether, name it ‘Rock/Lava Shader’ this will be the actual material we’re making now, so lets get ready.
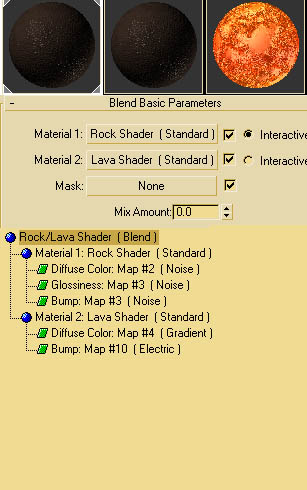
Make this new material a blend material by clicking on the standard button to the right. Once you’ve chosen the blend material a window will pop up asking you whether to keep the previous material or discard it. Choose discard since we want to put the two materials we’ve already made into the blend material. So now click and drag the rock material onto the Material #1 slot, and then choose ‘instance’ from the pop up window, so if we later want to make changes it will effect both the blend material’s Rock Shader and the separate one. Now drag the lava shader onto Material #2 and choose instance again. Lastly click on the blend material’s mask slot and when the material navigator window pops up click on the mtl editor checkbox under ‘browse from’ to the top right of the map navigator window.
Click on the electric bump map material we made for the lava shader. Choose instance, the bump map now is being used for the mask to blend the rock and lava together. (in practice its’ better to make the blend material mask first and then later copy it into the bump slot, but it’s easier and less confusing to explain this way for the time being. But all this bump map is doing is giving elevation to the mask so it pushes up a bit and doesn’t look as flat.
Now once you’ve done that assign the new material to the sphere and render, check it out!
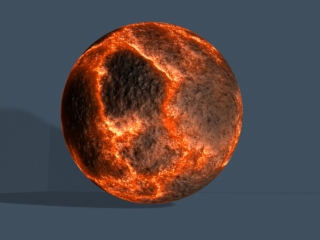
cool huh?
Below is a snapshot of the map navigator window to show you how the whole tree works and how everything plugs into each other. It may be confusing but it makes sense in the end!
Although it still looks a bit flat still, so next step is to plug the mask into a displacement modifier to make the geometry represent the actual lava/rock surface opposed to being a perfectly round sphere.
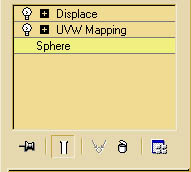
First of all go the modify panel with your sphere selected and from the drop down list choose uv map. Now when the modifier’s properties pop up, just choose spherical from the gizmo type. This is all we really need for it, just to specify how the shader is mapped onto the geometry. Now again go to the drop down list and choose displace, once the modifier pops up go down to the map slot part and drag your mask/lava bump map into the map slot and choose instance when the pop up window appears.
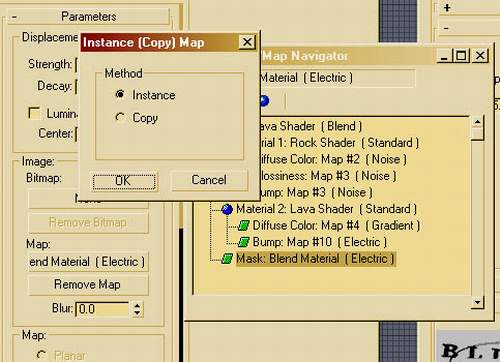
Click on spherical from the list of map types, now scroll down past all of the spinners and click on the ‘use existing mapping’ checkbox and enable it, this way it adapts the displacements mapping from the previous mapping coordinates we set up.
Now if you want to see how it looks, type in a value of –5 into the strength slot and click on render. If you want to make the geometry more defined than that, then put a mesh smooth or tessellate (tessellate will make it more jagged but that kind of suits a rock surface). This can be quite computer intensive so lets hope you have a fast cpu. But this will make the cracks even more defined, geometry wise.
Now it’s looking a lot better, we just need to adjust one or two more things. First of all we want to make the surface start out as a rock, and then split wide open revealing lava! So go back into the material editor and bring up the properties of your shaders blending mask. Make sure you’re on frame 0 with the animate button off and type in 0.0 for the width of the electric map. This makes the white values so thin they’re not visible, thus making the lava/rock surface, 100% rock. Render if you want to take a look at how it looks. Okay now go to the last frame of your animation and click on the animate button and change the value to .5. Turn animate off again. Now you can see the white values are back and they’re cracking up the sphere’s geometry as well as bringing out the lava shader.
If you now render out an animation you’ll be able to see it actually animating over time. Very cool!
From here it’s up to you where you go, you can apply it to other surfaces or pretty much anything. The purpose of this exercise wasn’t to create lava, but to demonstrate how to create great procedural shaders and blend others together seamlessly. Hopefully in the future I’ll show you how this can work perfectly to create 3D passes of FX like digital make up to composite over footage of people and sets.

Download 15,8 KB (R4)
That’s it for 2001’s tutorials! Happy New Years!
December 30.2001


