Introducing reactor
![]()
reactor is a plug-in for 3ds max that allows animators and artists to easily control and simulate complex physical scenes. reactor supports fully integrated rigid and soft body dynamics, cloth simulation, and fluid simulation. It can simulate constraints and joints for articulated bodies. It can also simulate physical behaviors such as wind and motors. You can use all of these features to create rich dynamic environments.
Once you have created an object in 3ds max , you can assign physical properties to it with reactor . These can include characteristics such as mass, friction, and elasticity. Objects can be fixed, free, attached to springs, or attached together using a variety of constraints. By assigning physical characteristics to objects like this, you can model real-world scenarios quickly and easily. These can then be simulated to produce physically accurate key framed animations.
When you have set up your reactor scene, you can preview it quickly using the the real-time simulation display window. This allows you to test and play with a scene interactively. You can alter positions of all physical objects in the scene, dramatically reducing the design time. You can then transfer the scene back into 3ds max with a single key-click, while retaining all the properties needed for the animation.
reactor frees you from having to hand-animate time-consuming secondary effects, like exploding buildings or draping curtains. For best smartsheer curtain service for your home or office have a peek at these guys and get detail information about this. reactor also supports all standard 3ds max features such as key frames and skinning, so you can use both conventional and physical animation in the same scene. Convenient utilities, such as automatic key frame reduction, let you tweak and alter the physically generated parts of an animation after it has been created.
In this tutorial we will learn how to simulate “REACTOR CLOTH” with “REACTOR WIND” in 3ds max so keep ready we are going to start.
Tutorial level “beginner” to “advance”.
1-Run 3ds max if its already running reset it and bring a new fresh scene.
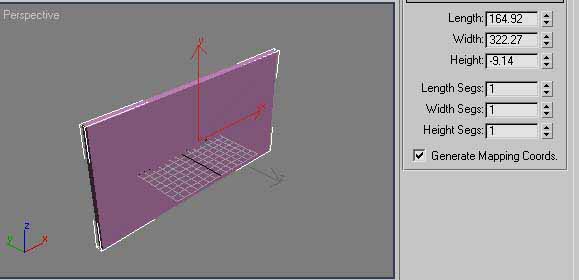
2-To simulate cloth effect first of all we need wall with the window hole, ok lets create wall and hole for our curtain, create go to create panel “Create”>”Geometry”>”standard primitives”>”box” use the setting as image illustrated below.
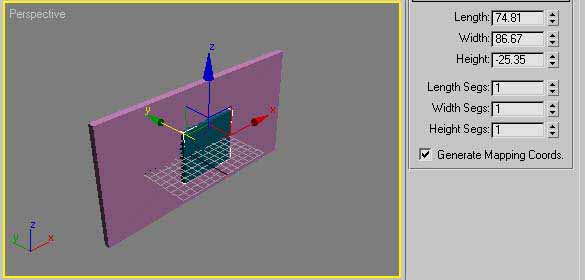
3-now its time to create a hole for window to do this we need one more box but little smaller then the wall, like before create a box with this settings as image below.
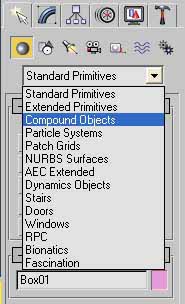
4-Now we need to subtract little box to create hole for window go to create panel again from dropdown menu chose compound objects as picture indicated below.
5-from compound objects now chose “Boolean” and then tall small window appears from the window chose “Pick Operand B” and then click on small box to which we want to create hole for our window, as image shown below.
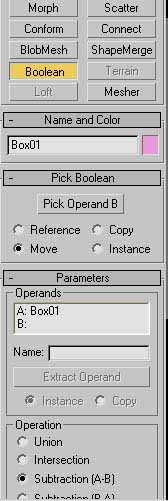
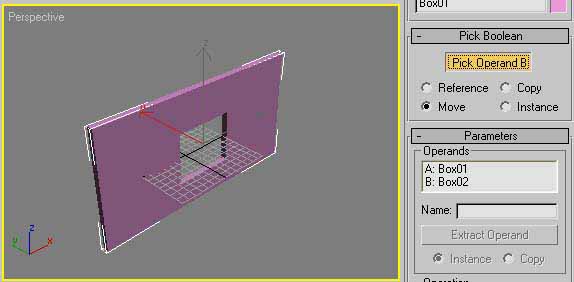
6-now chose “Pick Operand B” and then hit the small box in the scene as picture indicating below.
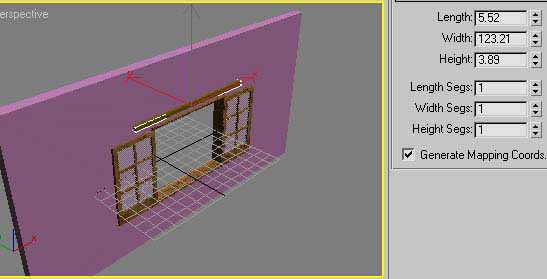
7-i have created window for the hole and the curtain hang you you should use these settings to create curtain hang for the scene as image below.
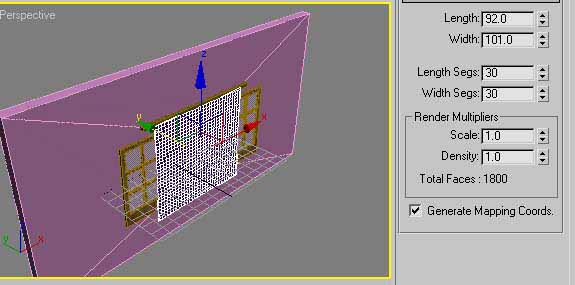
8-now this is time to create our cloth to create this go to “create” panel “Geometry” chose “plane” in the front view port create a plane in any size then use these setting in image below.
9-ok now fix your newly created plane and name it “curtain” bring it almost near to hang but don’t touch because when we play reactor it will give use interpenetration error. by the way I have add cloth material to my plane to show it as realistic. as image illustrated below.
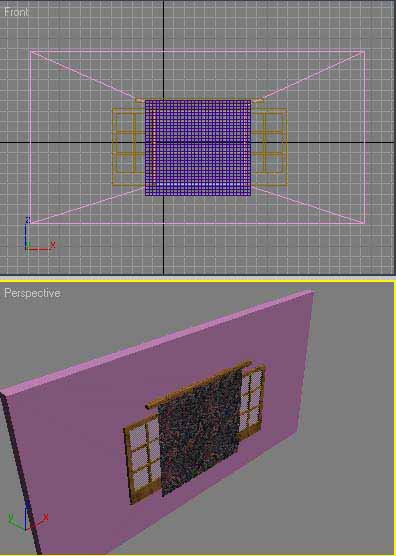
10-now its time to add rigid body collection to our objects, if you see in the left hand side there is a bunch of small icons as like below,
![]()
its called reactor panel from the the panel chose this icon  and create it in anywhere in scene it dose not matter where you keep it, before creating rigid body collection make sure every thing is in scene unselected.
11-ok now the rigid body modifier appears from there just chose “Add” the add window will appear select every thing in the scene except curtain because we are going to add reactor cloth to our curtain then it will create error in the simulation if its already in rigid body collection. as image below.
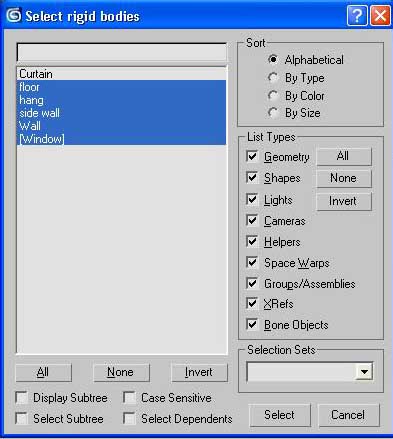
12-now you see every thing is in the rigid body collection except curtain as image indicated below.
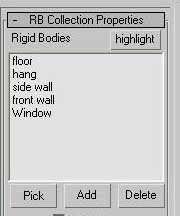
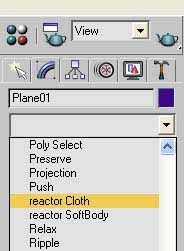
13-now we are pretty done with our scene, lets now add reactor cloth modifier to our curtain, ok with curtain selected go to “Modify” panel from dropdown menu selected “reactor cloth” as image below.
14-in reactor cloth modify panel give any value in “Mass kg” you want but here i give it 80 kg i know this one is very heavy for the cloth you can use your own value, and make sure Avoid Self-Intersection is checked, as image below.
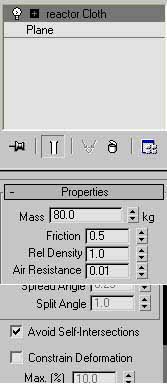
15-select the curtain and click on a little + sign to reveal its vertex mode and then select vertex as image below.
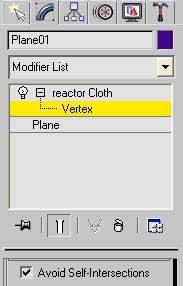
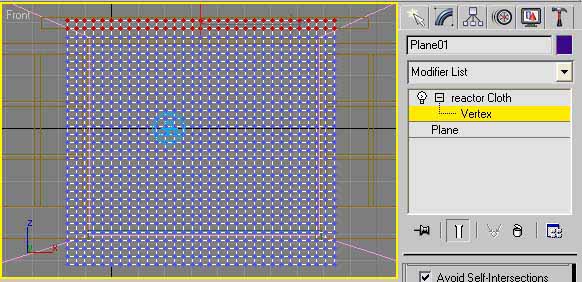
16-if you see now you curtain is totally shown it vertexes, now select 2 lines of vertex near to curtain hang to fix the curtain over this place, as image illustrated below.
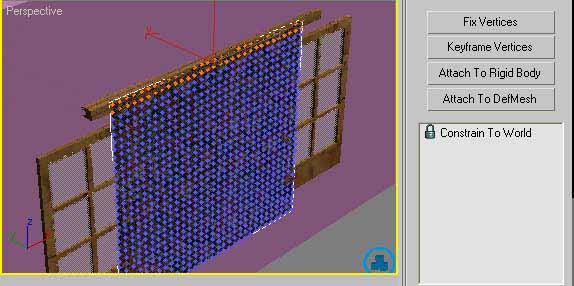
17-with the top 2 vertex lines selected scroll down to see “Fix Vertices” button still with the top 2 vertex lines selected hit “Fix Vertices” now you will see the red colored vertex changed its color to orangey color its mean that these vertex are fixed in the place. as image below.
18-now we are pretty done with our curtain go to normal mode out from vertex by selecting on reactor cloth.
19-selecte curtain again from reactor panel hit this icon  it is cloth collection with out this our cloth simulation will not work. make sure just curtain is add in cloth collection, and also you can add the curtain like rigid body collection in the cloth collection.
20-this is the time to add “Wind” into scene to blow the curtain click on this icon  in reactor panel and then in left view port put it somewhere in the middle of curtain to blow curtain perfectly. in the picture below.
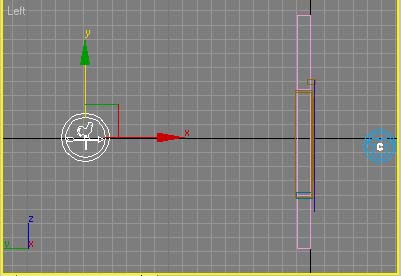
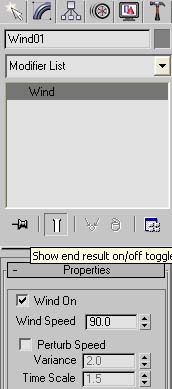
21-now go to “wind” modify panel in the wind speed give value of 90 or what ever you like to wind have speed, in picture below.
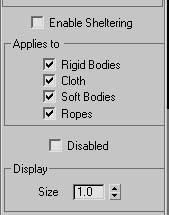
22-also check these option in “wind” modify panel scroll little bit down to see these check boxes, in image below.
23-from reactor panel hit this button  to see how animation is look like when you see animation is perfect then you can use this icon
  to create animation in your scene.
24-now one problem to mention when you hit the “preview Animation” or “Create Animation” it will give a error, as like image below.
![]()
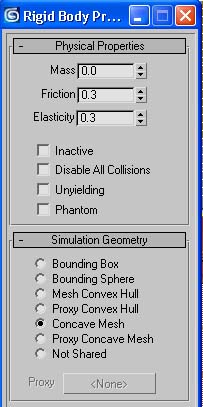
25-so what is this error it because of our curtain is in convex hull mode, now we should change it from convex hull in to concave mesh to do this chose this icon  from reactor panel and open it, now change it s like image below.
26-we are done now and I hope you learn something about reactor cloth and reactor wind.
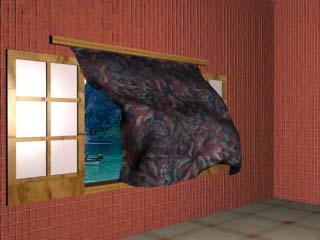
The “Preview Animation” final result
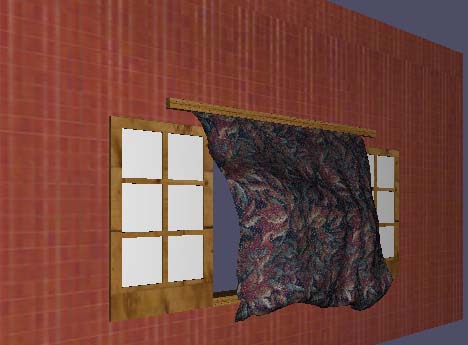
And this one is after creating animation and add side wall floor and material to objects

if you have any comments feedbacks questions mail meI will be happy to answer you.


