Making Of ‘Swamp Hunter’
The inhabitant of a tropical, swampy jungle
Hi, everybody. My name is Aleynikov Oleg, I live in Voronezh-city, Russia and I am a 3D modeler. I like character concept art very much. I prefer to create a 3D visual form without previous drawing. I am inspired by such masters as Scott Patton, Tsvetomir Georgiev and Ben Mauro, and films like Avatar. I am thankful to 3DTotal for finding my work interesting and giving me the opportunity to tell you about its creation.
This work was based on the images of the Indians from Mel Gibson’s film Apocalypto. But I didn’t want to make a typical “man”; I wanted something new and different. I pictured in my mind the inhabitant of a tropical, swampy jungle. I chose to use a frog as my starting point, but I wanted to make my character attractive, without the warty skin that frog’s usually have. The prototype for my frog was the Australian White Lipped Treefrog (Fig.01).
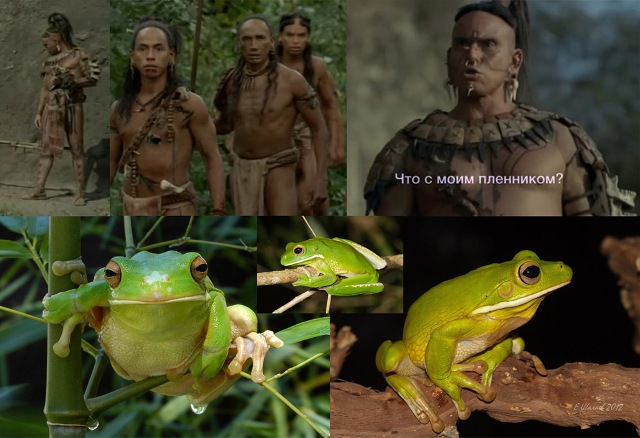
Fig.01
Sometimes I start making a character from a silhouette, other times from a head, which becomes a character (spirit) and forms an appearance. This time I used the second variant. I made the most of the possibilites offered by ZSpheres and DynaMesh (Fig.02).
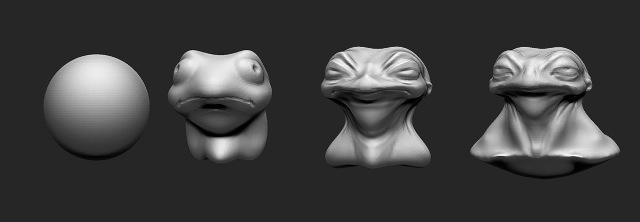
Fig.02
After I had found the head and features of the face, I continued to make the body, using basic brushes such as Standard, Clay Buildup, InsertCylinder, InsertHand, etc., and DynaMesh to join everything together. I based the shapes off my chosen frog’s body, but made it anthropomorphous with human muscles so the character looked more natural and realistic (Fig.03).
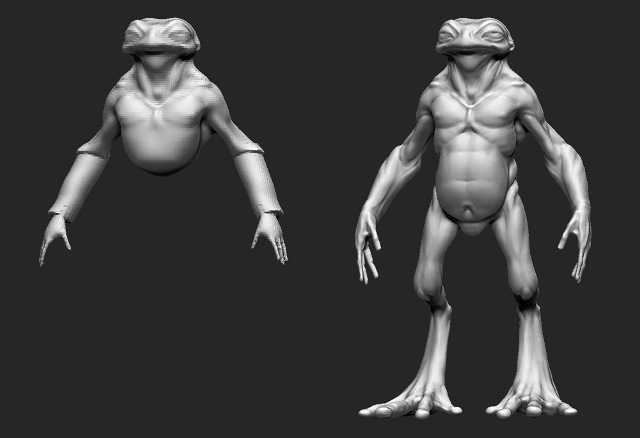
Then I increased the number of subdivision levels and worked on detailing the character. I didn’t work on the skin texture because, like I said earlier, I didn’t want to have normal frog-like skin (Fig.04).
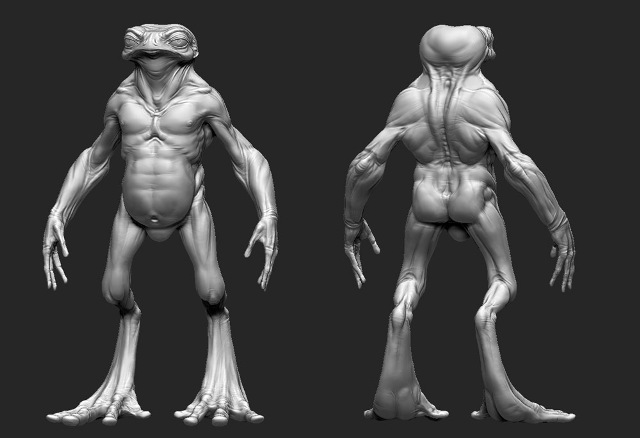
Fig.04
For the armor, I quickly made a base mesh in 3ds Max to allow me to see the silhouette and understand the number of needed elements (Fig.05).
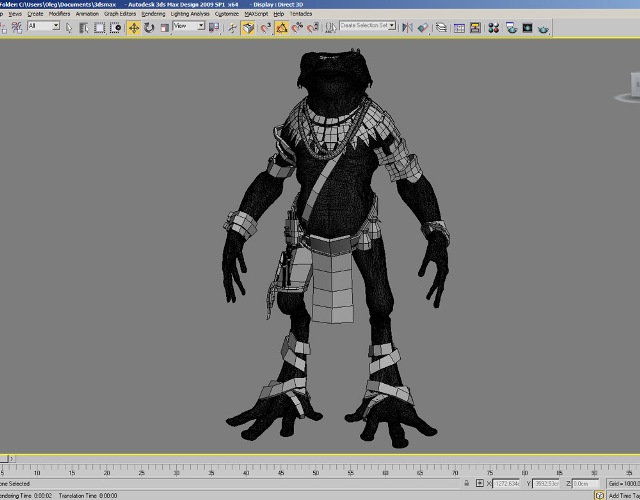
Fig.05
After that I imported the mesh back into ZBrush and began to add detail to the clothing. It’s good if the details of armor are not random, but tell the story of the character, so I added the skull of a beast to show that my hero was a skilled and experienced warrior. As a reference I used the skulls of a lioness and a wolverine and made it from a ZSphere. I also added a spaulder to make the character less symmetrical (Fig.06).
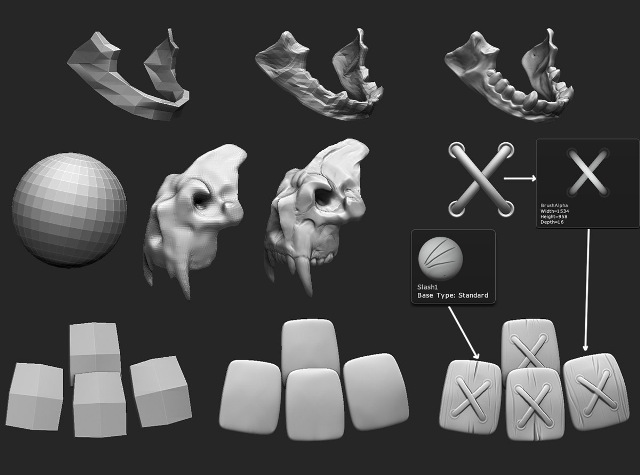
Fig.06
I used the Move brush and DynaMesh to form the main features. For the lasing of the wooden parts of armor I made an alpha and made it wooden with the help of the Slash1 brush (Fig.07).
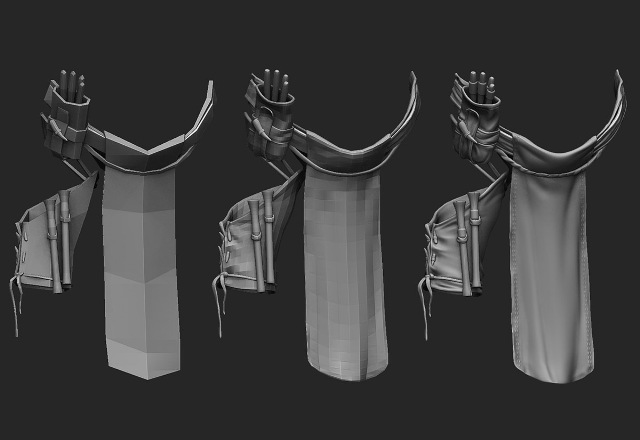
Fig.07
Next I increased the details of the folds in the cloth. Besides the aforementioned numbered brushes I used the Pinch brush with LazyMouse, ZIntensity at 75 and Brush Modifier at 80. It allows you to be more precise. After all the parts were detailed, I improved the proportions a bit. And then the character was ready (Fig.08).
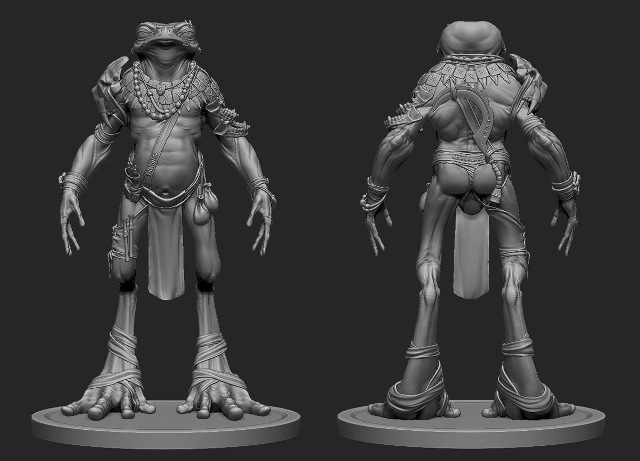
Fig.08
With the Transpose Master plugin, I put character in a pose, gave him a spear and made three renders (Fig.09):
1. Masking
2. Base with ambient occlusion
3. Reflex
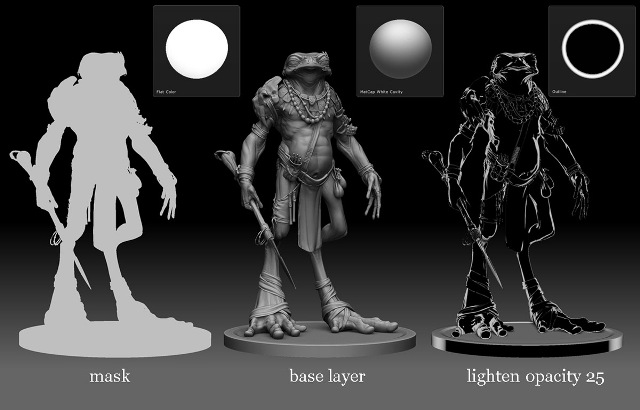
Fig.09
Then I combined all the layers in Photoshop, and rubbed the sharp edges with the Smudge tool to make them softer. And finally I used a metal texture for the background. The final result can be seen in Fig.10.
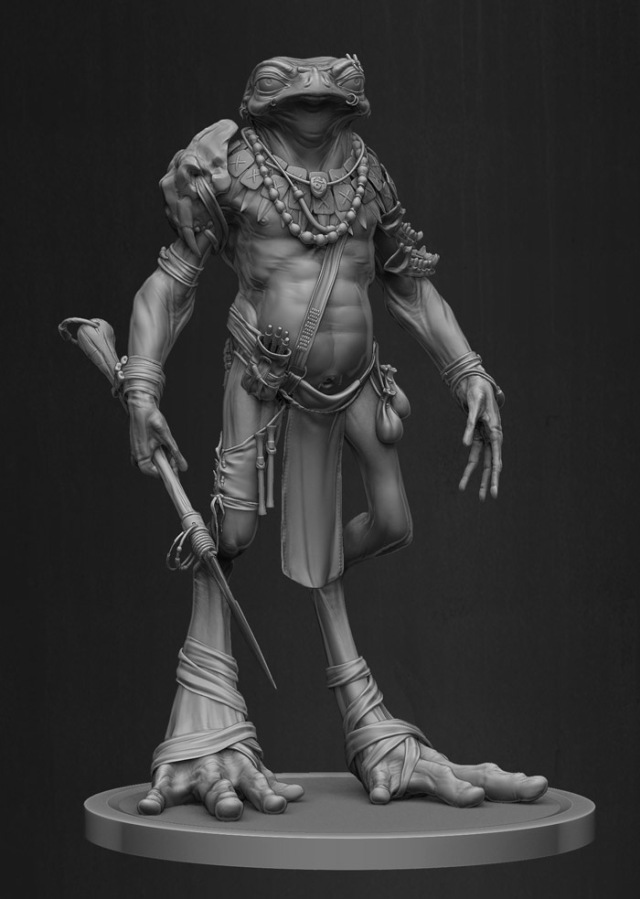
Fig. 10


