Creating a glade using Grass-O-Matic Plugin
Foreword
This lesson contains the detail view of glade creation process. The lesson is reckon on 3DStudioMax users and also is based on Grass-O-Matic plugin for 3DSMAX. The lesson consist of six parts, where you Can learn how to create: a ground surface with lichen and naked regions, illumination of bright sun day, grass of different types, flowers and stones.
- Creating ground surface
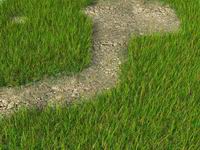
1.1 The first we draw in any 2D picture editor (for example in Photoshop) the mask for ground surface with path and hollows. It might be some of that kind:
 1.2 Now let’s create the region of a landscape.
The first we create an object “Ground” of QuadPatch type:
Length : 200;
Width : 200;
Length Seg : 10;
Length Seg : 10.
Applying the modifier UVW Map:
Mapping : Planar;
Length : 200;
Width : 200.
 Next you apply the modifier Displace:
Strength : -5;
Length : 200;
Width : 200.
Bitmap : “pic1.jpg”;
1.3 Now you’ll create two objects, that will serve us for placing grass, flowers and stones.
Clone our “Ground” object and name it Grass_Mask. Convert it to Editable Mesh. Then we switch ViewPort to the Left View or to the Front View. Select faces like it shown on the picture:

Detach selected faces. Name detached object as Step_Mask.
Hide both objects.
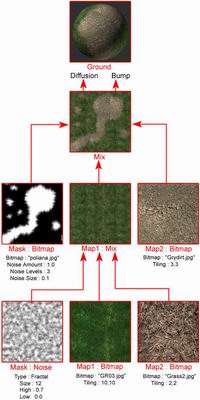 1.4 The next step is to create a Ground material for ground surface. It will consist of lichen and naked regions. Naked regions are pointed with the mask. Lichen region will be a mix of two bitmaps. Here is the scheme how to create the Ground material:
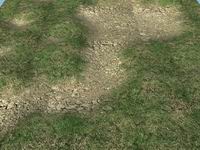
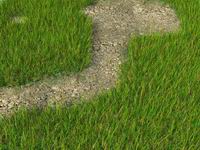
Now increase Self Illumination of material to 10 and our ground surface is ready. Apply the Ground material to our Ground object. You’ll have something like that:
- Illumination
2.1 Next create a Target Directional Light, that will emulate sun. Setting parameters:
Multiplier : 1.3 ;
R : 255 ;
G : 248 ;
B : 210 ;
Cast Shadows : On;
Shadow Map Size : 2048;
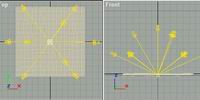 2.2 Now create a system of directed lights for sky light emulation. Place them like it shown on the picture:
They must have following parameters values:
Multiplier : 0.125 ;
R : 188 ;
G : 216 ;
B : 227 ;
Cast Shadows : Off;
Next create one light more and direct it from bottom to top. It will emulate ground illumination:
Multiplier : 0,35 ;
R : 189 ;
G : 273 ;
B : 138 ;
Cast Shadows : Off;
In fact, this part you can replace just increasing Self Illumination of all materials in scene, or using renderers Vray, Brazil, Global Illumination, Mental Ray and other.
- Grass
3.1 Create object of Grass-O-Matic type and name it Grass_Green. It will be green grass on the glade. In Wind and Placement rollout of grass properties select the object Grass_Mask as a placement object. Set following parameters to grass object:
Diffuse texture for green grass material will be Swpeedc.jpg:

3.2 Create another grass object and name it Grass_Dead. It will be a dry grass on the glade. Object for placement – Grass_Mask. Set the parameters values as following:
Diffuse texture for green grass material will be DeadGrc.jpg:

 3.3 Next step – high dry grass – Grass_Dead_High. Placement – object Grass_Mask. Parameters for this grass:
Apply to this grass the same material as for Grass_Dead.
 3.4 Now let’s create small round leaves that will look like the leaves of plantain. Placement – Grass_Mask. Set following parameters:
Diffuse texture for green grass material will be Grassc.jpg:
Let’s look what we’ve recieved:
3.5 The last part as for the grass – creating the bunches of dry grass on the path. This time the placement object – Step_Mask. This grass will have a little different parameters, but the same material as Grass_Dead have:
Here’s what we have:
- Stones
4.1 Use the Scatter object to create small stones all over the area of the path.
In the beginning create two kind of stones as it shown on the picture and name them StoneO_1 and StoneO_2:
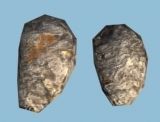
Select object StoneO_1 and create the Scatter object. A distribution object – Step_Mask. Next set parameters as following:
Repeat the same steps for StoneO_2. As for parameters change only the Seed parameter to 1996.
Here’s what we recieve:
It looks better. But the picture is a little sad. Let’s try to remove this sadness.
- Flowers
We’ll also use the Scatter object to create flowers on the glade.
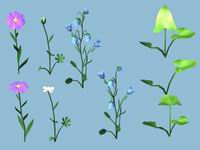
The first find or create several types of flowers. And for each type – a couple of varieties. This will hide a recur effect a little more:
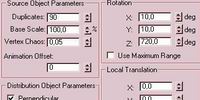
The next – create a Scatter object for each variety of each type, but this time as a Distribution object will be the Step_Mask object. Set up following parameters (don’t forget to change the Seed property):
Here we are:
- Big stones
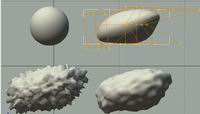
Now we’ll create big stones that you’ll put on the path. Better to make them from geospheres, that you can easily cripple with FDD Box and Displace modifiers. Here’s the veiw of stone creating process:
Texture makes stones quite nice:

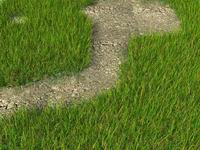
That’s all. Our glade is ready. Let’s look what we’ve got:
Not bad as for me. Enjoy!

You can download Grass-O-Matic Plugin here:








![How to make GLOWING MATERIAL in 3DS MAX [Video Tutorial]](https://3dm3.com/static/uploads/2017/01/how-to-make-glowing-material-in-320x180.jpg)

