Modeling Old School Rim in Maya
Introduction
In this tutorial I will explane you how to make Old school rim.
Step 1
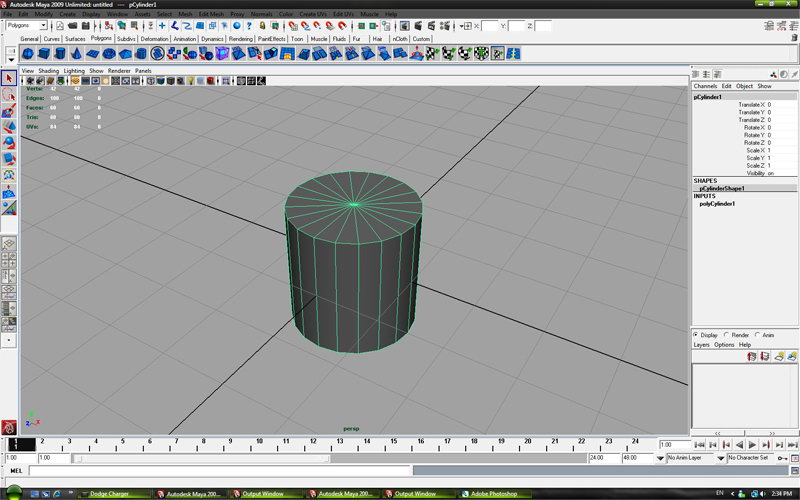
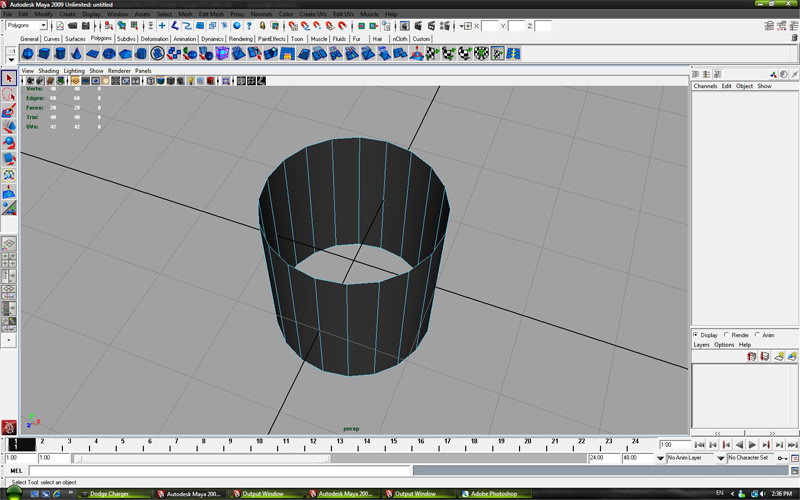
First make the Polygon Cylinder.
Step 2
Then delete top and bottom faces to look like this on picture.
Step 3
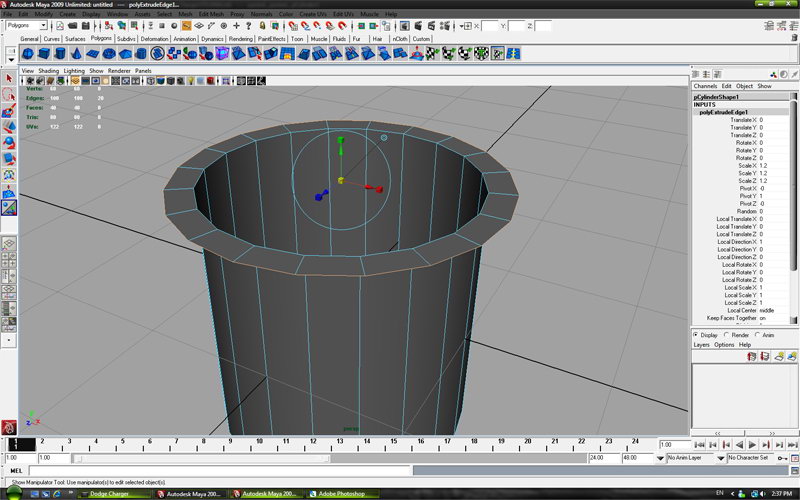
Select all top edges end extrude with tool witch you can find in Edit mash – Extrude.
Step 4
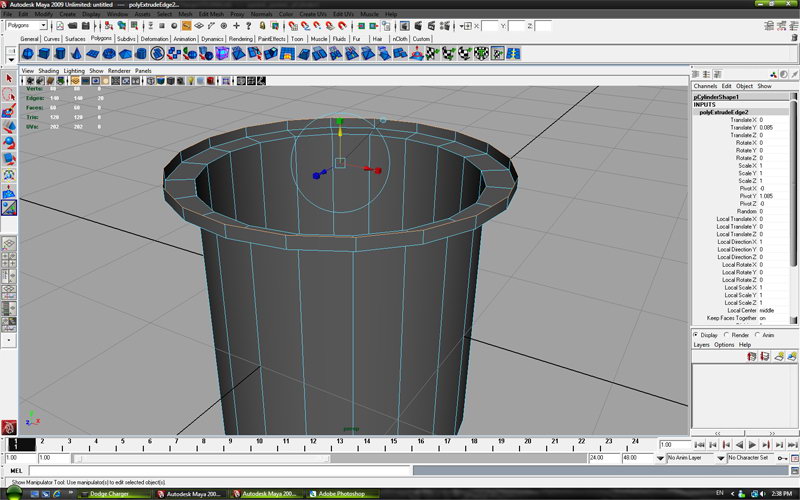
Then extrude up.
Step 5
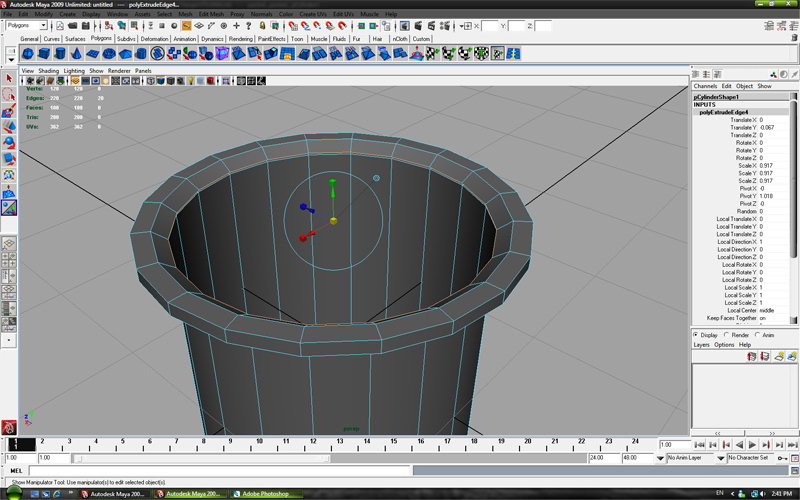
Then with Extrude tool make object like on picture.
Step 6
Then with Extrude tool make object like on picture.
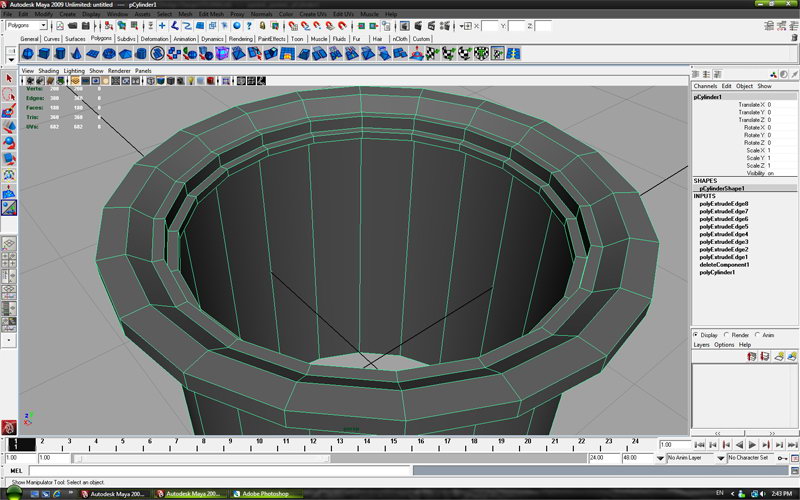
Step 7
When your model starts to look like on this picture change to vertex mode.
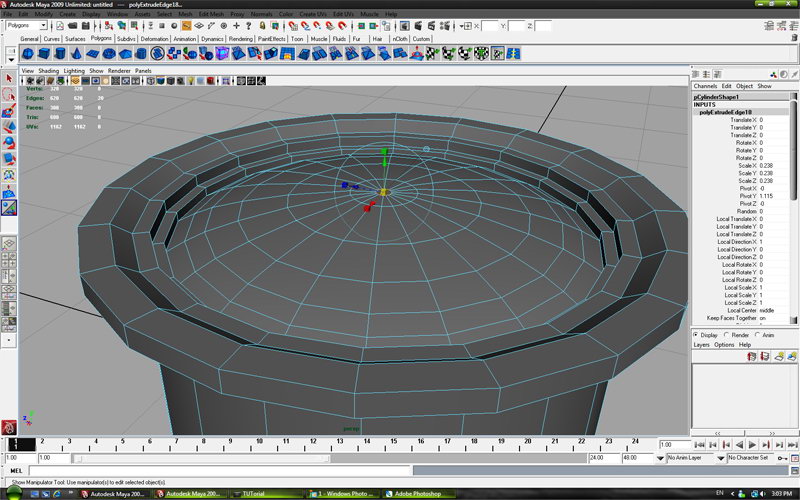
Step 8
Then select centar vertex and go to Edit mash – Merge to Center.
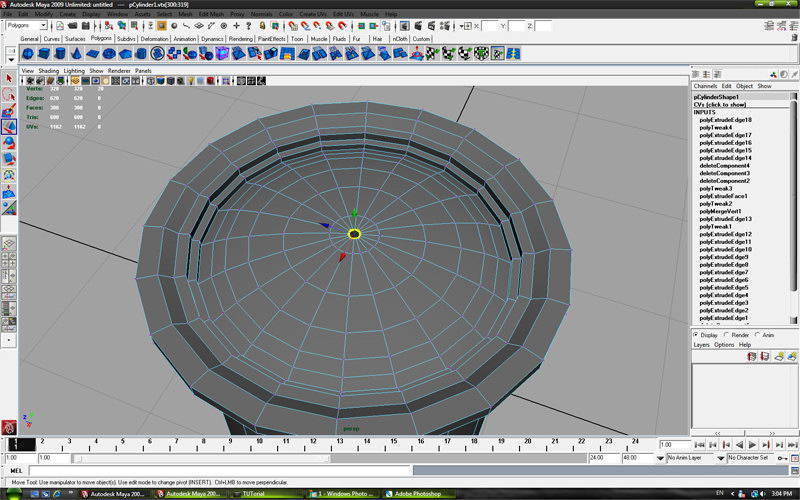
Step 9
It has to look like on picture.
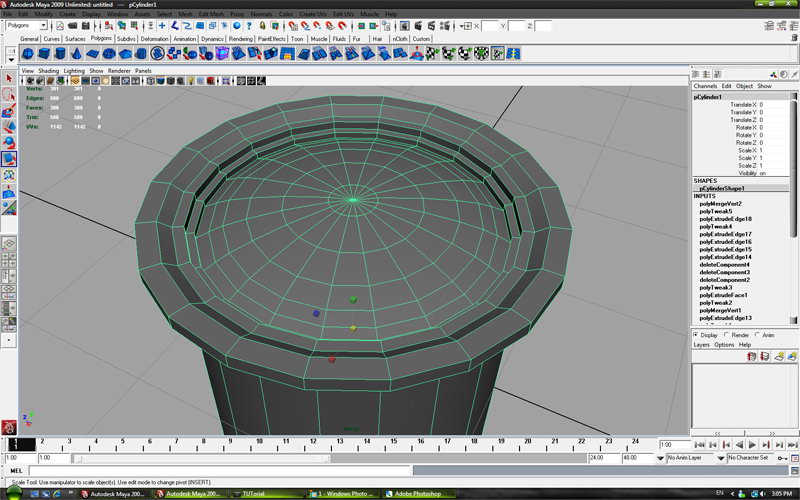
Step 10
Than select faces like on picture.
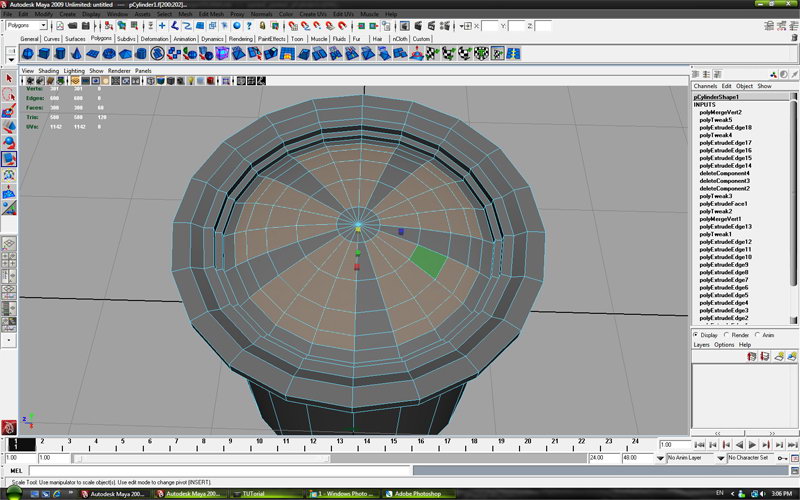
Step 11
Extrude selected faces.
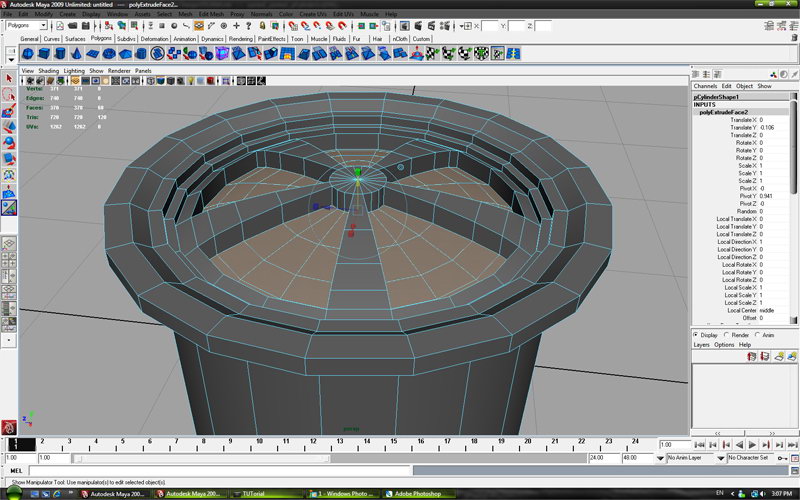
Step 12
Switch to edge mode and select edges like on picture.
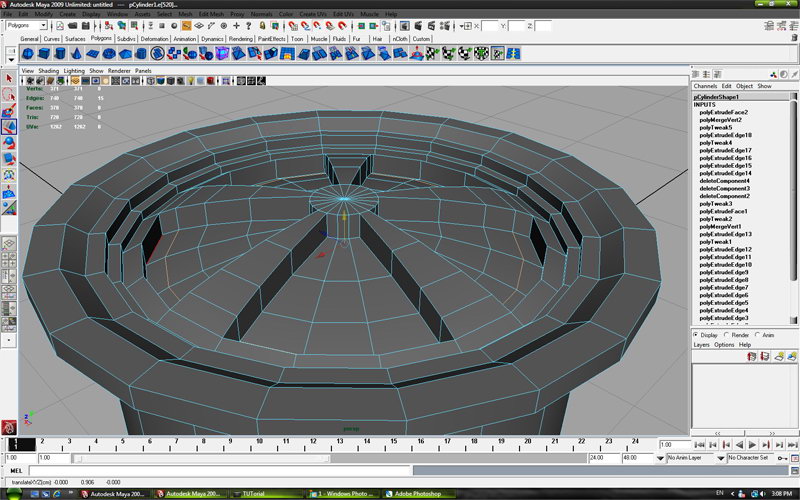
Step 13
Then select the Y axis ,hold “v” on keyboard and with mouse scroll wheel click on the marked vertex to align.
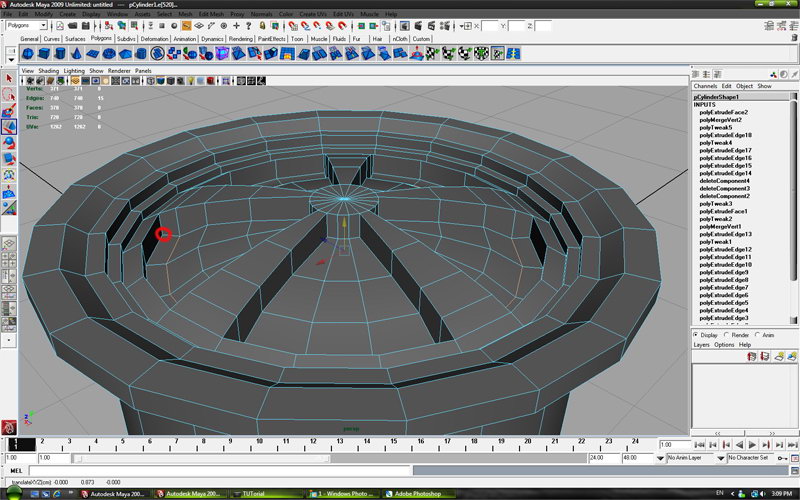
Step 14
Align rest edges with marked vertex to look like on picture.
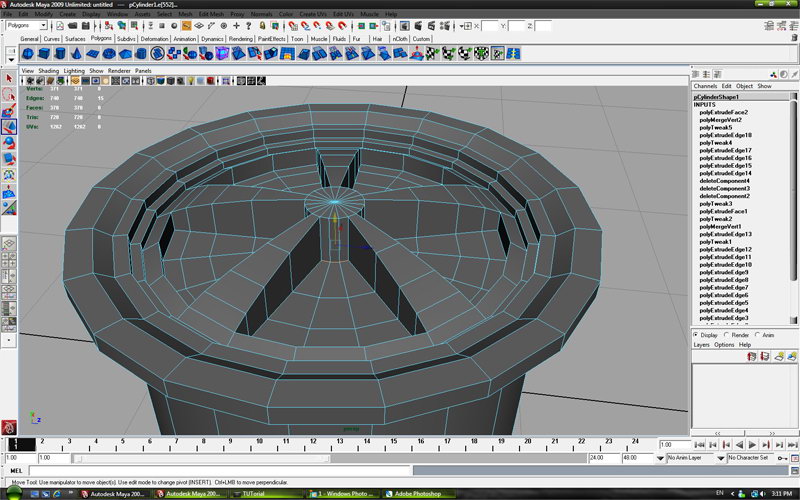
Step 15
Select faces.
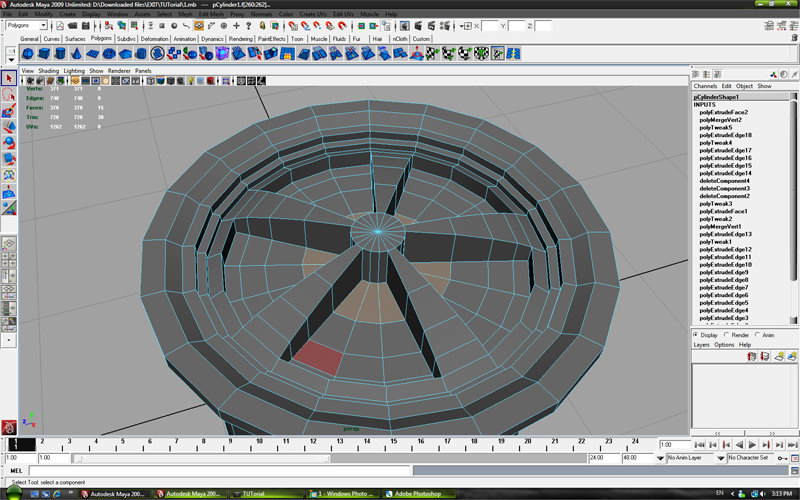
Step 16
Extrude selected faces.
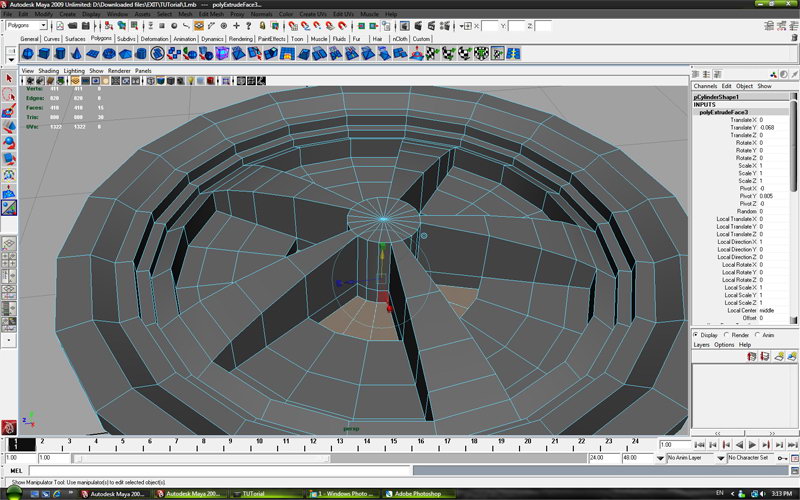
Step 17
With “Insert Edge Loop Tool” add edges to look like on picture.
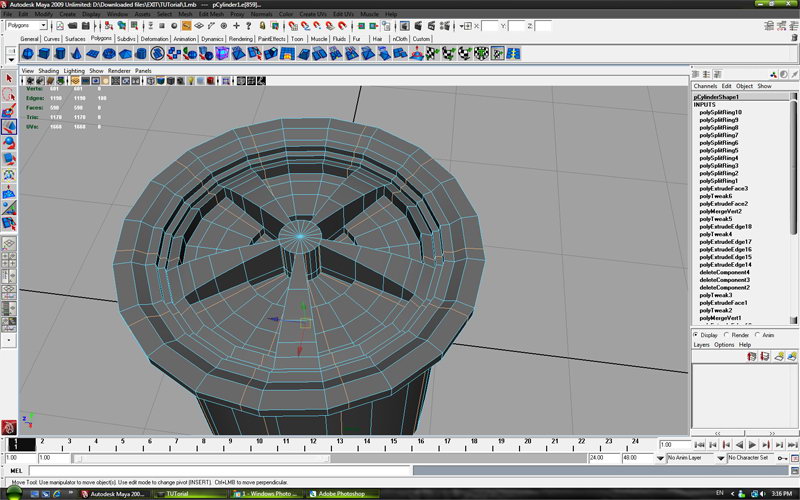
Step 18
Then remove the marked edges.
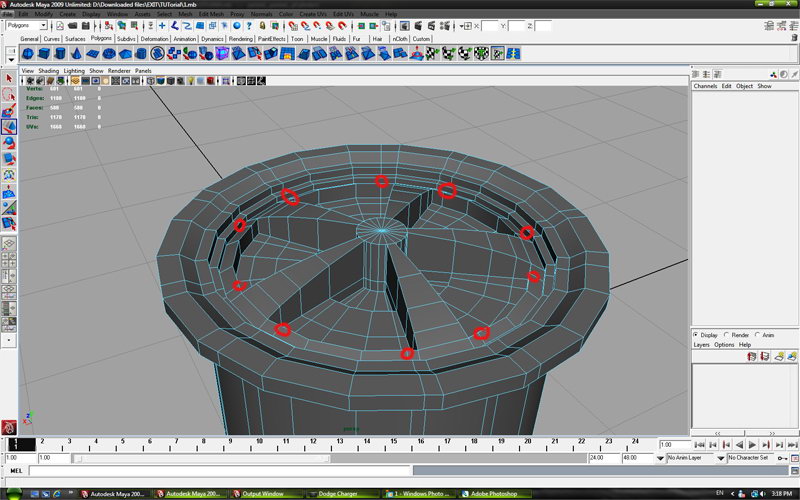
Step 19
Delete rest of the edges with “delete edge/vertex” tool and leave the edge marked od picture.
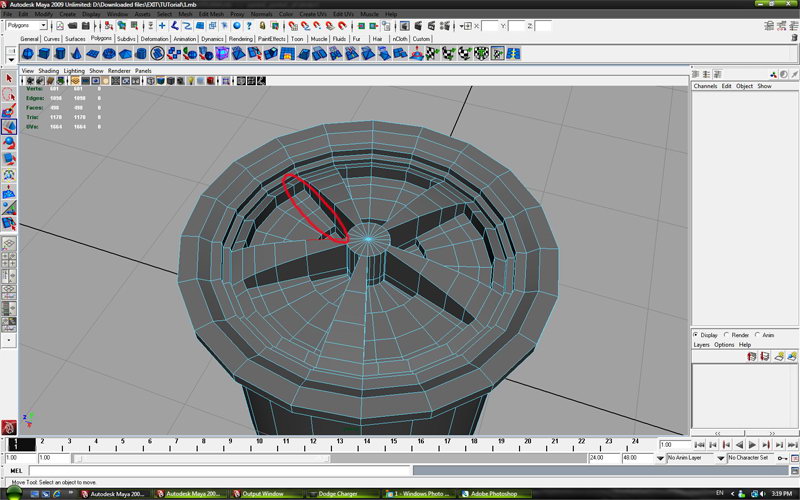
Step 20
Select faces.
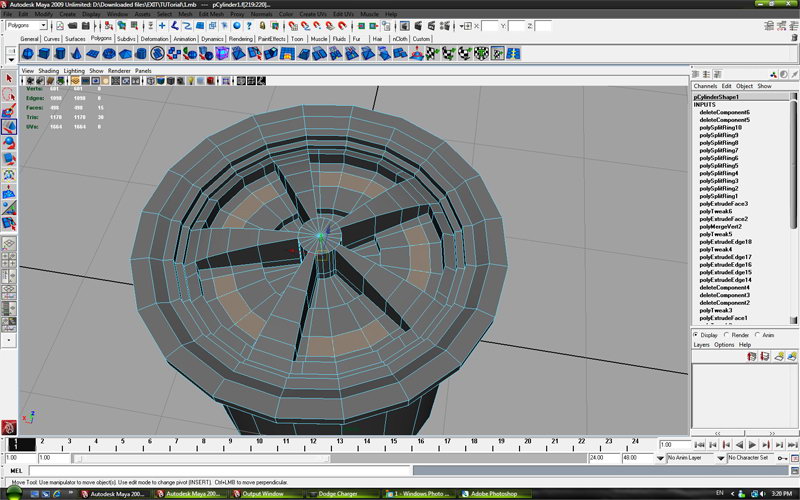
Step 21
Extrude faces.
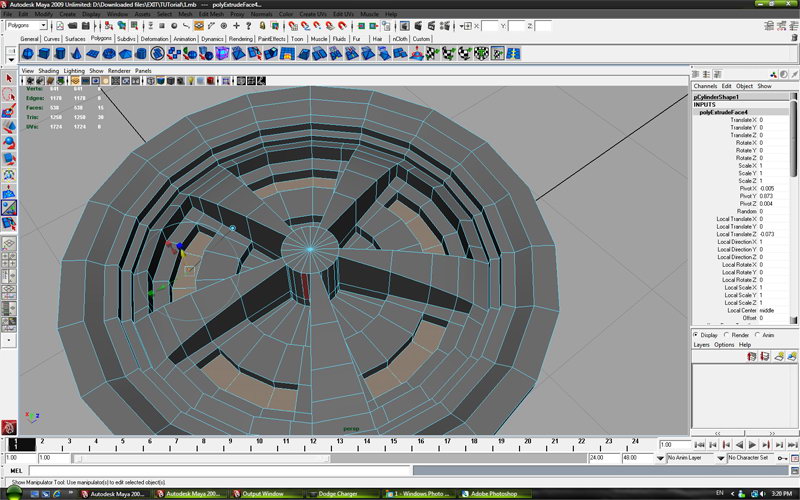
Step 22
Again extrude same faces.
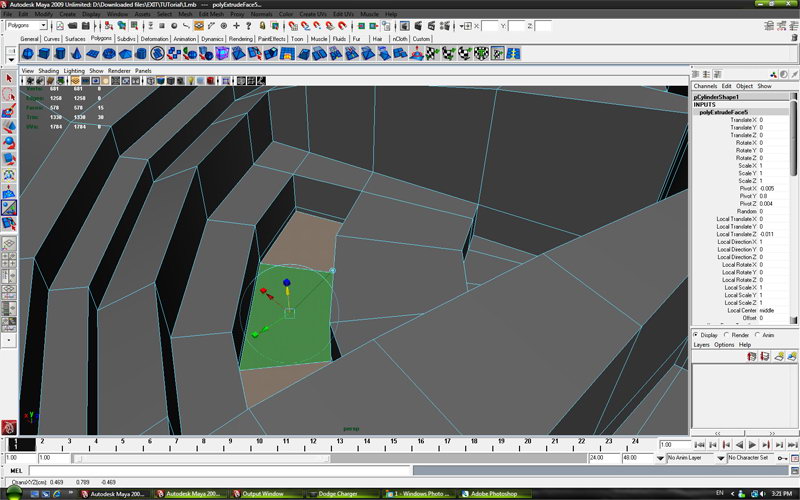
Step 23
Scale faces.
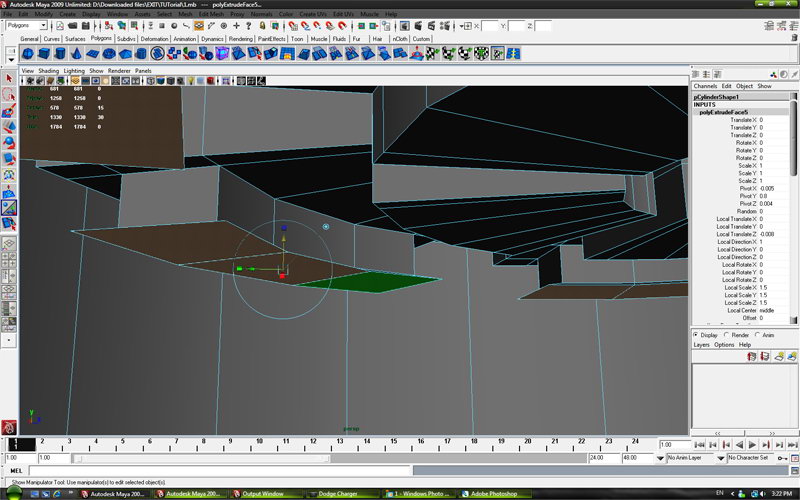
Step 24
Delete faces.
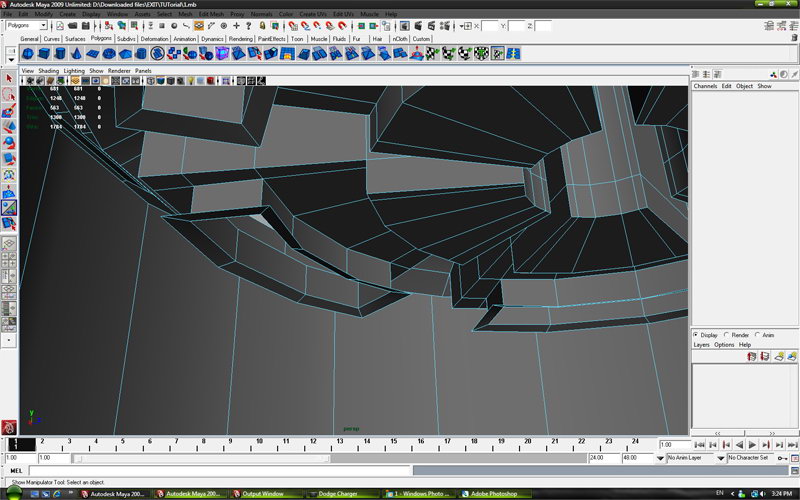
Step 25
Add edges with “Insert Edge Loop Tool” to look like on picure.
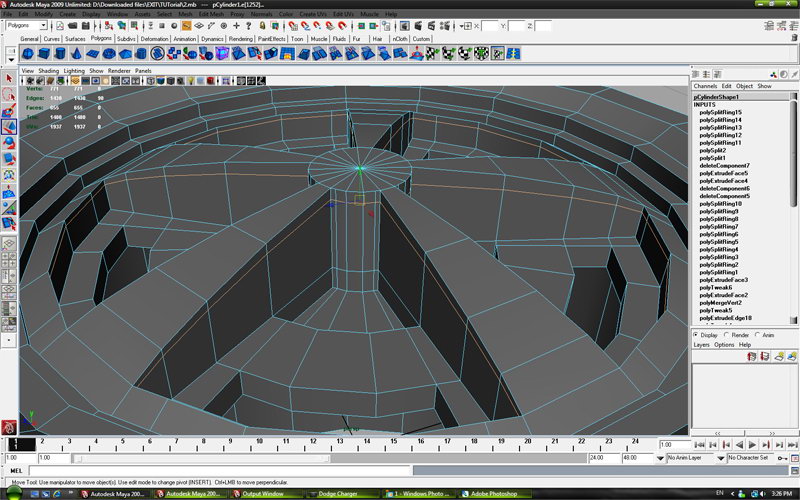
Step 26
Again add edges with “Insert Edge Loop Tool” on each hole.
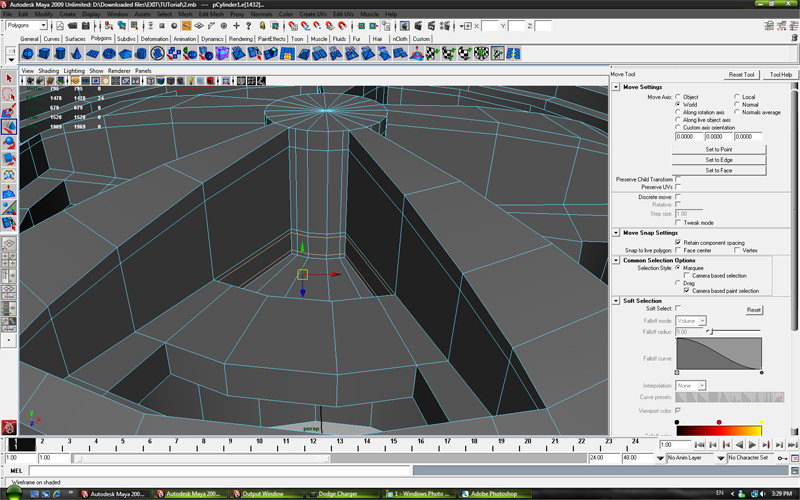
Step 27
Select 20 edges.
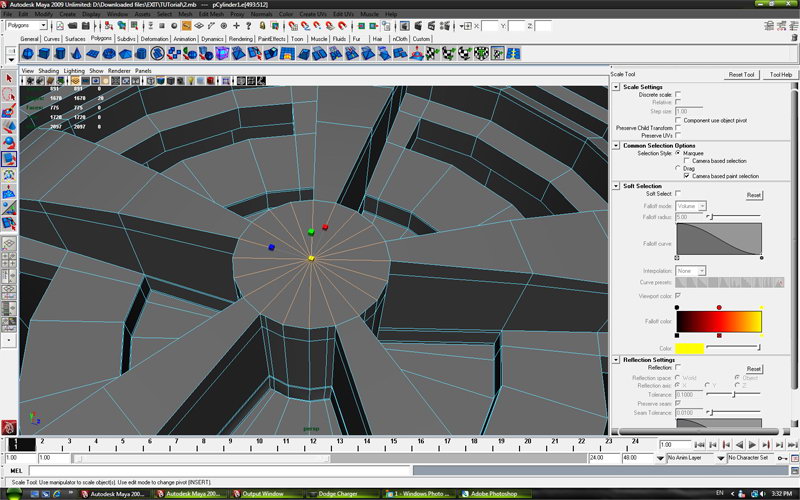
Step 28
When you selected edges go to “Insert Edge Loop Tool” settings and turn off “auto complete” and clik on one of selected edges, and when you done press enter on keyboard .
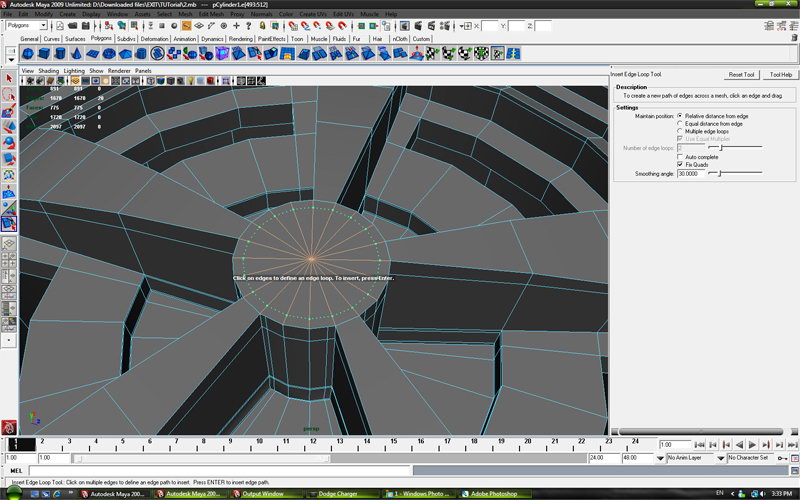
Step 29
Extrude faces to look like on picture.
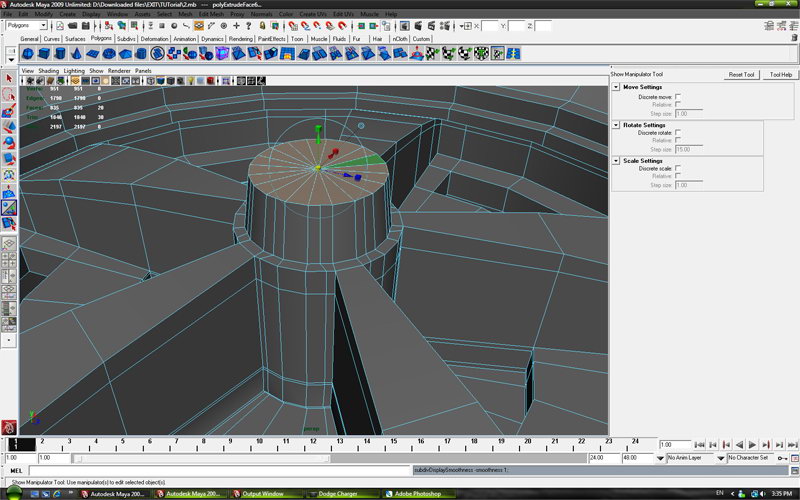
Step 30
Extrude again.
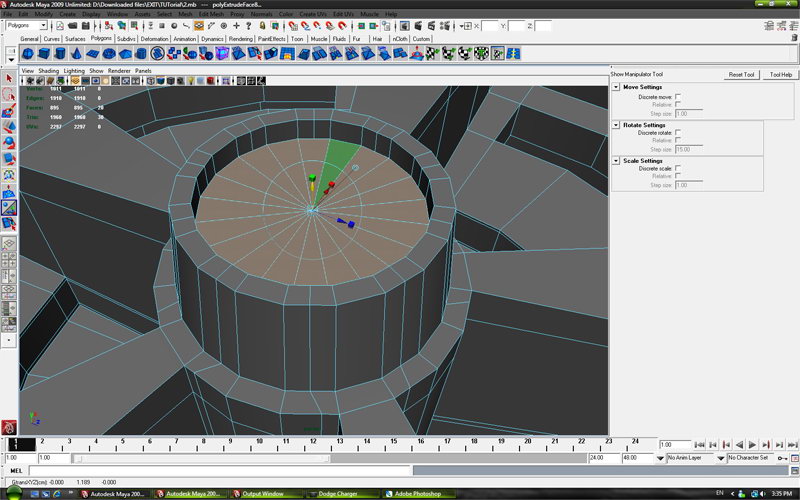
Step 31
And again.
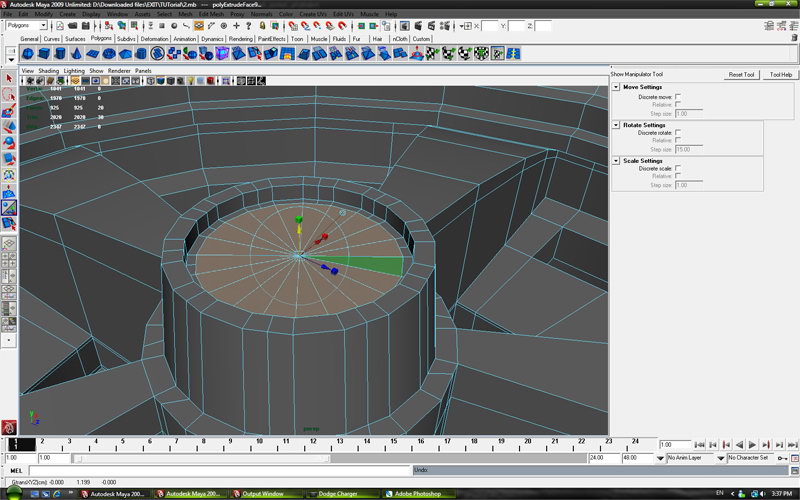
Step 32
And again.
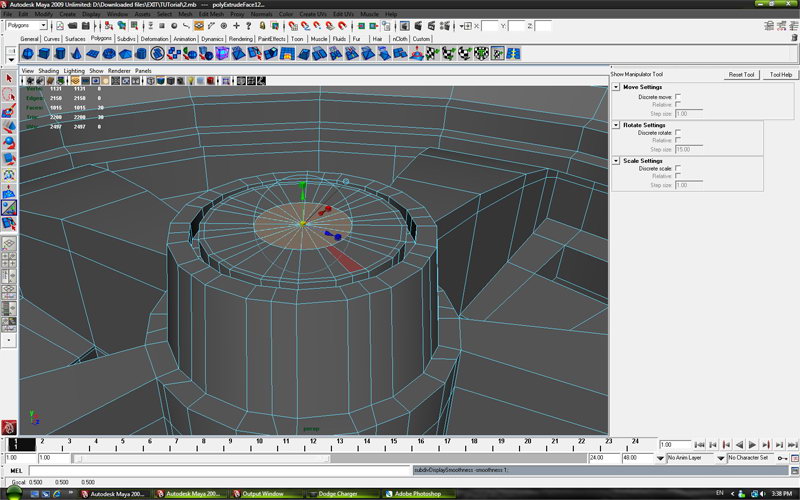
Step 33
Then selected edges pull down.
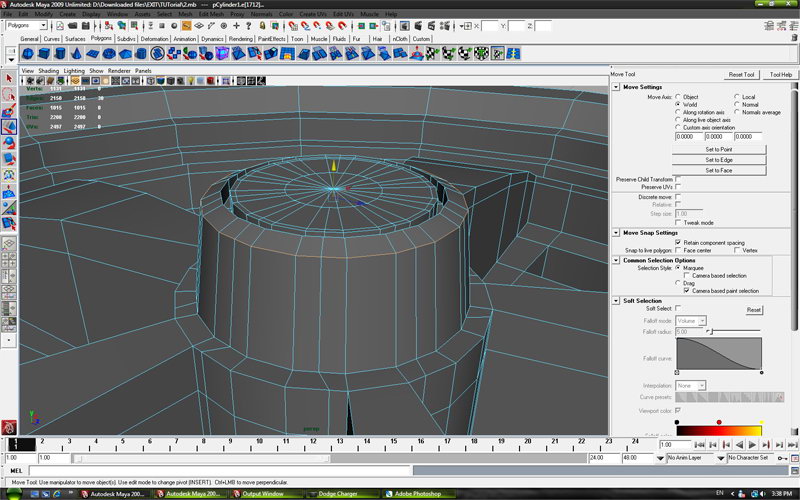
Step 34
With “Insert Edge Loop Tool” add edges like on picture.
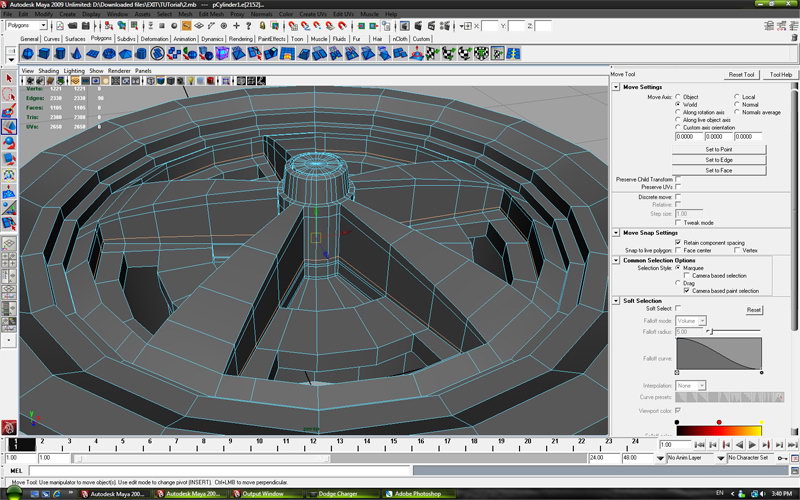
Step 35
Add edges on each hole to look like this.
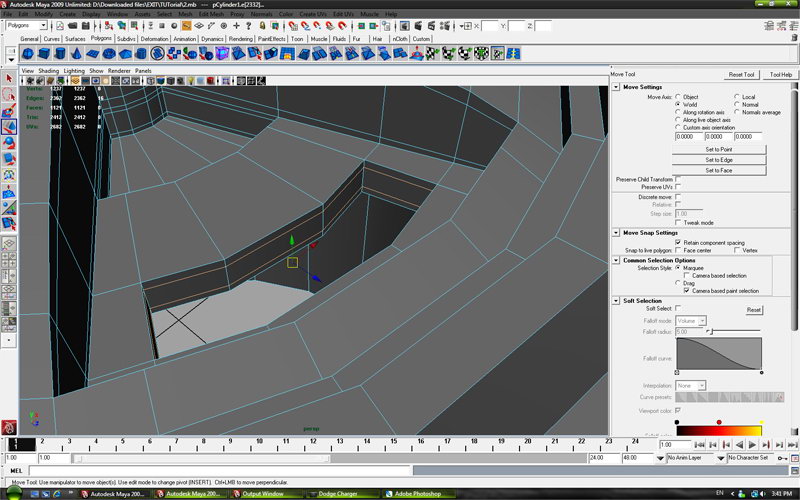
Step 36
Use “Insert Edge Loop Tool” to add edges.
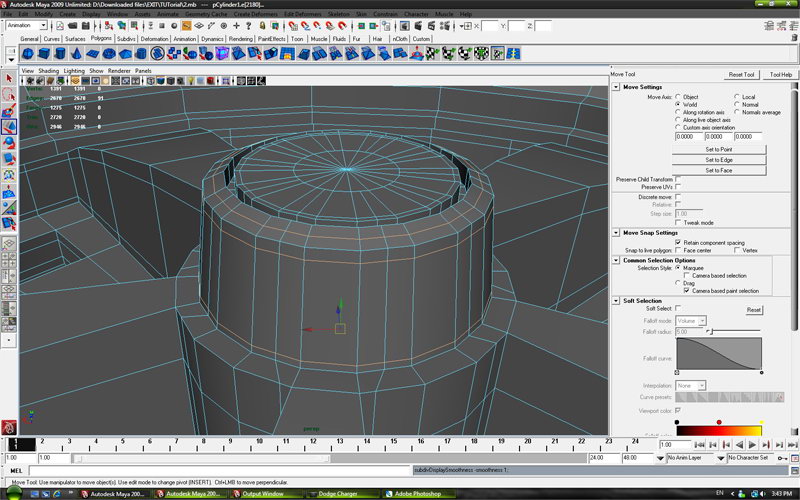
Step 37
Repeat procedure from previous step .
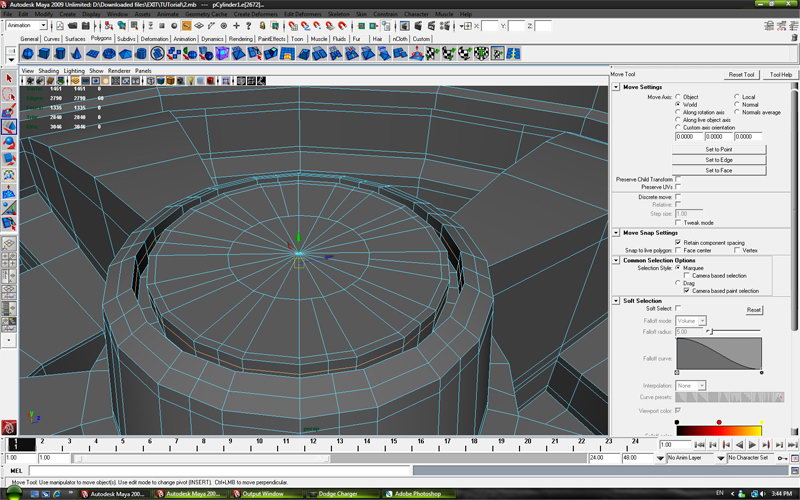
Step 38
“Insert Edge Loop Tool” again.
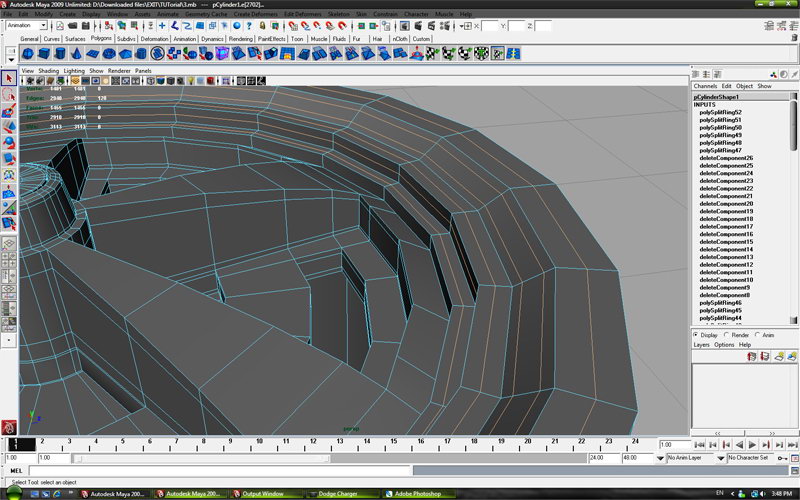
Step 39
And again.
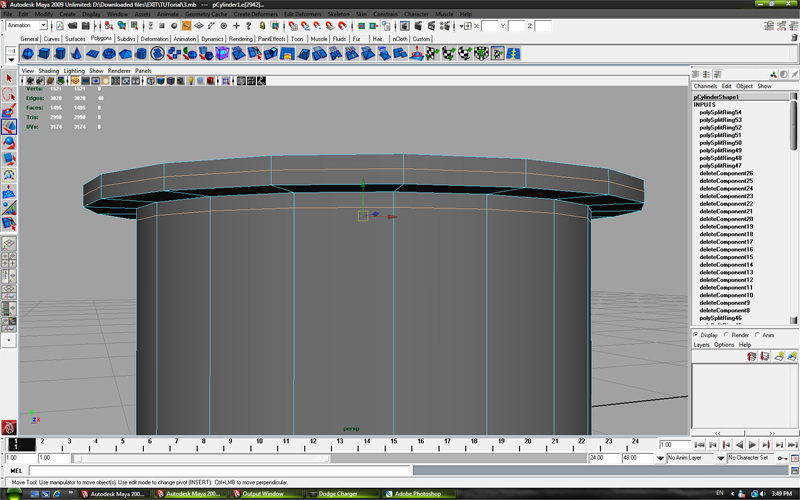
Step 40
Then create the new cilinder and place it like on picture.
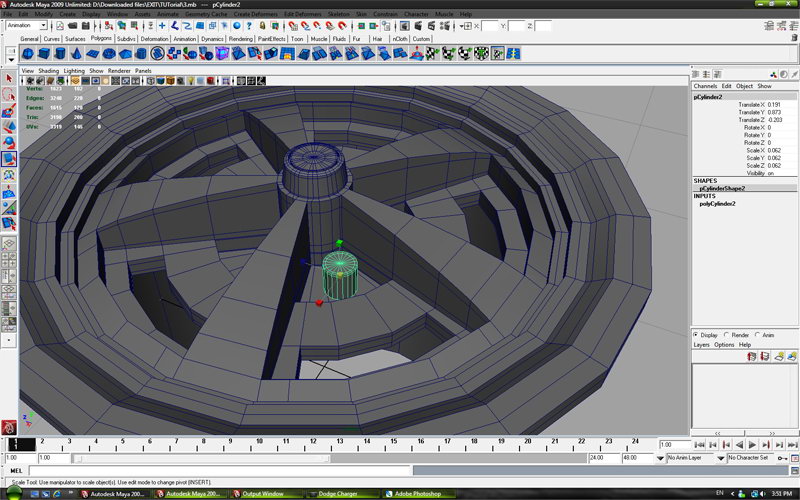
Step 41
Add edges to new cilynder.
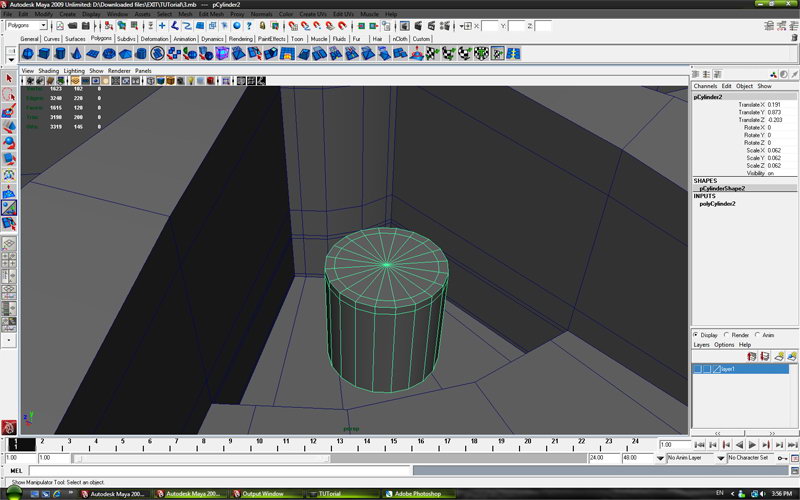
Step 42
Create new cilinder with 6 edges.
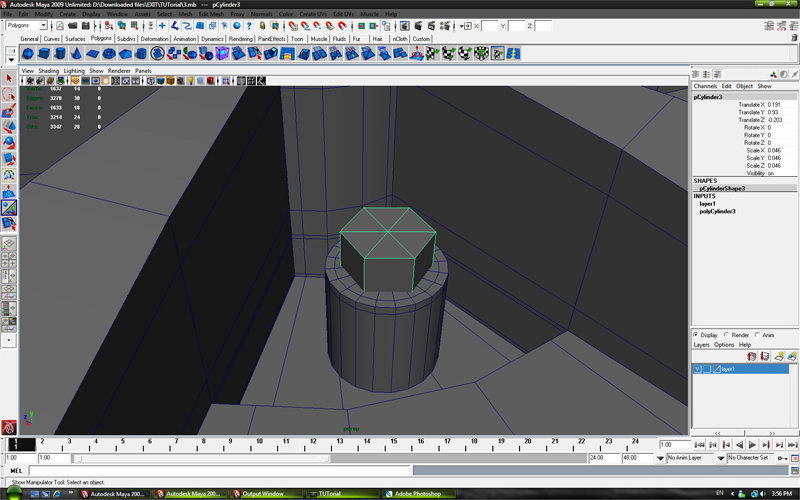
Step 43
On top edges apply Bevel tool with settings approximately like on picture.
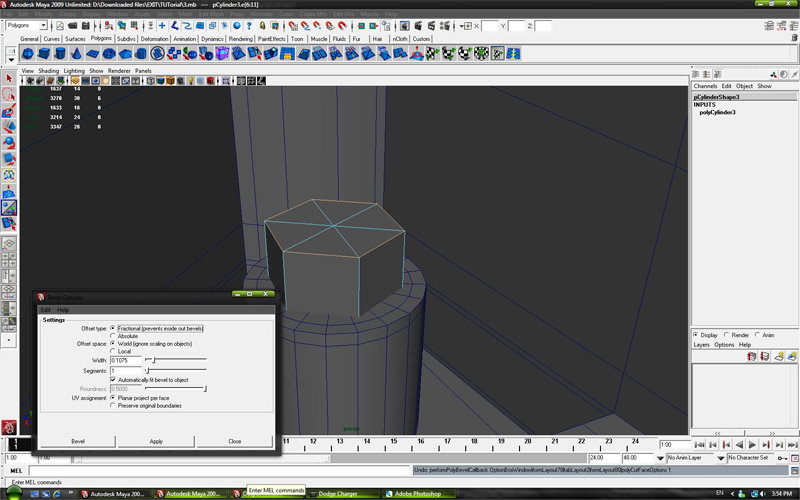
Step 44
Should look like the picture.
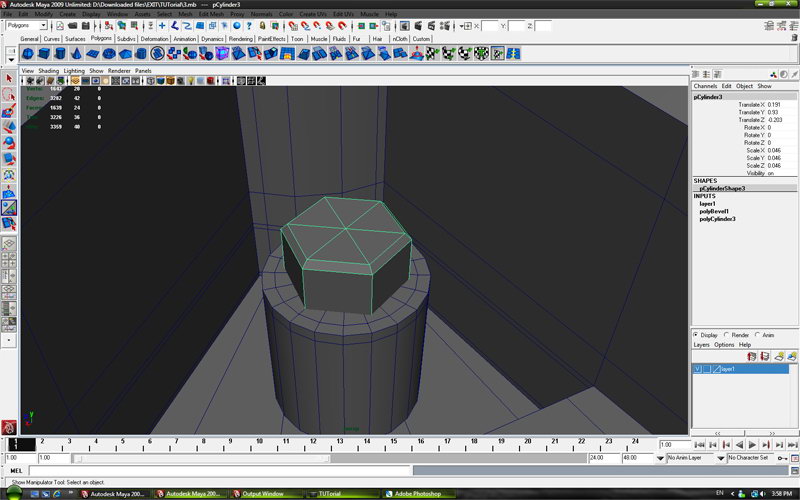
Step 45
Select all external edges and apply the bevel toll as shown.
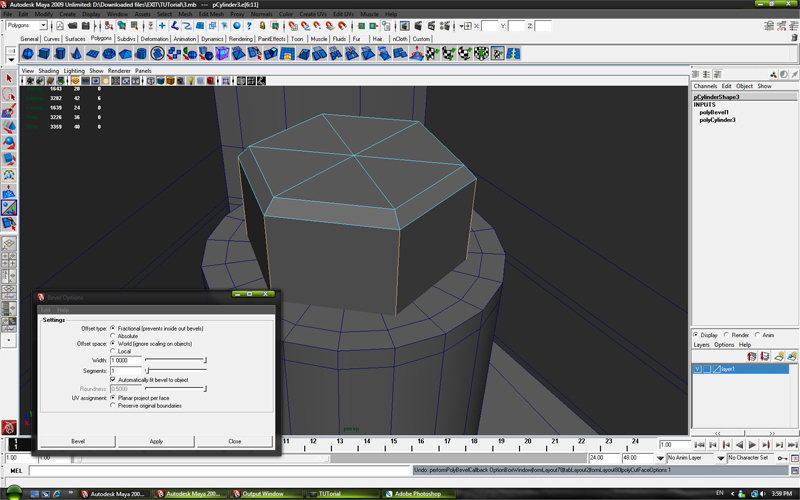
Step 46
Should look like the picture.
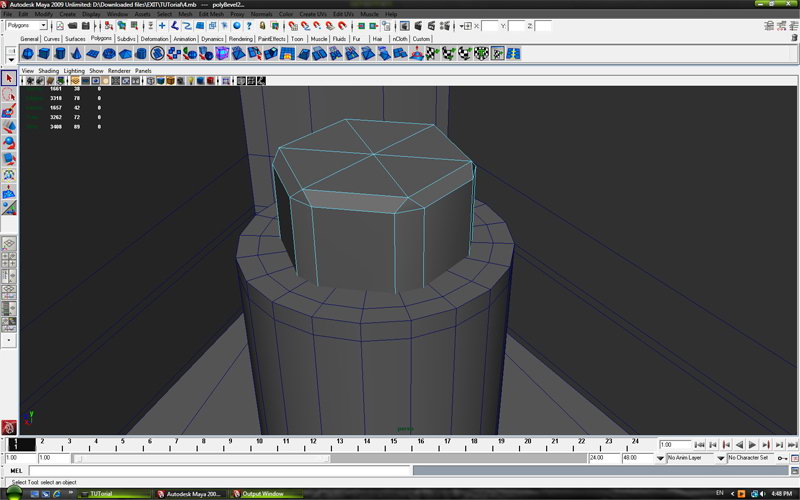
Step 47
Then create new cilinder to look like this on picture.
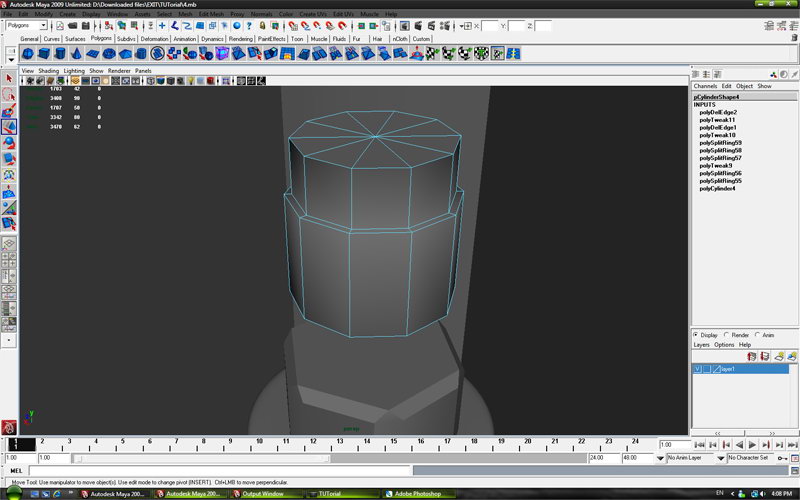
Step 48
Add edges with “Insert Edge Loop Tool”.
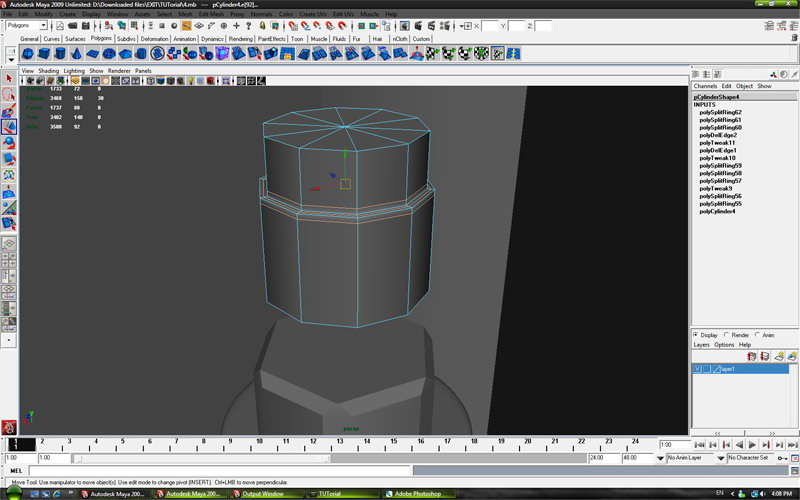
Step 49
Select center vertex and pull up.

Step 50
Last three cilinders set like on picture.
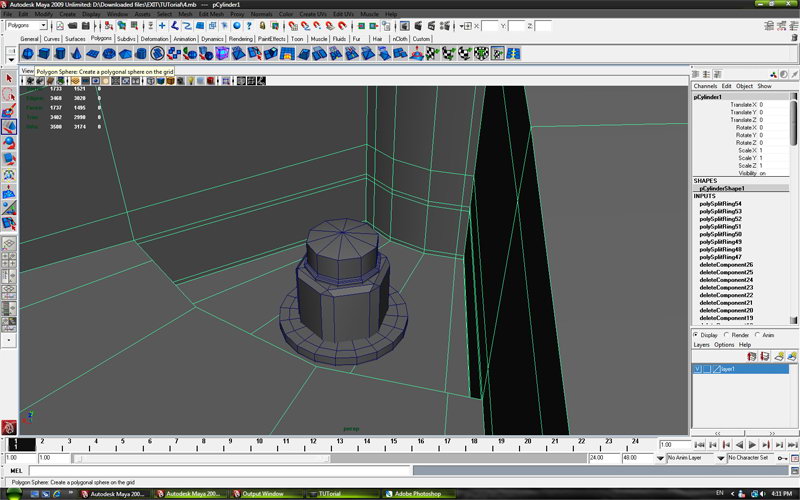
Step 51
Select last three cilinders and make group with (ctrl+g) on keyboard.
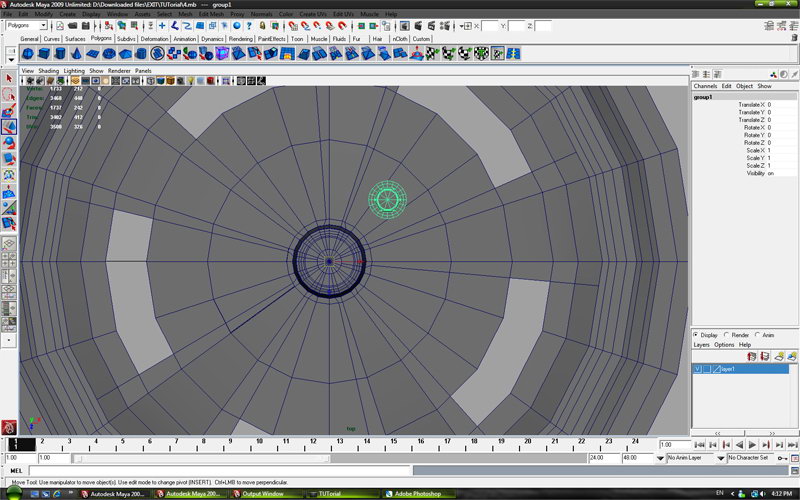
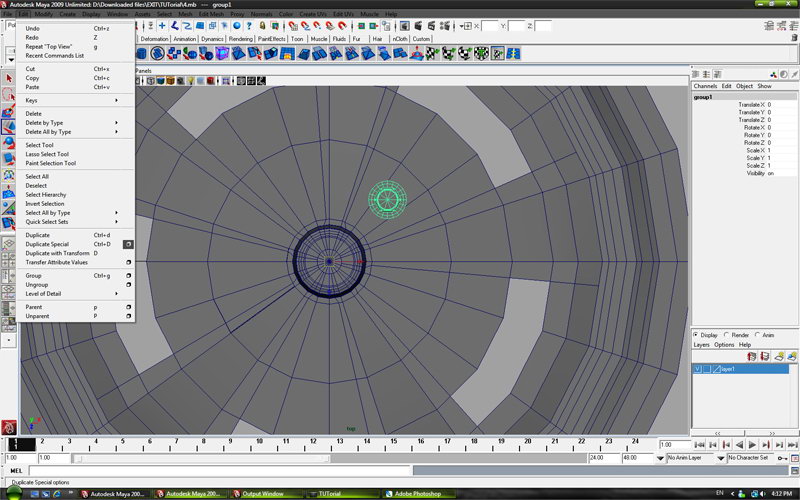
Step 52
Go to edit and press dublicate special settings .
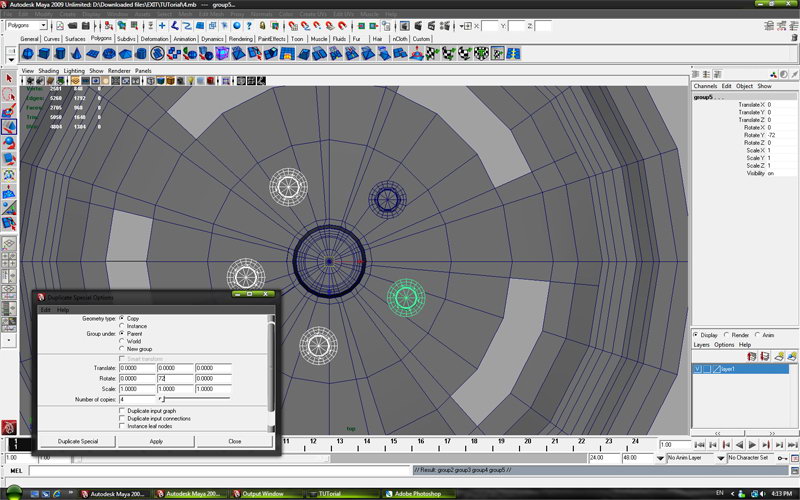
Step 53
Numbers of copies 4 , rotate y axis 72.
Step 54
Cover all cylinders as shown and press the number 3 on the keyboard.
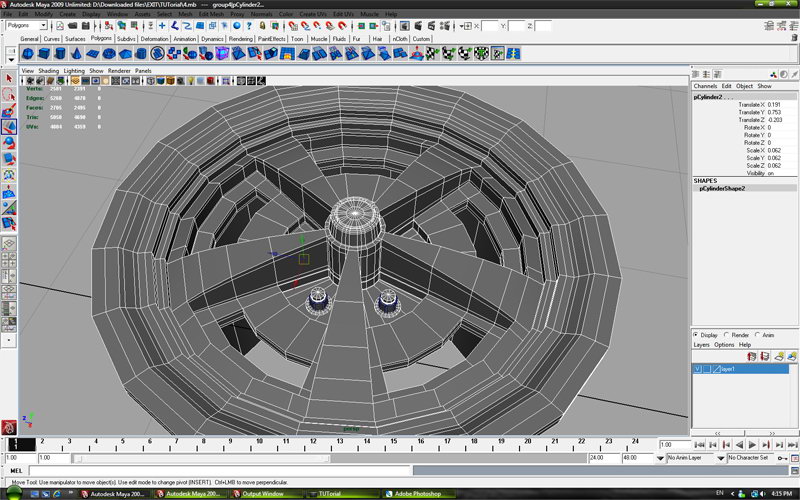
Step 55
Should look like on picture.
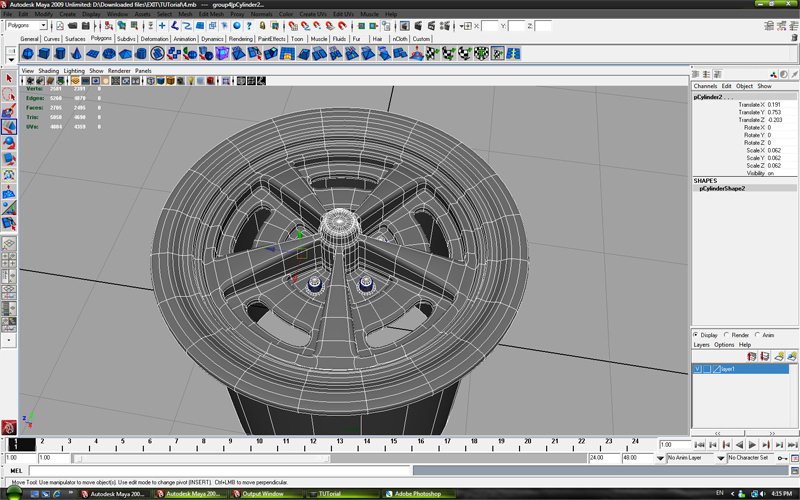
Step 56
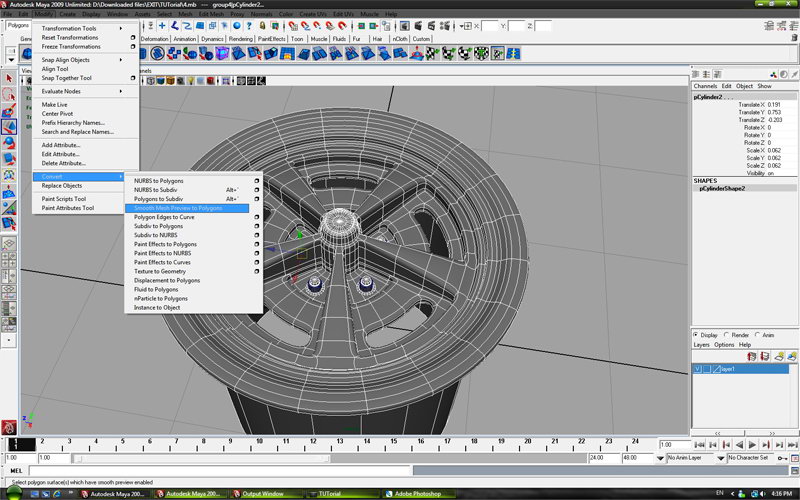
Go to Modify -> Convert -> Smooth Mash Preview to Polygons.
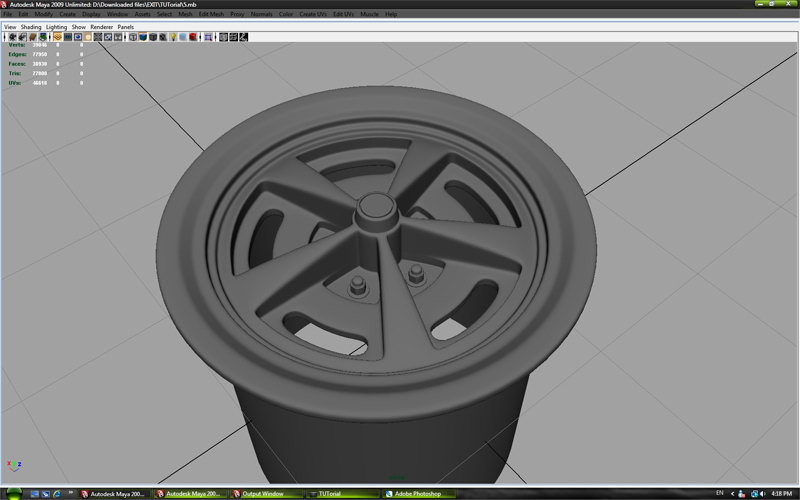
Final Result
 About the Author
I start with modeling in maya 6 months ago. This is may first tutorial and i hope you like this tutorial.If you have any suggestions please contact me on email: include91@live.com


