Proper tiling by Matt Vainio
|
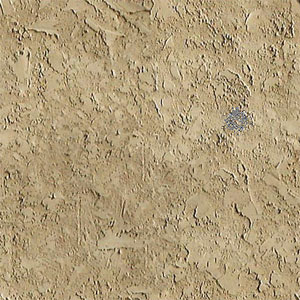
One of the most basic map texturing issues is how to have your texture tile seamlessly across the map. This has been covered in many tutorials before, but not everyone may know the best way to do this. For the purposes of this tutorial I assume you have a copy of Adobe Photoshop. I used version 6.0 so if you have an older version some buttons may be in different places. The functions should be there however. I’ll start first with an easy texture such as this wall texture on the right. Next I select a portion of the texture that I want to use. By holding down the SHIFT key I can select a perfect square. I try to select an area larger then what I want the final image size to be, since quite often the scale of the details in the texture will be too large in the game world. |
 The area I am working with selected |
|
Now, I quickly check the size of the image by hitting CTRL-A to select all then going to my info palette. Next I go to filter>other>offset to activate the offset filter. Make sure you have “wrap around” selected. |
|
| For the offset, choose numbers that are roughly half the image width and height to achieve an image that looks something like this. |  My offset image, note the visible tiling in the center. |
|
Now we can clearly see the tiling effect in the image, with the faint + shape in the center. So to counter this we are going to select the Stamp tool, which you can see selected in the right screenshot. One of the best ways to use the stamp tool is with an irregular brush, such as the one I have selected in the screenshot. A smooth airbrush style brush works as well, experiment with different brushes. The goal is to make the blending not noticeable. |
 Selecting the stamp tool and appropriate brush |
| Next we define a Clone point. To do this, hold down ALT and click an area you want to copy from. Like this screenshot has. |  Defining the clone point |
|
Then start painting over the + lines in your image. You can see how the brush takes information from the clone point and uses it on the area you are painting on. Using this technique you can touch up areas easily. You may notice how the image has different light/dark values across the image. Don’t worry, in the next tutorial we will cover how to get rid of that without excessive painting work. You may have to define more then one clone point, in fact is is recommended to alter the clone point every so often until you finish removing the tiing effect. Be carefully when you paint so that your brush is not over the edge of the piece. You may have to offset the image a second time if you go too near the edge of the painting, as you will make the edge visible again when you go untile the image. |
 Beginning to paint the tiling away |
|
Here we can see the tiling effect has been pretty much removed, minus some value differences. Now go back to the filter>other>offset and enter negative values from what you entered last time. So in my case I entered 210, 210. So I will enter -210, -210 and my image will return to the start position. This is extremely important when aligning trim to your images later – as you will see in the following tutorials. The tutorials were intended for Quake3 Arena modification development. |
 Finished – looks good huh? |


