The Making of Song Hye Kyo
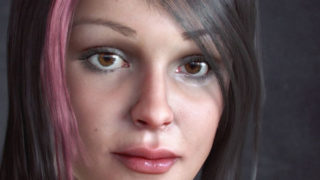
Max Edwin Wahyudi will show you the making of ‘Song Hye Kyo’ the Korean actress.


|
SHADERS AND TEXTURING I used SSS fast skin shader for the skin. All the textures were painted in Zbrush. As you can see, the textures are very simple. I wasn’t trying to make a photorealistic picture, instead I was going for the ‘airbrushed photo look’, so I can get away with just using simple and low res textures. HAIRS I used Hair&Fur for creating the hairs. For the main Hair I created different layers for every part that I think needs to be seperated. In order to make them renderable using Mental ray, change the hair rendering mode into ‘MR prim’ mode. As you might know already, The hair is very memory heavy and very slow to render. So, try to limit the hair count under 15000, unless you have a good PC.
|
|
|||
|
THE SMILE Basically I made the smile by bringing the mesh back to zbrush and start back from the beggining. Aside from using the ref pic, I also looked at my own face to learn about the facial muscle when smiling. After it’s done, I used the morph modifier to create the facial animation. FINAL RENDER
I posed the head, and added the earrings and clothes, I made them using 3dmax. For the lightning, I used same environment for scene 1, and changed the lightning setting a bit. And added couple photoshop touch up such as: That’s all, |
REFERENCES OF THE TOPIC |
|||


About The Author
You might be interested in