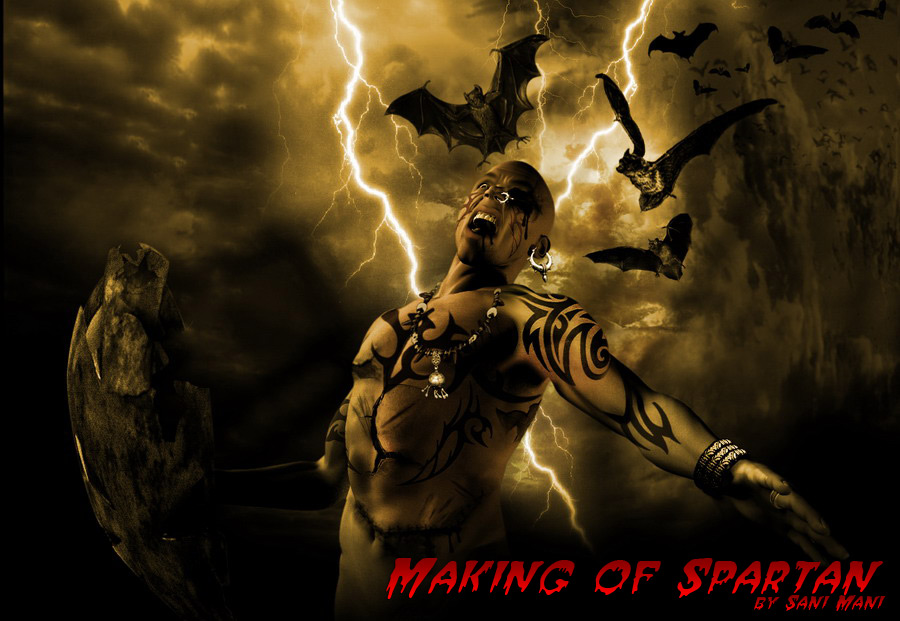
Making of Spartan
I did this work to explain to you the use of Photoshop brushes and the software Poser for image manipulation. I referred to a wallpaper of the movie ‘300’. The first challenge I faced was to create a human figure which I did using Poser.
|
I did this work to explain to you the use of Photoshop brushes and the software Poser for image manipulation. I referred to a wallpaper of the movie ‘300’. The first challenge I faced was to create a human figure which I did using Poser. Now, though it sounds simple, let me tell you that there was a lot of work involved…
|
|
|
I started my work with the image that you can see above. However, I wanted my figure to be lifelike and original. So I duplicated the figure and applied saturation mode on one layer and saturation mode on the other layer which gave me the next image |
But don’t you think he looks a bit too simple…well, I felt so too… So I decided to use Tattoos to decorate him as Tattoos help to bring in the tribal look effectively. I used tattoo brushes and warped it with Transform Warp tool to draw the tattoos which gave me the figure you seen below. |
|
Well, no warrior can be found without wounds, right. At least, so I felt, and to get the look right, I got the scratch marks, black eye and wounds on his stomach using few brush strokes. Now that makes him look like a true warrior. |
The next idea was to present him with ornaments and a shield. I created an earring for him, and duplicated the image of the earring to create a nose ring as well. Well, if you look hard, you will see that the necklace is also a combination of the earring image. To finish the look, I created a few bracelets as well as shield for him. Now, he looks ready to fight anyone who would mess with him. |
|
Now that the warrior was ready, I had to create a suitable background for which I came up with a nice sky texture… |
To accentuate the effect, for which firstly, I brought in the thunder effect into the picture which you can see in image below |
|
Secondly, I got the bats to hover around him by using an Adobe Photoshop brush which I applied once and copied a number of times, followed by transforming it which gave me next. |
But even though the warrior was ready to fight, I felt that there was something missing. Well, it was my favourite fantasy colour tone which I brought in by making a hue saturation adjustment layer and applying it to the figure, which gave me the final image |
|
I am Sani Mani, hailing from India, the mystique land known as the abode of culture. Though I work as a creative artist in IDG Media, where my designation is Web and Multimedia UI Specialist, I am someone who is immensely interested in Digital Painting and creating 3D images. Hoping to catch up with you later. website: www.sanimani.com |
|


