Tutorial “Depth of Field with Composition”
Depth of field is a cool effect that let you bring focus to particular object in the scene and blurring rest of the background and foreground.
Introduction
Depth of Field (DOF) works according to Z so distance is one of the important settings.
In this tutorial I am not going to talk about DOF technique in Mental Ray or Scanline. I just show the composition way for simulating this effect with 3DS Max and Photoshop. In this way you just need once render your scene and as much as you like try different distance for DOP. This way can be useful for style rendering and save a lot of time if you want show different distance to your client.
Notice that in this tutorial I used Mental Ray renderer but it can work in Vray or scanline as well.
So let’s start…
STEP 1
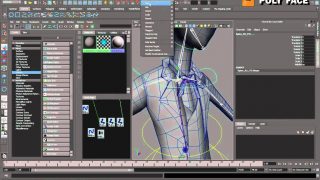
Open the below file or use your own scene.
STEP 2
This scene is ready for rendering. In camera viewport hit render button. Then save the rendered image with a format that can support alpha channel such as TGA.
Now need to get some information about depth of the scene. For this I used Z-Depth element. This element shows depth of scene in grayscale. The nearest objects appear in white, and the depth of the scene in black. Intermediate objects are in gray.
STEP 3
So open Render Setup dialog. In Render Elements tab, hit add button. From Render Elements list choose Z Depth (mostly in the end of list) and Click on OK button.

STEP 4
Now that Z Depth element added to your list, choose it and in bottom of Tab you will see Z Depth Element parameters rollout. Here there are two fields that let you setup the minimum and maximum distances. For this scene is changed Z Min to 20 and Z Max to 150. if you are using your own scene, should render it several times and change Z Min and Z Max values to get right numbers.
STEP 5
Now render scene again. But first uncheck Final Gather because we no need to use it now and it will cost render time.
After hitting render button, firstly scene will be rendered and then will give you z depth in another rendered frame window. Save it.

STEP 6
Open both rendered pictures in adobe Photoshop. While the z depth picture is active press Ctrl+A to select all frame. Then press Ctrl+C to save it.
STEP 7
Now active scene picture. In Channel tab select Alpha channel. Press Ctrl+V to paste z-depth to it.

If you zoom in picture you may find there are some hard edges in z depth. We need to smooth them before moving to next step.

STEP 8
While Alpha channel of the picture is selected in Filter menu, choose Gaussian Blur from Blur submenu. Change the Radius size until satisfy with result. In this tutorial I used 0.9 in Radius field.

STEP 9
Now in Channel tab select RGB channel. It shows your original picture.

STEP 10
Go to Filter menu and this time choose Lens Blur from Blur submenu.
STEP 11
In Depth Map Source select Alpha channel. Now if you click on each object or place in your picture you will find that the camera will focus on it and rest of scene will be blurry. You can also change distance with Blur Focus Distance. Radius will set the maximum and minimum amount of blurring. And in noise group can add noise to the blurry area.
In Depth Map Source select Alpha channel. Now if you click on each object or place in your picture you will find that the camera will focus on it and rest of scene will be blurry. You can also change distance with Blur Focus Distance. Radius will set the maximum and minimum amount of blurring. And in noise group can add noise to the blurry area.

So simply you could create DOF effect in any area of your picture with compositing 3DS Max and Photoshop. Just keep in mind that this composition cannot always work accurate.


About The Author
You might be interested in