All About Spline: Working with Sub-objects
In this tutorial I would like to talk about Splines in 3DS MAX.
Watch the video and then look trough the text for details
Tip 1
Each vertex in a shape can be one of these four types:
Corner: It will create a sharp corner. If the type of vertices be corner the segment between them will be a linear segment.
Smooth: it creates smooth continuous curves. But you cannot set its curvature. In fact the spacing of adjacent vertices determines its curvature.
Bezier: also will create a smooth curve but you can change curvature with its tangent handles. The curvature at the vertex is set by the direction and distance of the point to the vertex. also handles are locked and move together.
Bezier Corner: is same as Bezier but the handles are not lock. So you can move them independently.
If you right click on a vertex or a group of selected vertices you can see its tangents types in quad menu

Tip 2
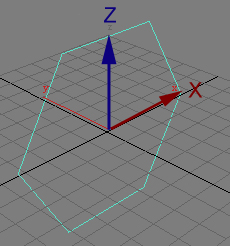
Sometimes when wana move the handles you will find it just can move in one direction. Same here the Y axis is off. The Y word is green color, when it becomes yellow means is active and u can move handle in that direction. In this situation just hit F8 to active another axis.
Another way is to right click on main toolbar and choose Axis constraint. Here also can select the axis.
Tip 3
In modifier stack you can select subobjects of your shape. Also you can find them in selection rollout. Keys 1 , 2 and 3 are shortcuts for selecting subobjects of spline.
When you choose vertex, then can find every vertex of your spline and move them or play with
Tip 4
You have learnt that vertex has tangent. Segments also have 2 types. If you select a segment and right click, in quad menu you will see Line and Curve. If you choose Line, the segment becomes straight line. So even if its end and start vertex be Bezier, will not have any effect on its curvature and the segments will keep as a straight line. It can be happen sometimes that you import shapes from Adobe Illustrator or AutoCAD. So just select the

Tip 5
the last things in this lesson , when you wana create a Line, in its Creation method you have 2 types of setting. On is initial, here you define when click in scene what type of vertex should be create. Corner or smooth and in Drag part just choose if drag in scene what kind of vertex should be create.
When u are creating a line it can be happen that you close to one side of the scene. In this situation for gaining more viewport space just hit I Key.
if creating a new vertex and wana back it just press backspace to let last vertex remove. if u repeat it will remove more vertices.
For stopping drawing line just right click.
Remember a Line because doesn’t have any parameters; after u go to modify panel it already


About The Author
You might be interested in