Modeling a Table
A table is super simple to model, it consists of just one modified box for the top, and four boxes for the legs. Let’s get started.
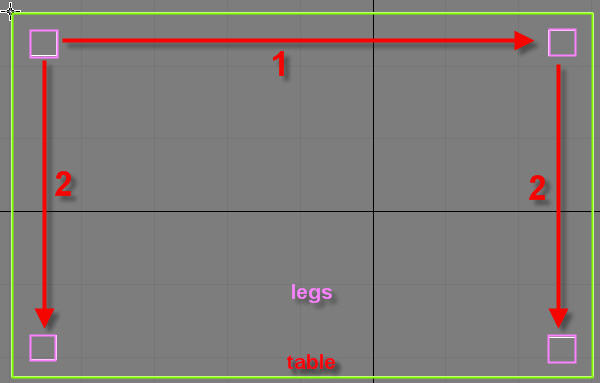
1) Create a box that is 50 by 80 by 1 units. And make sure it has only 1 length, width, and height segments. Make sure everything is exactly like the image below. This will be our table top.

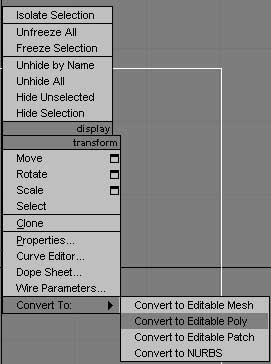
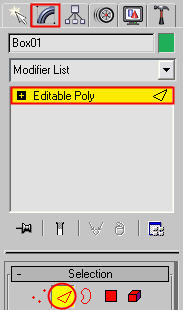
2) Go into the top viewport so you can have a better view. Then select the box, right click on it, and go to Convert To, and select Editable Poly.
3) Go to the Modify tab, click on Editable Poly, and select the Edge tool.
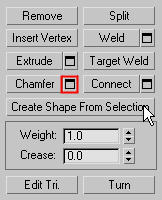
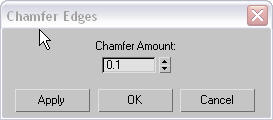
4) Select all the edges on the box, and then click on Chamfer. Put in the values indicated. Now your table top has smoother edges.
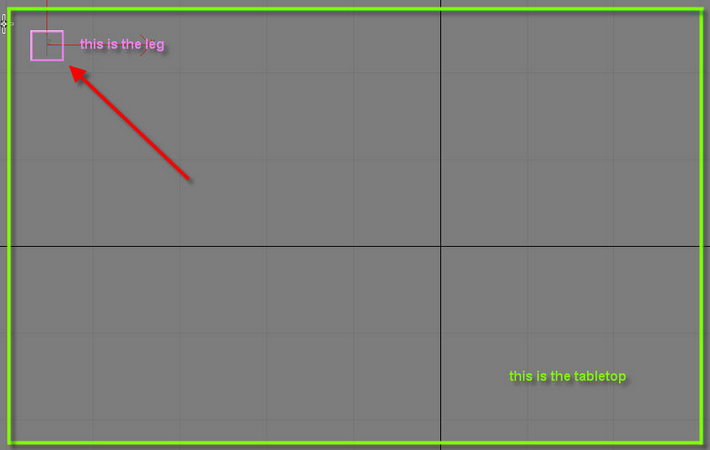
5) To create the legs, go to the top viewport, and make a box that looks like below, don’t worry about the height (make it anything you want) but make the length and width like the picture below.
6) Go into the front viewport and select the leg. Select the “Select and Non-Uniform Scale” tool which looks like this. Scale the height only, until it looks good. ![]()
7) Select the leg, hold down the “Shift” key and move the leg to the other corner. When a window pops up, select “Copy”. Now select the new leg and the old leg, hold down shift, and move them down to the other side of the table so you have four legs. Again select copy in the window that will come up. Now you have four legs.

Cool, you’re down. That was pretty simple.


About The Author
You might be interested in