Making of ruins by Lukasz Szeflinski
This time I wanted to concentrate on proper texturing and realism. It took me 5 months of my free time to create this scene. My main goal was to recreate the already existing environment in 3d as accurately as possible to achieve a high degree of realism, just like in the movie production. I knew from the beginning that for this work, in order to achieve the intended realism, I would have to put emphasis on textures. I started to look for an interesting existing environment that would be on the brink of exterior and interior. After I have found the right place I took a LOT of pictures for textures and reference. Additionally, I took the measurements to keep the right scale. All the textures were created from pictures I had taken with my digital camera (Canon Powershot A95). In this scene, there is no texture that comes from any internet source or texture libraries. In the end, the whole scene was around 840.000 polygons.
Here’s the reference picture I took.


Modeling
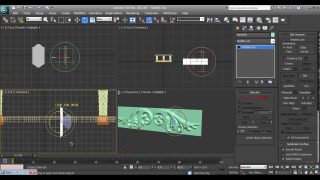
My main tool for modeling was 3dsmax 9. I have made some short movie captures of the scene so you can have a better look at how it looked like. The first rough model looked like that: click here
I mainly used basic polymodeling for all the objects and render spline for the hose and metal bars (sometimes sweep modifier). I was modeling and mapping basic things at the same time. I am always trying to use rendeable spline or sweep modifier on splines if there are any object that can be created with it. This is the best way to have things under control and it saves a lot of time.

When creating metal wire cables I started from creating the section of all 6 wires that are a part of the whole cable and a path. Then I applied Loft modifier and turned on Twist in Loft. It’s important to remember that the path not only should have its starting and ending points but it should also be divided into sections/units. Otherwise, when using Twist in Loft for example, we might have problems because the twist will not look evenly spaced. It will twist more at the beginning and less at the end. The problem can be avoided by dividing the path into sections/units. Here’s a short movie showing you how I did it: click here


I did the texture from an existing object: a wire wrapped around the main wire and then I straightened it up in Photoshop in order to make it tillable. In max, I used bump texture to displace the wire.

Roof tiles are also polymodeled on the basis of reference images. Then I mapped them using Zbrush because it was much easier for me than uvmapping them manually in max. Then I used textures from reference pictures in Photoshop and again wrap mode in PS to match the uvmaps and problematic areas, which I fixed again in Zbrush. Here’s movie showing roof tile model: click here. And fixing some texture problems in ZB: click here

I also modeled few junk props lying on the ground. All was polymodeling and on turbosmooth modifier at the end.

As you can see here, in the case of the chocolate drink box, I used FDD modifier to give it a bit of a smashed look.

To texture the hose lying on the ground I decided to use vertex paint in order to add all the dirty spots easily. This way I didn’t have to fight with uvwrapping.


In order to create textures I used pictures which I took with my digital camera. In Photoshop I straightened those parts of a photograph that I needed to use for texture so as to get rid of perspective. Here is an example:
On the left: reference picture. On the right: the picture after I have worked on it in Photoshop:

For this part I also used Photoshop Transform Wrap Mode to match the uvmap.
www.lukx.com/content/tutorials/ruinsMakingOf/media/ruinsPSWrapMode.html
When working with textures, people usually use different files for diffuse and bump maps. Using PSD file format in 3dsmax offers you the possibility to choose a layer that you want to use. Thanks to that I was able to have all the maps I needed in one PSD file (diffuse, bump, opacity etc.) and then I could choose a proper slot and layer in material editor chase. Unfortunately PSD files can get quite big so if you really need to save RAM I would still recommend using standard approach to saving textures.

It’s important to have full frame checked because otherwise if you forget to crop image in Photoshop it might be in wrong place on the uvwraped object. It often happens when you create for example a texture that is supposed to be 1024×1024 pixels and you drag the textures from other images etc. If you just save in the PSD a part of an image that is outside 1024×1024 boundary, the image will still exist if it wasn’t cropped before saving the file. This is example what I mean: click here
For an old broken wall I also used BodyPaint 3D in order to have a better preview of what I’m doing. Here’s a short movie showing the process: click here
The pictures I took with my digital camera were also used to create plants. I cleaned them in Photoshop and created opacity masks. Next, I created 2 planes for each plant so they did not look too flat.

Here is the example of how a few UVW maps looked like:

Final Scene wireframe:

Final scene preview: www.lukx.com/content/tutorials/ruinsMakingOf/media/ruinsFinal.htm
Rendering
I didn’t use any special tricks for lighting the scene. I just used one vray sun plus vray sky. The truth is that it’s all about good textures and materials.


Animation
Both the camera move and a hand shake come from a short recorded movie registered with my A95. I tracked the movie in boujou and then exported the movement into 3dsmax. Just a few tweaks and here comes the result: www.lukx.com/content/tutorials/ruinsMakingOf/media/ruinsAnimPreview.html
In order to render this animation I just changed the render settings in Vray built in preset for Medium Animation.
I put everything together in Adobe Premiere with Reel Smart Motion Blur.
To download final animation please click here: Download video file – ruins.mov (click Save as)
So there was a bit of modeling, a lot of uvwraping and a huge amount of work to be done on textures in Photoshop to get it all right. The final scene and animation were rendered using Vray 1.5.
I hope this overview was helpful to you. If you have any further questions please don’t hesitate to contact me via my website. Lukasz Szeflinski


