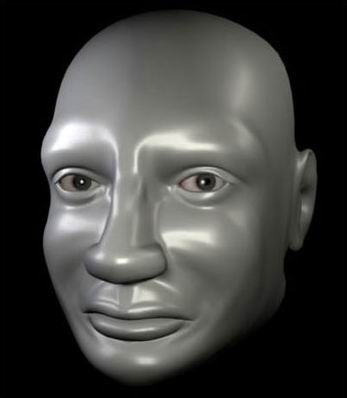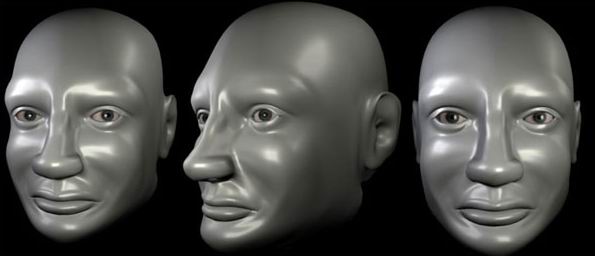
Modeling a head using Nurbs-Polygon technique by Sasan Rafiee

In this technique we first create a low detail head by nurbs patch modeling then convert it to a polygon object, then we add detail to it. The reason is that we have more control on the basic shape in Nurbs modeling and then we apply powerful tools in polygon modeling to add details. You should know the basics of modeling in Maya to do the modeling technique in this tutorial.
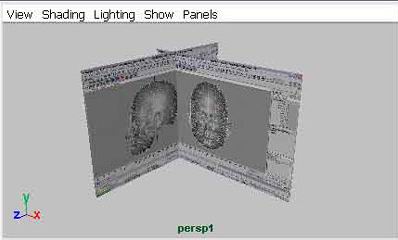
First create two planes in Front and Side view then project the images onto the planes as reference. You can find many high res reference photos at http://www.fineart.sk/
Draw the front and side profile of the head.
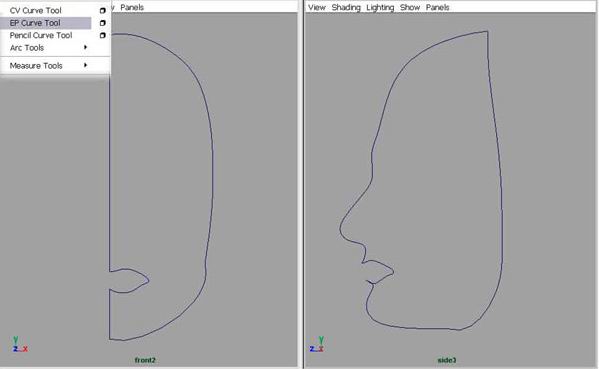
Then draw the curves that define the eye, nose and mouth and connect them.
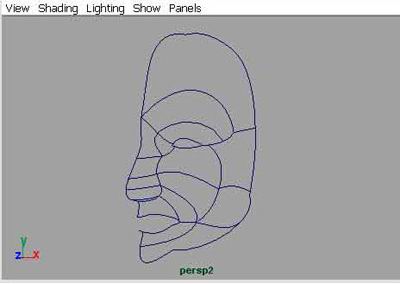
After drawing all the curves, select them and cut them from the intersects.(EDIT CURVES>CUT CURVE) Make sure to cut every curve, then Rebuild them.(EDIT CURVES>REBUILD CURVE) -use defult setting Start creating surfaces by selecting four curves (hold SHIFT for multiple selection) and apply Boundary tool. (SURFACES>BOUNDARY)
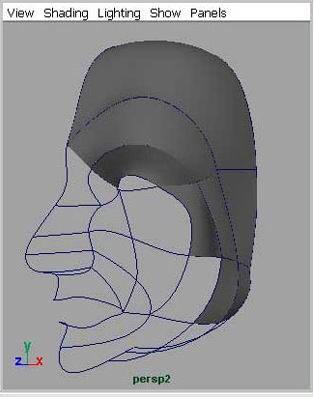
After you finished all the Nurbes patches, delete History.(EDIT>DELETE ALL BY TYPE>HISTORY) As you see , eye, mouth and the nose are very simple and low detail. We will add details later on polygon object. Select all the patches and convert them to polygon
Delete all of the Nurbs curves and patches. Apply Combine to the polygon head.(POLYGONS>COMBINE)
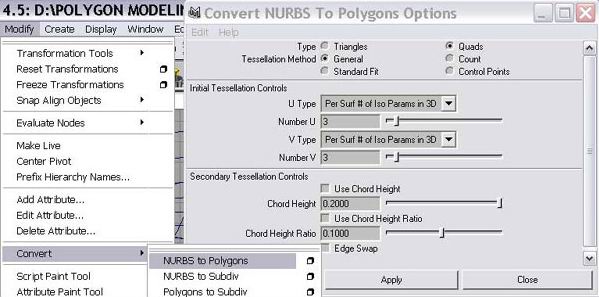
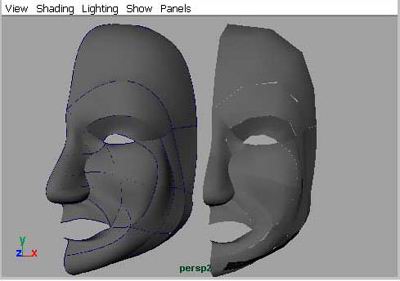
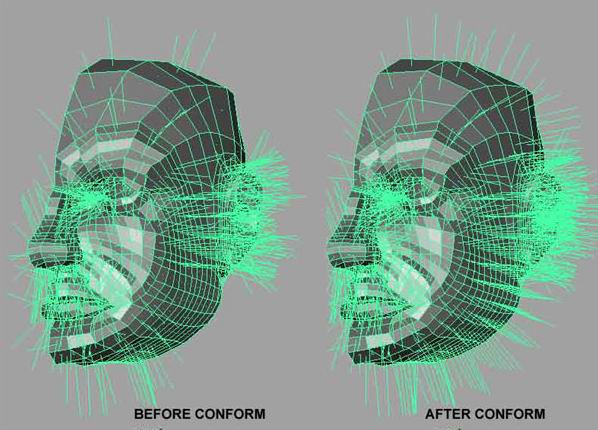
The vertices between the patches have to be merged, So select all the vertices and merge them using Merge Vertices. (EDIT POLYGONS>MERGE VERTICES) Adjust the Distance between 0.1 and 0.4 . It depends on your model and distance between the virtices. In some case, you should merge two virtices manualy. (Be careful not to merge wrong vertices.) Some face Normals are in opposite direction, select all of the faces and apply Conform to make all the normals piont in a consistent direction. (EDIT POLYGONS>NORMALS>CONFORM) (Use EDIT POLYGONS>NORMALS>REVERSE to reverse normal direction.)
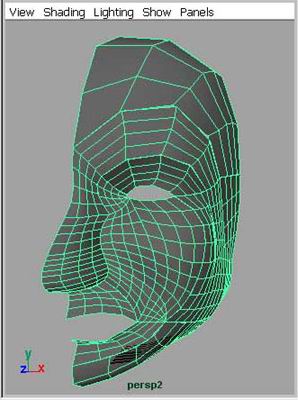
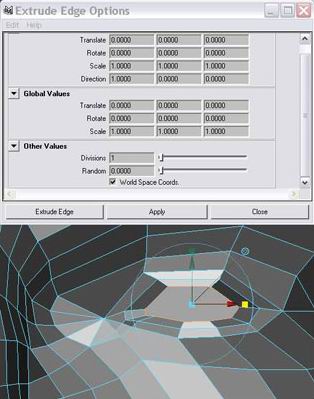
Time to adding details to face. Use Extrude Edge to extrude inner edge of the eye. (EDIT POLYGONS>EXTRUDE EDGE)
I scale the extruded edges to shape the eye and mouth. Another way is to make the face components then attach them to head.
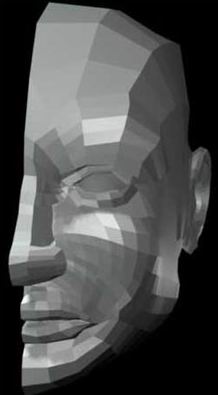
You can find many great tutorials in WWW.3DTOTAL.COM to model components of the face. There is a way to see the result of the polygon object in smooth mood as you adjust the vertices on the original head. Make a Duplicate of the head.(EDIT>DUPLICATE) Select Connection Editor.(WINDOW>GENERAL EDITORS>CONNECTION EDITOR) Load the Shape node of original head to outputs window by clicking the Reload Left button then load the Shape node of the duplicate model to the input window. connect the OutMesh from the output window to InMesh from the input window. Smooth the duplicate model.(POLYGONS>SMOOTH) Now when you adjust a vertex on the original model you can see its result in smooth mood on the smooth model. (duplicate model)
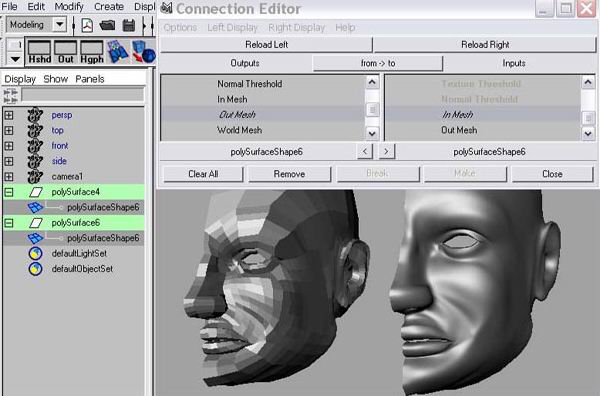
After you complete the head and its component, delete the smooth head. Select the original head and apply Mirror Geometry..(POLYGONS>MIRROR GEOMETRY)

Select the vertices of the middle of the head and merge them. (use Merge Vertices)
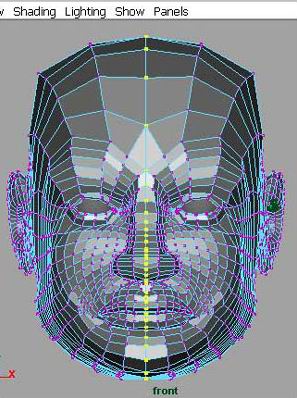
Smooth the model..(POLYGONS>SMOOTH).

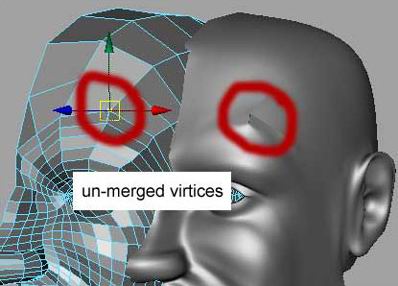
If you noticed any problem check the vertices. some of the vertices may remain un-merged.
I hope this tutorial was useful. If you have any questions or remarks please contact me at: info@3draf.com
