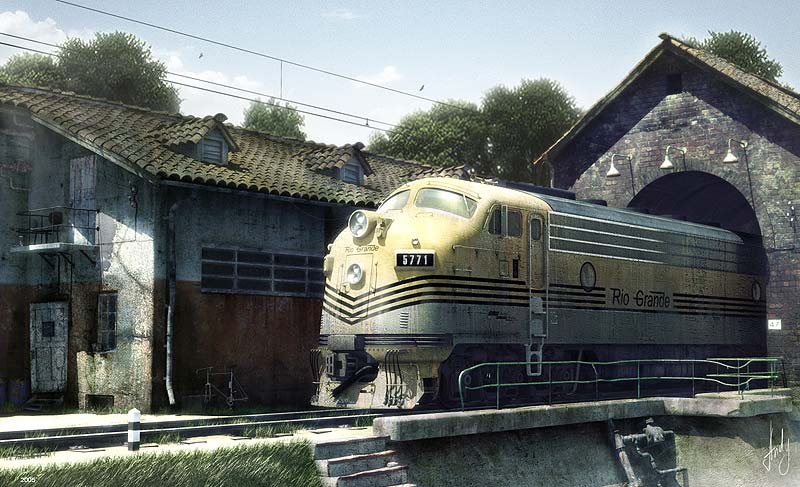
The Making of ‘RIO GRANDE’
 |
|
August 31, 2005 | Stryker This tutorial includes the most interesting and complicated steps of making the scene. The idea to create RIO GRANDE image came up to me while I was watching small copies of locomotives and steam locomotives at a shop. So when I came home I’ve decided to make one of these machines. And now let’s talk about making of the scene. I think that the best way to explain all the details is to show the sequence of images with breif descriptions for them. So more images are included and less words.
I’m sure that methods used to create the image do not differ much from those used by the most part of the modelers. Just take a look at this wire and skylight layer pictures to understand how everything is built up. The whole scene:
A close-up view:
A Skylight layer:
I haven’t worried about polygon count because I wanted to create a static image, not an animation. The model of a train isn’t the cleanest one so polygon count of it is quiet large. |


|
Lighting in this scene is very simple; it consists of one direct light only. Here is a picture with different views of the scene with light source in it:
As you can see from the image above, direct light have quiet simple settings. The most important is that multiplier has been set to 1,5 to create light like in summer shiny day. Color for this light has been set as the pale yellow to simulate the sun. Texturing was more difficult stage because scene contain many objects. Moreover all textures for the locomotive and walls are 4000×4000 pixels. Parts of the train texture:
Texture of the walls on the left:
To add some dirt for all the windows in the scene I used blend material with a mask(black color is a glass material and white color is a dirt ):
Also I have used some of 3d total textures like this one:
Then I have created bump and specular maps for all textures. You can see an example of the textured trains with different color without dirt on the following images:
|


|
Rendering of the scene was the most complex for me because of my hardware limit (Athlon XP 2400+, 1 gig of RAM). I had to render my Masterpiece :) by layers. So I rendered out diffuse, skylight, direct light, specular, z-depth layers, and the same layers again with an additional reflection layer for the train to composite it in separate way. I created following image for those people who wants to learn how to render by layers with Brazil :
This is my favorite part of image creation process. I shutdown Max and start Photoshop. Then I began to collect all layers together. Here they are:      
(from left to the right: diffuse, skylight, direct light, specular, train reflection, train specular).
|


|
Software used: 3ds Max7, Brazil r/s 1.2.56, Photoshop CS. Hope this article would be useful for you! Author:Yamkovoy Andrey
mail:sheff@pisem.net 3DM models creation |


About The Author
You might be interested in