Making of an Anemone in Realflow
In this tutorial, I will try to explain how to make an anemone in RealFlow.
Hello everyone. My name is Jalo and I’m an Art Director in an Argentinean agency and a 3D instructor. In this tutorial, I will try to explain how to make an anemone in RealFlow. It is important to clearly understand what it is that we are trying to create, so it is necessary to at least quickly investigate of the subject of our attention.
So search for some anemone reference images to get an idea of textures and the artistic touch you would like to pursue. Investigate a little the morphology and aspects of anemones and, after studying, try to draw one. It is an exercise that always I make… it is a good beginning.

Now it is time to create the base. We use 3ds Max and we start off with modeling a box. Add noise and two bend modifiers. Bend the box from two different axes to obtain a ball shape. asdasddasdad


Eliminate the unnecessary faces from the back of the cube. Once we obtain the correct shape, we exported the object as .obj to the archive. Be sure to use triangular faces: it is a golden rule to be able to obtain good results once inside RealFlow.

Inside RealFlow: the first step is to define the folder we want to work with and the second step is to define that the axes in the “Preferences” tab are the same as in 3ds Max.


The next step is to define if your scale will be of 1.0 or 0.1. In this case it is best to leave scale at 1.0. Our simulations will be better with this scale.

Import the box .obj from the archive into RealFlow.


Create a Fiber emitter. This type of emitter lets us choose if vertices are going to generate fibers, such as hair, canes or in this case, anemones

First we choose the object.

In the “Node Params” field, we can choose the Length, Stiffness, etc of the fibers. But first we need to define which vertices are going to generate these fibers. We don’t want the whole surface to be full of fibers; we just want to select some single areas. In this case the idea is to generate an empty space, surrounded by randomly places tentacles.

Once we have defined the areas that we want to generate fibers, we create them with the “Create” button.


If we are satisfied with the generated areas we could move on to simulate the scene. But we need to add to daemons like gravity to produce a dynamic simulation. So we add a gravity daemon.

Simulate. We see that the fibers by effect of gravity fall to and collide with the ground.

This is of course logic, but it is not what we are looking for when we want to create anemones in the sea. The density of the water and their form make the anemones look like they are without gravity and controlled by the mass of the water. So we are going to rotate the gravity upwards to obtain the floating effect of the anemone arms. Simulate.

This is a good beginning but, it is not the end. We have to create the sensation of the mass of the water affecting the anemones, and in addition we have to produce the effects of the waves and water streams.
The first step is to animate the gravity in both its axes X and Y. The animation of this gravity must always take place with a type of inclination, because the sea currents do not change so quickly from one direction to another one. What we are reproducing is only a short take of the ocean so there is not too much change in direction.
To do this, we go to “Node” and do a right-button click on the track of X. Create key frames at Time frame 0.

Go to frame 120. Animate X to 85 degrees in frame 0. Turn X to -30 in frame 120 and to 85 degrees in frame 200 again.
Animate Y to 45 degrees in frame 0 and turn Y back to 10 degrees in frame 120 and again to 45 degrees in frame 200.
Simulate.

We have to create a loop of the animation and to do that we use the “Curves Editor”. In the “Node” pane a right-click open the Curves Editor. We are going to visualize the curve.


In order to create a loop of the animation, we go to “Envelope” and we choose “Loop” in “Post-behavior”.

However, to obtain a more random loop we can also create one directly with the mouse. Double click on the keyframes line and draw a random and constant curve. This gives much more loop with greater realism.

We do this same for the Y-axis.

Simulate.

At the moment we get a good effect with the incidence of the masses of water with the anemones, but nothing is happening with the arc on fibers. So we will add three “Noise Field” daemons to the scene.


Once added, we turn on the “Bounded” option which will restrict an area and we distribute them over the surface to create different fields from the arcs, to create randomness.

Before simulating, we are going to edit the parameters of “Strength” and change the “Scale Factor” for the three noise fields.


Then we randomly animate the rotation of the gravity and the Strength of the Noise. Take as look at the Curve Editor of Noise Fields.

Simulate.

Now we have defined the animation of the anemones. Add a “Mesh” to the scene from the command icons panel inside RealFlow.

In Nodes, right-click on “Mesh” and we see that the only emitter that there is in the scene is “Fiber”. Right-click on “Mesh” and select “Build”. This creates our scene.

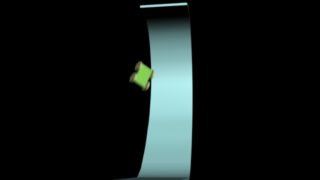
Without the floor Mesh, our Mesh is defined by the layout of Fibers. Generate the Mesh… first you deactivate this and build the Mesh again.


Now we have a more rounded form cleared of the tentacles. We do not have a floor but only a membrane that integrates the tentacles with the floor, like a system of Metaballs.
To make this, first we remove the Mesh of the floor from “Global Links”.

Add a Realwave to the scene. In the commandos of the Realwave layout, we select “Custom” and in Custom .obj we select the Mesh of the floor.


Now, the important part is in the options of Realwave. We select “Particle to Layer” and put it on “Yes”. This will make a distribution of particles on the ground, fixed particles that will serve to add it to the Mesh Builder.

Add both emitters of the particles to the Mesh, and right-click on “Mesh” in Nodes, Build.

Good… although one does not see it, parts of the Mesh are being generated. On the floor the particles are much separated and it is necessary to edit them.
Select the emitter of the floor in the Mesh emitter, in this case, the Realwave emitter.

Edit the parameters of “Radius” and the amount of “Blend” between these particles. Use a Blend factor of 190 and put Radius on 0.09.

Now there is a problem: as this is a system of Metaballs, if the tentacles are joined too much they will stick together. The best thing than we can do is to select the Fiber within the Mesh Builder and lower the Blend Factor to 0.00001 and the radius to 0.11. This will keep the tentacles from sticking together too much.

Before exporting and generating the file BIN to 3ds Max, generate a Mesh dense Polygon with size 0.03 and activate two other parameters…
Intro, Mesh options.
Filter: Yes. Put “Relaxation” on 0.07 and “Tension” on 0.1 and “Steps” on 100.
Optimize so that the flat zones smooth: Optimize, Curvature.


Simulate, but in the Mesh option node choose “Build, No”.
To only generate the simulation of the fiber, choose the frames you like for us to test first. Render and put the “Node on mesh” option on “Yes”. Then click in “Build” again and generated a single file BIN.
In this case: frame 357

Once we have exported the BIN, we check it in the folder we are working with for RealFlow. Import into 3ds Max. Command panel “Next Limit”. RF LOADER. We select the BIN and create the Mesh.
With the “Create Mesh” button, we go to the frame in 3ds Max that corresponds to the generation of the Mesh in frame 357 in RealFlow, which should show this Mesh:


Once we have found the Mesh in the scene, we activate the “Hold” button from the options on the Mesh loader and select frame 357. Activate Offset: 357, and select the frame that we want to hold. Now, frame 0 in 3ds Max always presents the Mesh.

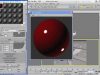
Now we need a test render. We create a camera and we locate its best position. Finally, we render the scene.
Now we need a test render. We create a camera and we locate its best position. Finally, we render the scene.


Okay, that is all for now. I hope this tutorial has helped you to open up new ways to build scenes and think about 3D and CG. I enjoyed doing this and I hope you enjoyed too. Keep up the good work!

About The Author
You might be interested in