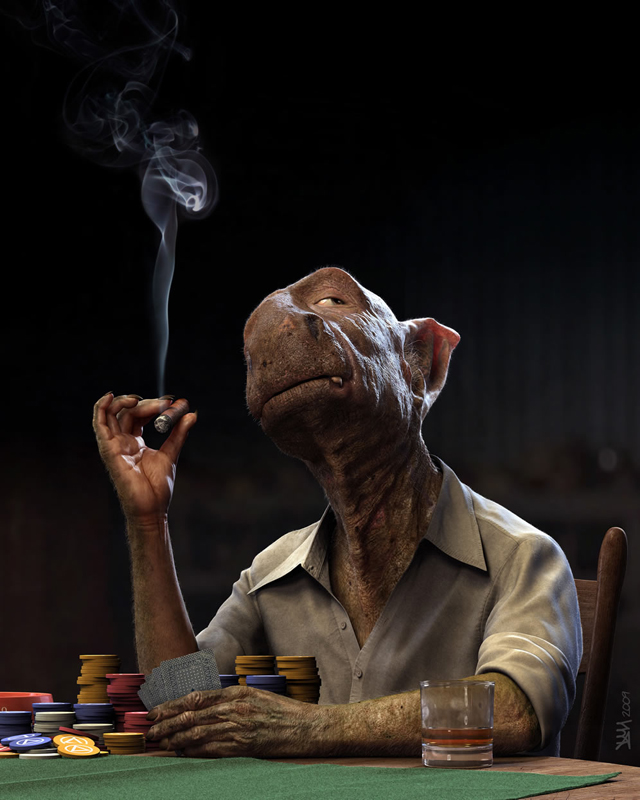
Making of “Poker Master”
In This “Making OF” article I wil try to explain the techniques that I used to create this image. I will focus mainly upon the creation of the character
Modelling
I made a basic model in Maya, taking care to ensure that all the polygons were four-sided, and then exported it to Zbrush.
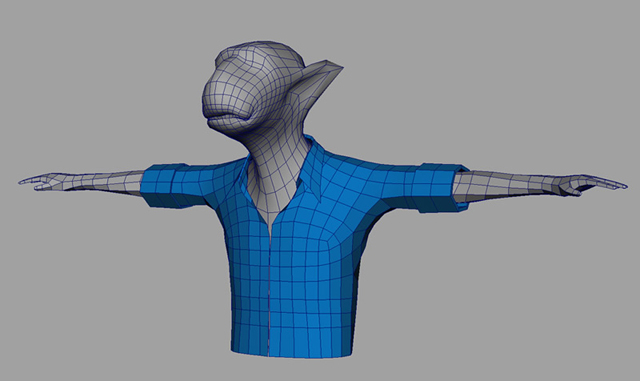
I could have generated the UVs here; this would have been a good moment for projection mapping. But I decided that I would use UVLayout later. With this software, the “pose” of the geometry doesn’t matter, and so I decided to wait for more detailed meshes from ZBrush.
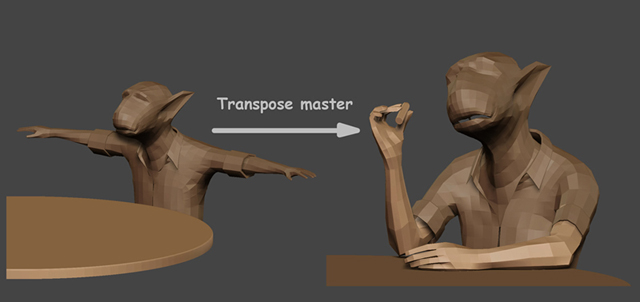
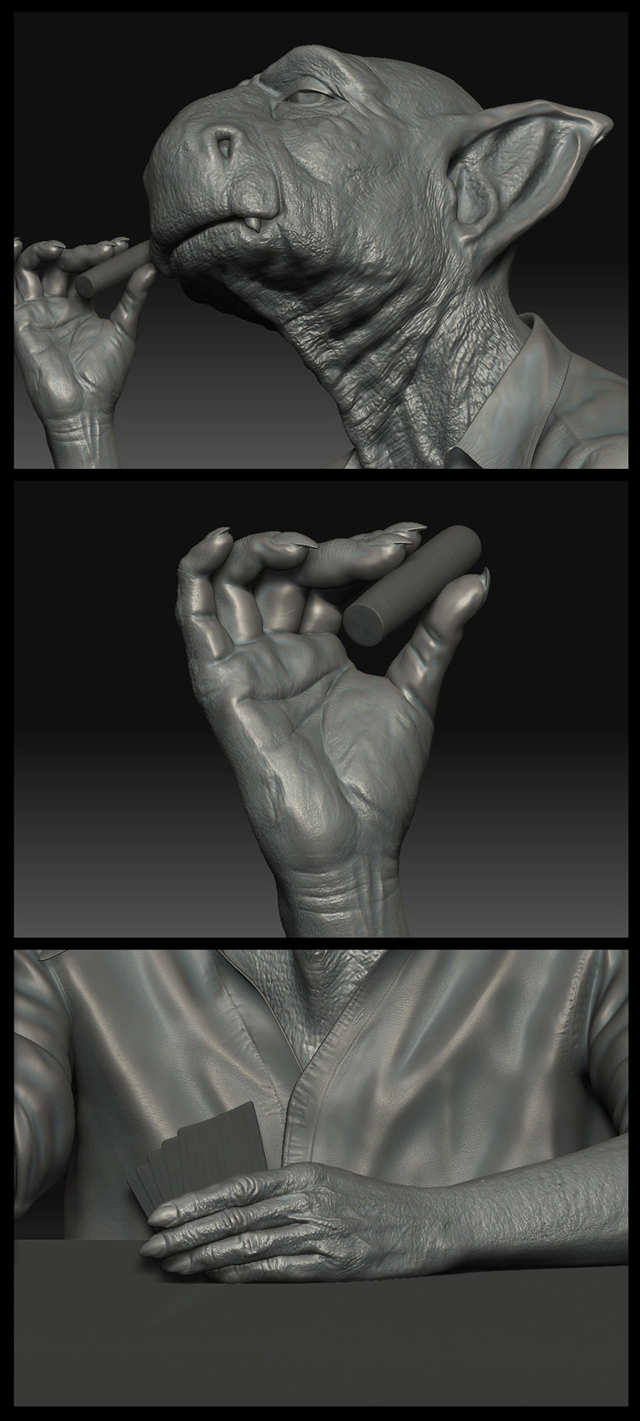
I imported the OBJs into a ZBrush file using SubTools. I created some reference objects, like the table and cigar, and then posed the character using Transpose Master.
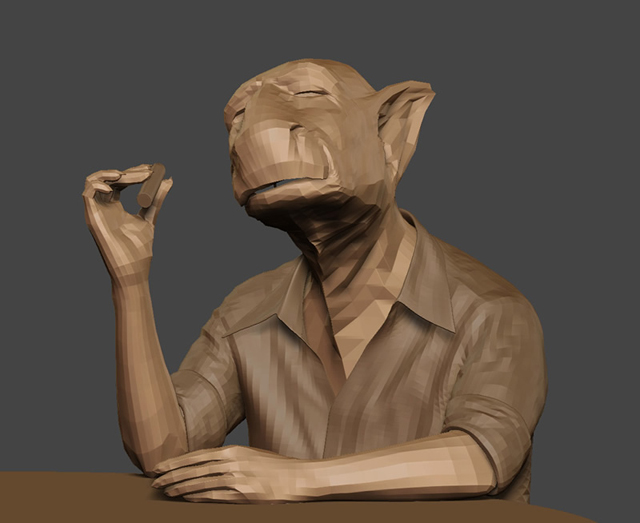
Using the Standard and Move brushes, I then began the process of adding detail and refining the meshes. I continued this until I had something similar to the geometry that I wanted, but still with a low number of polygons
I deleted the polygons that were not going to be visible, like the torso and the interior of the shirt. I then had three different meshes: head, arms and shirt. I exported these meshes to OBJ format to create the UVs with UVLayout.
In UV layout, I made some UVs shells for better distribution and less distortion of the UVs. I tried to place the seams away from the view.

Detailing and Texturing
Once I had the OBJs with the correct UVs, I imported back to ZBrush and started to add detail and subdivide. At this point, it was a process between ZBrush, Photoshop and BodyPaint. I used different ways to add detail, such as using alphas with the DragRect tool in ZBrush.
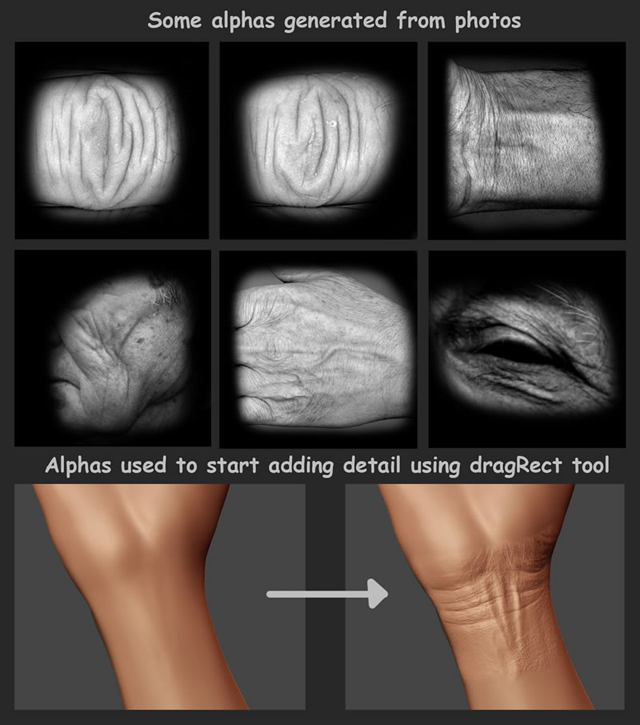
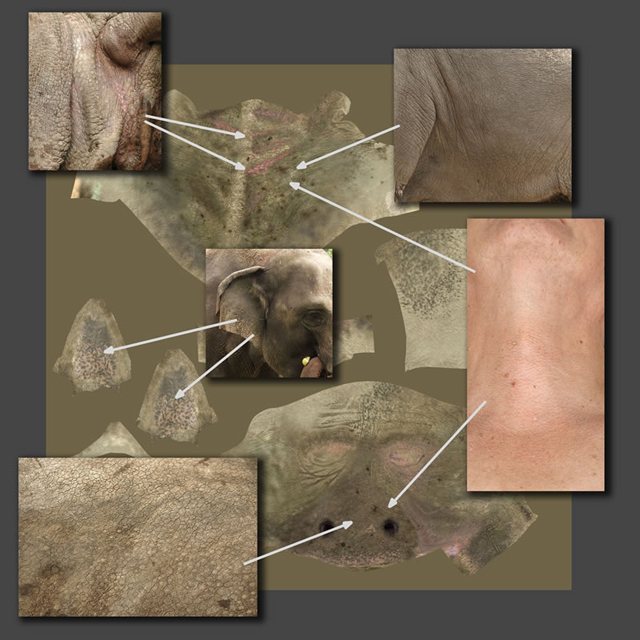
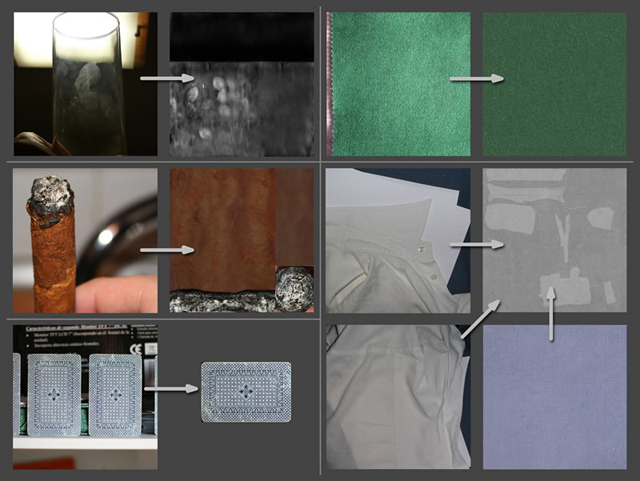
Also, in Photoshop, I added some texture layers from photographs.
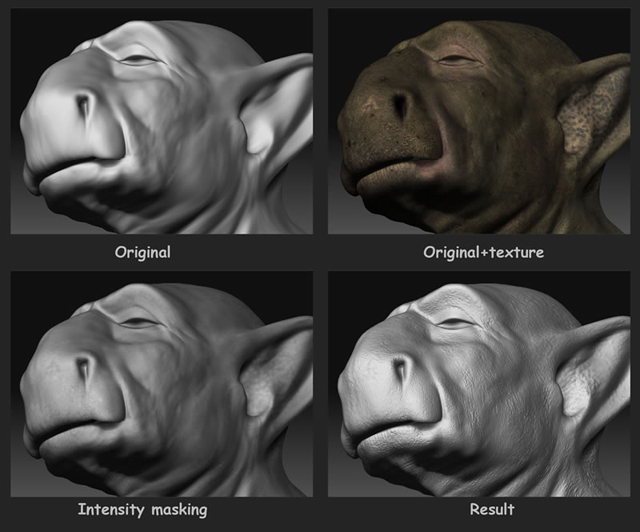
And then in ZBrush I modified the geometry based on that texture, masking by intensity.
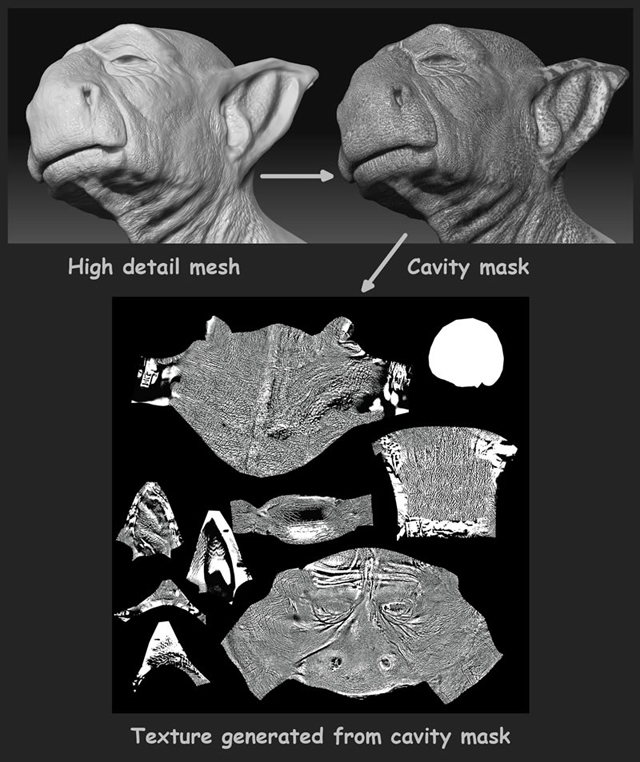
Sometimes I generated first the displacement in ZBrush and then used that information to modify the texture based on that, using cavity maps. In Photoshop I used that cavity map texture for masking.
I also used ZBrush’s poly painting feature and BodyPaint to remove the seams, to add detail and project photos. Finally, I created a normal map to apply to the shader in Maya. This is the final aspect of the geometry in ZBrush.
For the shirt and the rest of elements, I took photographs of all the possible things that I could use.
LIGHTNING
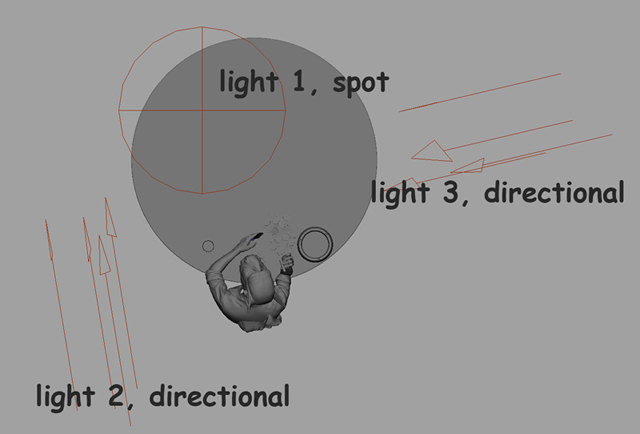
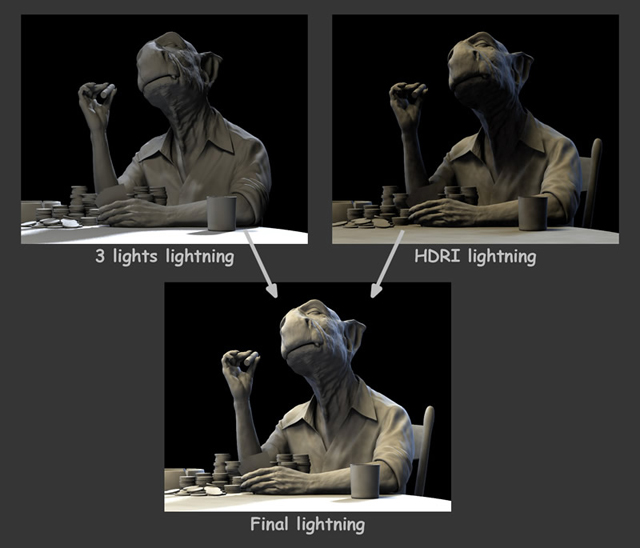
Back in Maya, I assigned a neutral white shader to start with the lighting tests. I used 3 lights, as follows:
One light above his head acting as main light (light 1)
One bluish backlight (light 2) that accentuates the volume of the head
One bluish fill light coming from the left of the image (light 3) to reduce the dark areas of the character
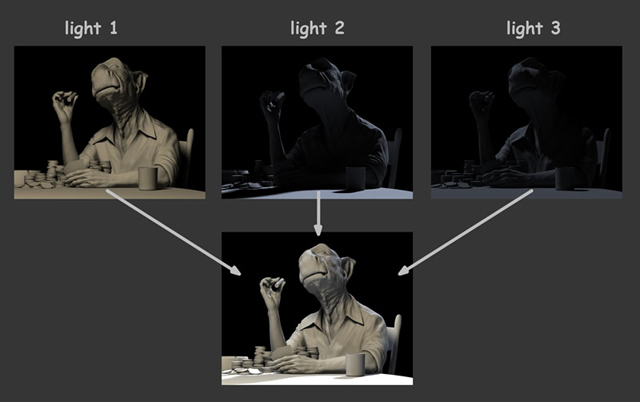
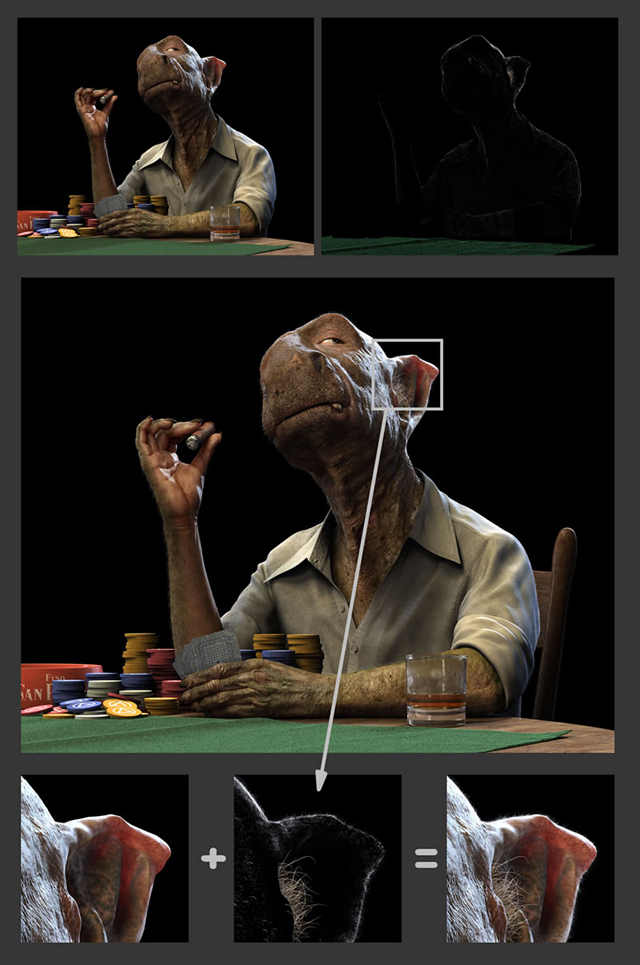
You can see the effects of this lightning setup in this image:
At this point, I decided to add an HDR sphere to make the lighting with more variations. In Photoshop, I merged different HDRs and placed the light sources of those HDRs to match the lighting that I previously created in Maya. I also duplicated some light sources from the HDR and changed the hue and intensit. I then mapped the HDR to an invisible sphere.
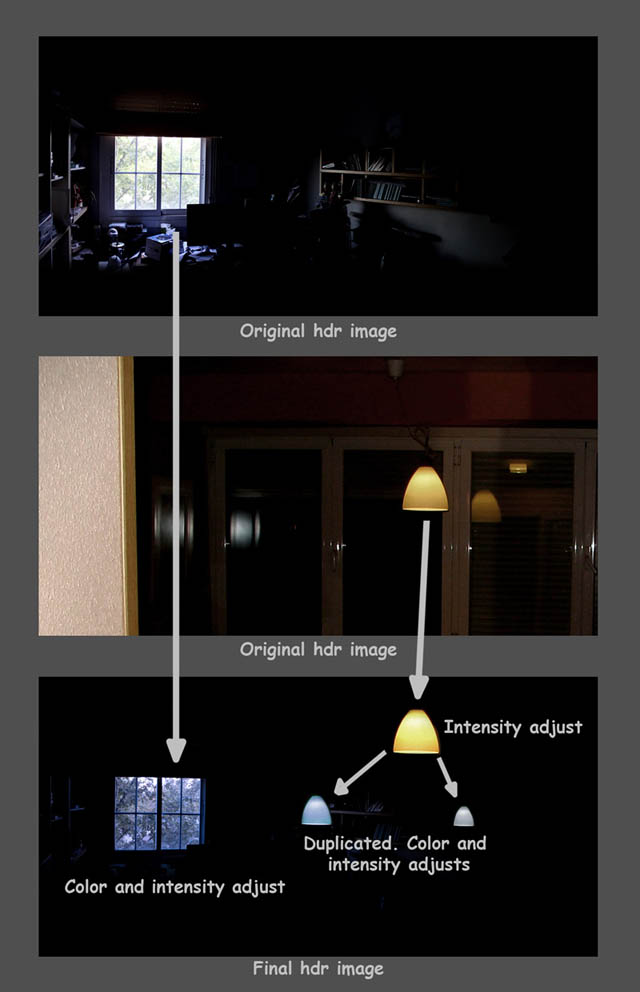
As this FG lighting would be added to the previously created lighting, I reduced the intensity of the initial Maya lights in order to finally get a similar light intensity with the FG sphere just adde.
SHADING
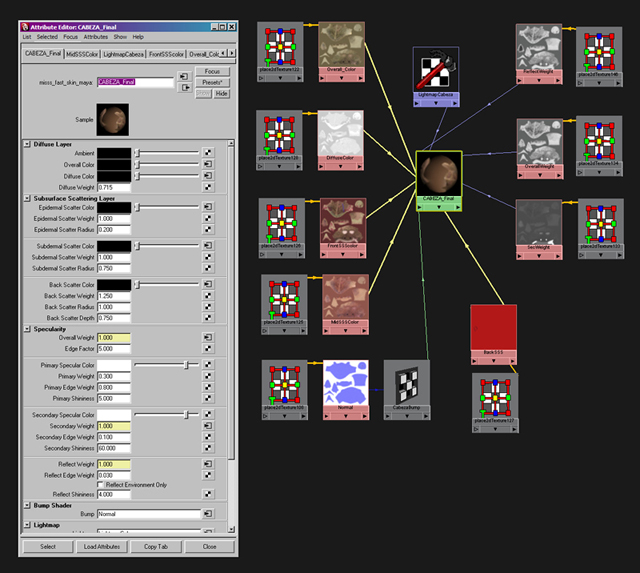
In this section of the article I’m going to focus on the head and the arms; the other objects simply used “standard” shaders. For the head and the arms, I used the Mental Ray shader, “misss fast skin”. First, with the colour base assigned, I adjusted the colours and the weight/radius values. Finally, instead of using a solid colour for all those colour boxes, I duplicated the base texture and made some adjustments in Photoshop to match the colour that I had previously chosen. This added more variety to the shader.
The base colour texture was 4096 by 4096 pixels. The other textures were 2048 by 2048 pixels, to reduce texture memory.
Render
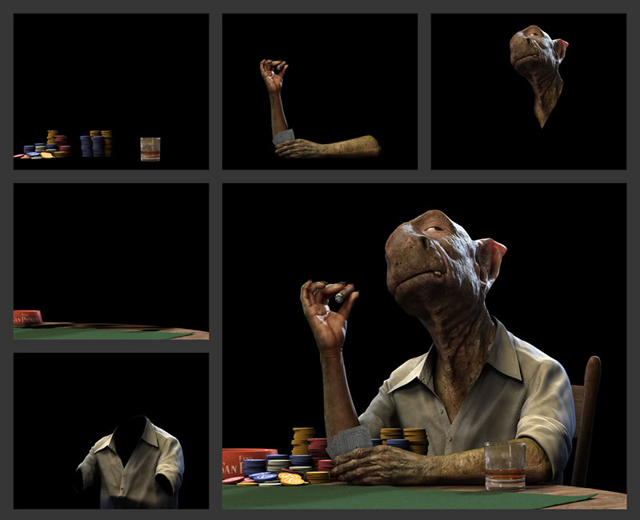
For the render, I separated the scene into different elements and made a render for each one: head, shirt, hands, cigar, table, chair, poker chips… I prepared a different file for each render layer, adjusting the render attributes to show only the parts that I wanted to see, and affected by the things that could affect it. This helped me to reduce the render time. It would have been impossible to render everything at once. Finally, I merged all that layers in Photoshop.
FUR
I also made the fur using some layers/files. I created a file for each fur type, and then rendered with Maya’s renderer, not Mental Ray. As I was going to composite the fur, I configured the render to show only the fur. The rest of the image would be black. Finally, I merged all these layers in Photoshop using the Screen blending mode.
POST PRODUCTION
Finally, I added the smoke of the cigar and the background in Photoshop. Both are from photos that I took for this very purpose. And the result is the final image.

CONCLUSION
In this image I created what I wanted to create. There are perhaps some things that I could have made better (I would change some things), but in general I’m happy with the final result. And of course, I had to stop work on it at some point. To this image I applied many things that I have learned in my years of 3D experience, and from it I learned many things that I hope to be able to take with me into my future projects.
Well, this has been a general overview of the project; if you would like more information about anything covered here, please don’t hesitate to contact me. Thanks for reading!!!

About The Author
You might be interested in