The Making of Wonded Ork
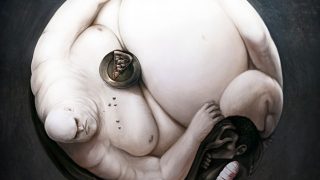
I was angry to sculp that fantastic creature. That was my first goal, to frame that wonded monster in mesh. I got started with a simple piece of geometry, and gradually building up volume and form.
|
As this is a making of article, I’m not gona cover every step of the creation process of this image. I assume you have some basic knowledge in 3D in general, and basic to intermediate level for all the 3ds max users. Different from my past creations, where I prepare a concept sketch prior to the cg work, I jumped stright to the computer and start modeling it as fast as I could. I don’t know, the idea comed to me as a flashlight and I did’nt want to lose that first impression. I was angry to sculp that fantastic creature. That was my first goal, to frame that wonded monster in mesh. I got started with a simple piece of geometry, and gradually building up volume and form. |
|
 |
 |
|
I tend to spend a lot of time focusing on the modeling flow, the way the surface is created, the way the edges tie together forming the necesary grid of mesh to help define the form beter. |
 |
|
Ok, after modeling quite a rough shape of his head, I exported it to Zbrush. It is a great program and offers infinte ways and techniques for character artists. Because this is an early stage for the modeling, I’m using Zbrush only for shaping the head, playing with proportion and not for adding small details. |
|
 |
|
| Sadisfied for the moment from Zbrush, I got back to max extending and building new geometry | |
 |
|
[pagebreak]
|
I’m trying to get the most of 3ds max robust polygon toolset. After that point, back to Zbrush. |
 |
|
It’s amasing how quickly you can carve a lot of detail, with very few tools like draw and move in Zbrush. Going this way, I’ve modeled the body. Starting from a simple shape/ turning to poly/ and adding detail with only these simle tools. |
 |
|
Back in max I builded the gums and teeth. |
 |
|
The tounge. |
 |
|
I’m almost done with modeling and it’s time to do some Uv work!… I added Unwrap UVW modifier and started pulling and pushing the UV’s, trying to make them as flat as posible. I also used pelt techniques to flaten and adjust the Uv’s in order to avoid texture streching. |
 |
[pagebreak]
|
Bringing the model back to Zbrush, I started painting some color for the texture. At the end I exported displacement and normal maps from Zbrush, to use them later on the rendering proces. |
 |
|
Time for skining. |
 |
|
This way I can pose it. |
 |
|
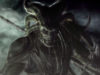
After that, I worked with the enviroment, building the cave first , and than adding rocks, grass, and other tiny details. I’ve created a spot light. Added a Volume light to Atmospheres & Effects rollout. |
 |
|
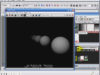
The shaders played very important role in what I was trying to achive for the skin look. Using Brazil rendering system gives me more fredom to play with shaders because it has more channels to fed the texture in. I used brazil skin material for achieving that soft and warm look I was looking for. I turned on Global illuminations and enviroment lightening. Played with Brazil shaders to get the soft and translucent effect I was looking for the skin. Here is a test I’ve done using the ellements mentioned before,(volume light & translucent effect). |
 |
|
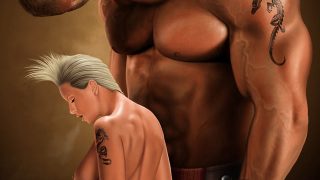
The sss shader combined with normal bumps, enhanced the look of the character even further. It was easy to add hair & fur to my character, using the new intuitive hair system in 3ds max. Combig and styling the hair, bringed to a new level the look of the ork. |
 |
|
I added some more spots and omni lights in the scene. With all the lights setup in the scene I ensured that Global Illuination was turned on in the rendering panel. Checked once again all the shaders, the textures and the geometry, to verify that everything is all right. |
 |
|
Here are some of the main passes. |
 |
|
I used Digital Fusion to blend all the passes together into a sigle piece. Alsow added some lens blur and defocus effect on the main character and the scene itself. |
 |
 |
|
Thank you for the care and patience. Hope to be useful. Software: 3dsmax and Zbrush, rendered in Brazil, composed with Digital Fusion. |
Dorian Bushi |

About The Author
You might be interested in