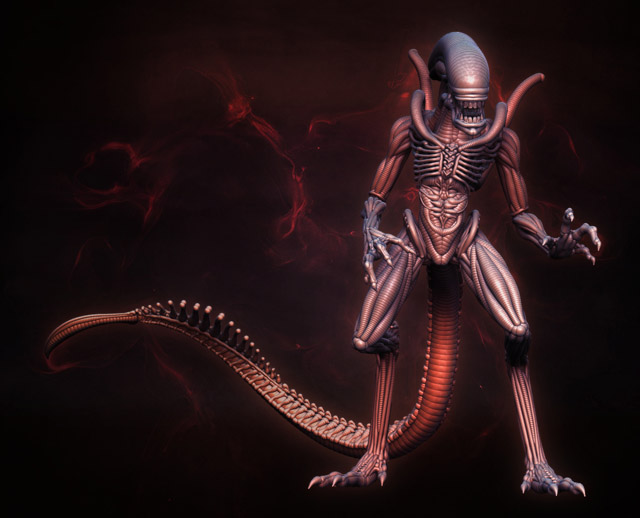
Making of Alien
In the process of Alien creation I would be able to experiment and explore a little more of the possibilities of ZSketch tools
Introduction
ZBrush is one of those applications that always surprises with innovative and creative features. At the most recent release includes the new ZSketch feature. This one is based on the known ZSphere tool, which allows to create basic shapes from interconnected sphere structures. Through this new function, you are able to create structures even more complex by a more efficient way, getting better control and greater freedom to make them.
The process of zsketching consists in building up forms from strips of ZSpheres drawn freely in 3D space or applied to structures already created. This is similar to the technique of covering a wire armature with clay used in traditional sculpting.
Concept
As a follower of the Aliens movies as well as a big fan of Giger’s work, I thought that creating a version of one of these complex creatures was a good opportunity to try out the different ZSketch tools. So I would be able to experiment and explore a little more of the possibilities of this new feature.
STEP 1: BASIC STRUCTURE
I started creating the basic armature, which I would use later to cover it with the strips of ZSpheres. The first thing I did was to select the Zsphere tool and drawn a sphere on the canvas. Then I went to the Edit mode and added more spheres building up the structure for each part of the body. Here, I also was using Move, Scale and Rotate modes to bring out form to the structure (Fig.01).
Here the wire armature would carry out two main functions: first, being a support surface for the strips of spheres applied, second, by working as a skeleton, so once the model is finished, I would be able to move, rotate or scale the parts more easily and get pose to the model.

STEP 2: ZSKETCHING
With the ZSphere armature created, it was time to cover it. To start off I activated the ZSketch mode by clicking on the EditSketch button, located in the Tool:ZSketch menu. Then I was able to use the ZSketch brushes and was ready to start covering the ZSphere structure, starting by the head. ZBrush have several brushes, which produces different embed depth. First, I selected the SKetch 1 brush. This brush allows to apply strips of spheres almost inside the underlining applied surface. Using a large stroke, so I started covering the structure with this ZSpheres (Fig.02).

Once I got the right shape, I began to draw a series of strips with different stroke sizes to create the details. To make this task, I used mainly the Sketch 2 brush, which allows to add spheres, leaving half of its radius under the applied surface. In other areas, I used Sketch 3 which create spheres almost out of the surface. Then I used Move to position them, followed of Bulge and Smooth to adjust them. The Bulge brush simply increase or decrease the radius of the spheres. This one was a very helpful tool to bring out form to each strip of spheres (Fig.03).

One important thing when using the Smooth brush, is to know how works the different smoothing levels and how is the behavior of each one of them. For example, Smooth 1 and Smooth2 soften in greater or lesser degree the ends of the strip, causing them to blend with the underneath contact surface. On the other side, Smooth 3 only smooth all the strip keeping intact the ends of the strip of ZSpheres.
I also used the Armature brush to build up the structure of the mouth, jaw and teeth. This brush, unlike Sketch brushes, allows to create free-form patterns. This means that the spheres does not need any contact surface, so it is the best way to create floating strips in the 3D space (Fig.04).

After creating each form, I was switching among Bulge, Float and Move to adjust the size and position of the spheres. Sometimes I also used CTRL + Shift + Click on the strips to hide the other underneath strips of ZSpheres, so I was able to work only on current strip.
A similar procedure was used to create each one of the Alien’s body parts (Fig.05).

Of course, some areas like the torso and tail requires more detail and more work than others. Also some specific parts requiring most use of a brush over another. For example, in the chest and ribs, I only used Armature. While for the spine of the back and tail, I mainly used Sketch 3 (Fig.06 & 07).


STEP 3: DEFORMATION AND POSE
Another of the advantages of using a ZSphere skeleton, is the fact of being able to apply global deformations to the model. This allows to perform actions such as changing the pose of the ZSketch model. The skeleton structure can be connected easily to this model by using the Bind function. Doing so, the ZSketch becomes transparent and the internal ZSpheres skeleton becomes visible, allowing to manipulate the structure comfortably (Fig.08).

To start with the changes, first I deactivated the ZSketch mode by clicking on the EditSketch button. Then I activated Bind button and started using the Move, Scale and Rotate modes on the ZSphere skeleton (Fig.09).

Each change I did to this one was applied to the ZSketch model. One by one I was adjusting the parts until I got the right pose for the model. This process was straightforward, though, every time I finished a pose, I had to accommodate manually some spheres that came out of the structure. At the end, I had to adjust a little more the ZSketch structure by using mainly Bulge and Smooth (Fig.10 & 11).


STEP 4: RENDER AND COMPOSITION
To complete this process, I just needed to apply some custom Matcap materials to the model and get the final renders. In the final image I used materials with a glossy finish and activated Best Render Mode. This render mode generate softer and precise shadows. As usual, I also activated the anti-aliasing mode to avoid jagged edges (Fig.12).

Finally the images were opened in Photoshop to compsite, add a background, put some effects and make some levels and color adjustments (Fig.13).

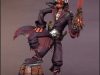
And the result was the final image.

Well, this has been a general overview of the project. You also can find some time lapse videos showing the zsketching process on http://zsketchmania.blogspot.com.Thanks everyone for reading and I hope you found this Making Of helpful.


About The Author
You might be interested in